
1,4K
The Stitch Amigurumi is a beloved project for fans of the Lilo & Stitch universe. This crochet version captures Stitch’s signature big ears, expressive eyes, and adorable round body. Whether you’re a beginner or a seasoned crocheter, this pattern is perfect for creating your own cuddly alien friend to gift or keep.
As an experienced crocheter, I’ve learned that character-based amigurumi always ask for a bit more attention to detail, and Stitch is a perfect example of that. He’s instantly recognizable, full of personality, and has very distinct features that require careful shaping and thoughtful construction. From the moment you begin, you can already tell this isn’t just another amigurumi piece—it’s a character that needs to come to life through your stitches.
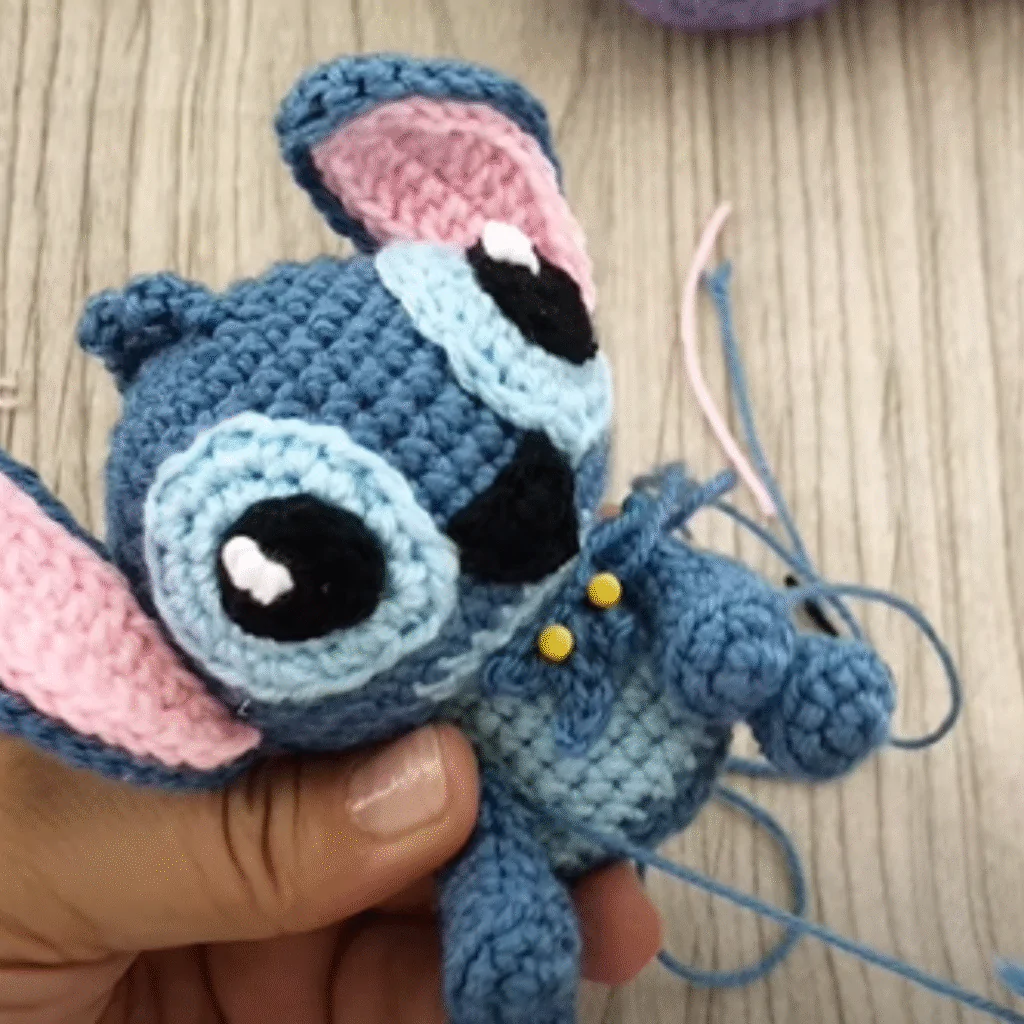
The first thing I always consider is yarn choice, because color and texture play a huge role in capturing Stitch’s look. That soft blue tone is essential, and I like to work with a smooth cotton yarn so the stitches stay defined and clean. Cotton gives a crisp finish, which is especially important when working on detailed areas like the face and ears. Sometimes I’ll mix in a slightly softer yarn for accents, like the inner ears or belly, to create a gentle contrast. Using the right hook size is just as important. I usually go a bit smaller than recommended to keep the stitches tight and prevent the stuffing from showing, which helps maintain a neat and polished appearance.
Step-by-Step Stitch Amigurumi Pattern
This Stitch Amigurumi pattern includes carefully shaped parts such as the ears, eyes, and body. With detailed instructions and basic stitches, you’ll enjoy bringing this iconic character to life with yarn and hook.
Crocheting Stitch Amigurumi is a fun and satisfying way to celebrate a beloved character. Add your own creative touches and enjoy crafting your own mini alien companion!
Stitch Amigurumi Pattern
The head is where everything begins, and with Stitch, it’s truly the focal point. It’s larger in proportion to the body, which is typical in amigurumi, but the shaping needs to be very precise. Working in continuous rounds, I focus on maintaining even tension and carefully counting each stitch. Over time, you develop a rhythm, and your hands start to recognize when the shape is forming correctly. I add stuffing gradually, adjusting as I go, so the head remains smooth and evenly rounded without becoming too firm. This balance is important because it affects how the facial features will sit later on.
The face is where the real personality comes through. Stitch has those large, expressive eyes that instantly draw attention, and placing them correctly is crucial. I often use safety eyes for a bold look, but I’m always mindful of spacing and alignment. Even a slight shift can change the expression completely. The nose, usually a darker shade, is another key feature. I like to crochet or embroider it with a bit of dimension so it stands out without overpowering the face. Small details like the mouth and subtle shaping around the cheeks can add so much character, and this is where patience really pays off.
Then come the ears, which are perhaps the most iconic part of Stitch’s design. They are large, wide, and slightly curved, and they require a bit of extra care. I usually crochet them separately, working in rows or rounds depending on the pattern, and shaping them with gentle increases and decreases. The inner ear, often in a contrasting pink or lighter shade, adds depth and visual interest. Attaching the ears is a step I never rush. I like to pin them in place first, adjusting the angle until it feels just right. When positioned correctly, they give Stitch that playful, slightly mischievous look that makes him so recognizable.
The body is smaller and more compact, designed to support the head without drawing attention away from it. I keep the stitches tight and the stuffing firm so the piece holds its shape well. The arms and legs are short and rounded, adding to that classic amigurumi style. Attaching them evenly is important for balance, especially if you want the piece to sit upright. I always take a moment to check symmetry before securing everything, because small adjustments here can make a big difference in the final result.
Video Tutorial Here!
Materials:
- Yarn in blue, light blue, pink, black, and white
- Crochet hook (2.5 mm recommended)
- Safety eyes or yarn for embroidery
- Fiberfill stuffing
- Yarn needle
- Stitch markers
- Scissors
- Pins for assembling
