
1,1K
Easy Crochet Bunny Ears for Beanie. Want to add a playful touch to your beanie? This Easy Crochet Bunny Ears for Beanie tutorial will guide you through making adorable, soft bunny ears! Creating easy crochet bunny ears for a beanie is one of those projects that feels light, playful, and incredibly satisfying, even after years of crocheting.
It’s a small addition, but it completely transforms a simple beanie into something full of personality and charm. I always find myself smiling while making them, because there’s something about those soft, upright shapes that instantly brings a sense of warmth and whimsy to the piece.
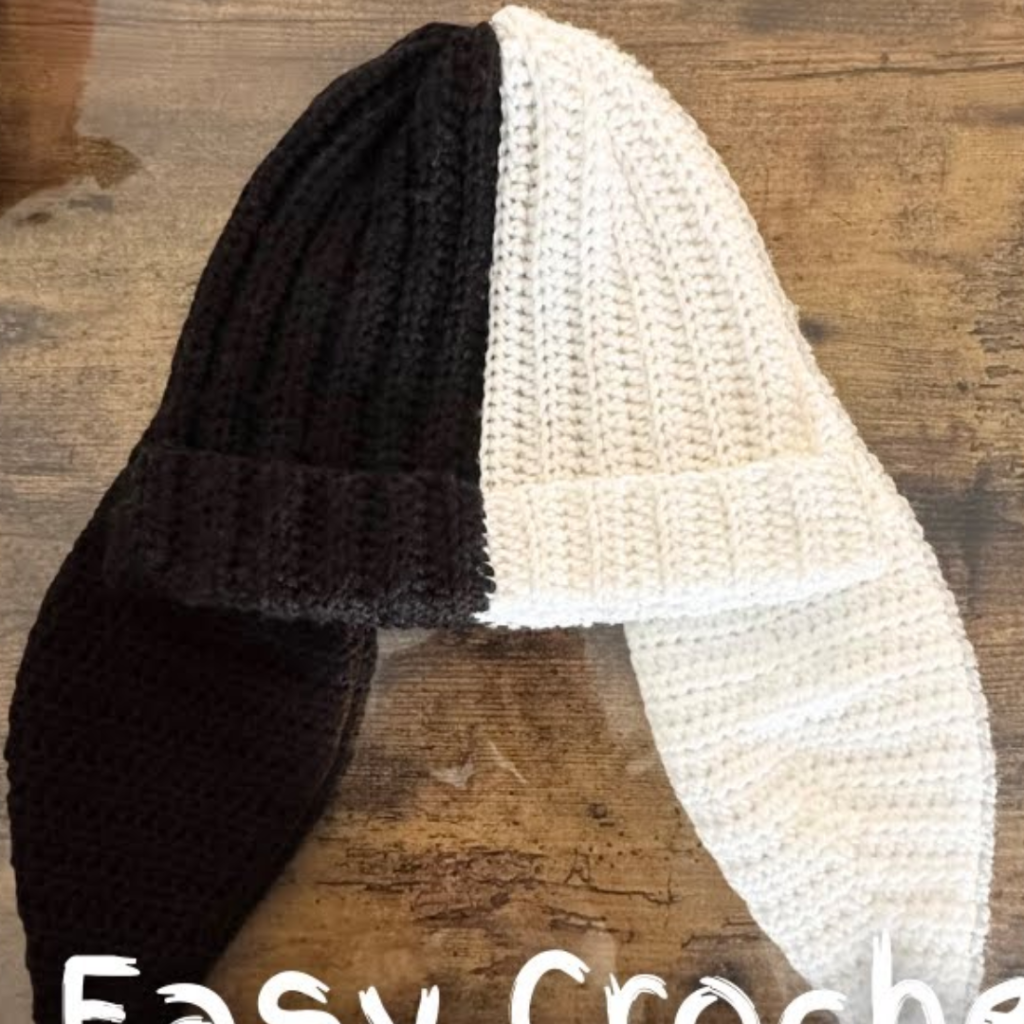
Step-by-Step Guide to Easy Crochet Bunny Ears for Beanie
These bunny ears are simple to make and perfect for Easter or cute everyday wear. You can attach them to any beanie to create a fun and cozy accessory.
With this Easy Crochet Bunny Ears for Beanie pattern, you can customize your hat with different sizes and colors. Try it and bring extra charm to your crochet projects!
I usually begin by thinking about the beanie itself, because the ears need to complement its structure and proportions. The yarn choice should match or coordinate well, both in weight and texture, so the final look feels cohesive. If the beanie is made with a medium-weight yarn, I’ll use the same for the ears to ensure consistency. I also stick with a slightly smaller hook than recommended, especially for the ears, to give them a firmer structure and help them hold their shape over time.
Easy Crochet Bunny Ears for Beanie – Free Pattern
Easy Crochet Bunny Ears for Beanie. When I start crocheting the ears, I typically work them in rows rather than rounds. This gives me more control over the shape and allows for that gentle taper that bunny ears naturally have. I begin at the base, making it slightly wider so it sits securely when attached to the beanie. As I work upward, I gradually decrease to create a soft, rounded point at the top. The shaping doesn’t need to be complicated, but it does require attention to tension and stitch placement to keep the edges smooth and even.
One of the things I’ve learned over time is that simplicity works best for this kind of project. Clean lines and consistent stitches make the ears look polished, even if the pattern itself is very straightforward. I keep my movements steady, making sure each stitch is uniform, because with a piece like this, every detail is visible. It’s a wonderful exercise in precision, even for experienced hands.
Adding an inner ear detail is optional, but it’s something I often include because it gives the ears more depth and character. I usually crochet a smaller piece in a contrasting color, often a soft pink or a lighter shade of the main yarn, and attach it neatly to the front of each ear. This step doesn’t take long, but it makes a noticeable difference in the final look. It brings a softness and a touch of realism that really enhances the design.
Once both ears are complete, I take a moment to shape them gently with my hands. Sometimes I’ll lightly fold the base or adjust the curve to give them a more natural appearance. If I want them to stand more firmly, I might crochet them with tighter stitches or even double them up slightly at the base. The goal is to find that balance between softness and structure, so they hold their shape without feeling stiff.
Attaching the ears to the beanie is a step I always approach with care. Placement is everything here. I usually pin them in place first, trying the beanie on or positioning it as it would be worn, to ensure they sit evenly and at the right angle. Bunny ears can look playful, upright, or slightly tilted depending on how they’re positioned, so I take my time to find the look I want. Once I’m satisfied, I sew them on securely, making sure the stitches are strong enough to withstand regular wear.
Durability is something I always keep in mind, especially for items like this that may be worn often. I reinforce the base of the ears and make sure there are no loose stitches or weak points. It’s a small detail, but it ensures the piece will last and continue to look good over time. I also weave in all ends carefully, keeping everything neat and tidy.
