
Round 3 — Ch 1 for height. Starting in the same stitch as the join, repeat five times. Sl st to the first sc and fasten off. (40 sc, 5 ch-2 tip spaces, and 5 valley sl sts, plus the final joining sl st.)
Work the edging loosely enough to preserve the five points. Weave in both ends on the back, then dampen the star and pin the five tips and five valleys into shape. Allow it to dry flat before attaching the hanger.
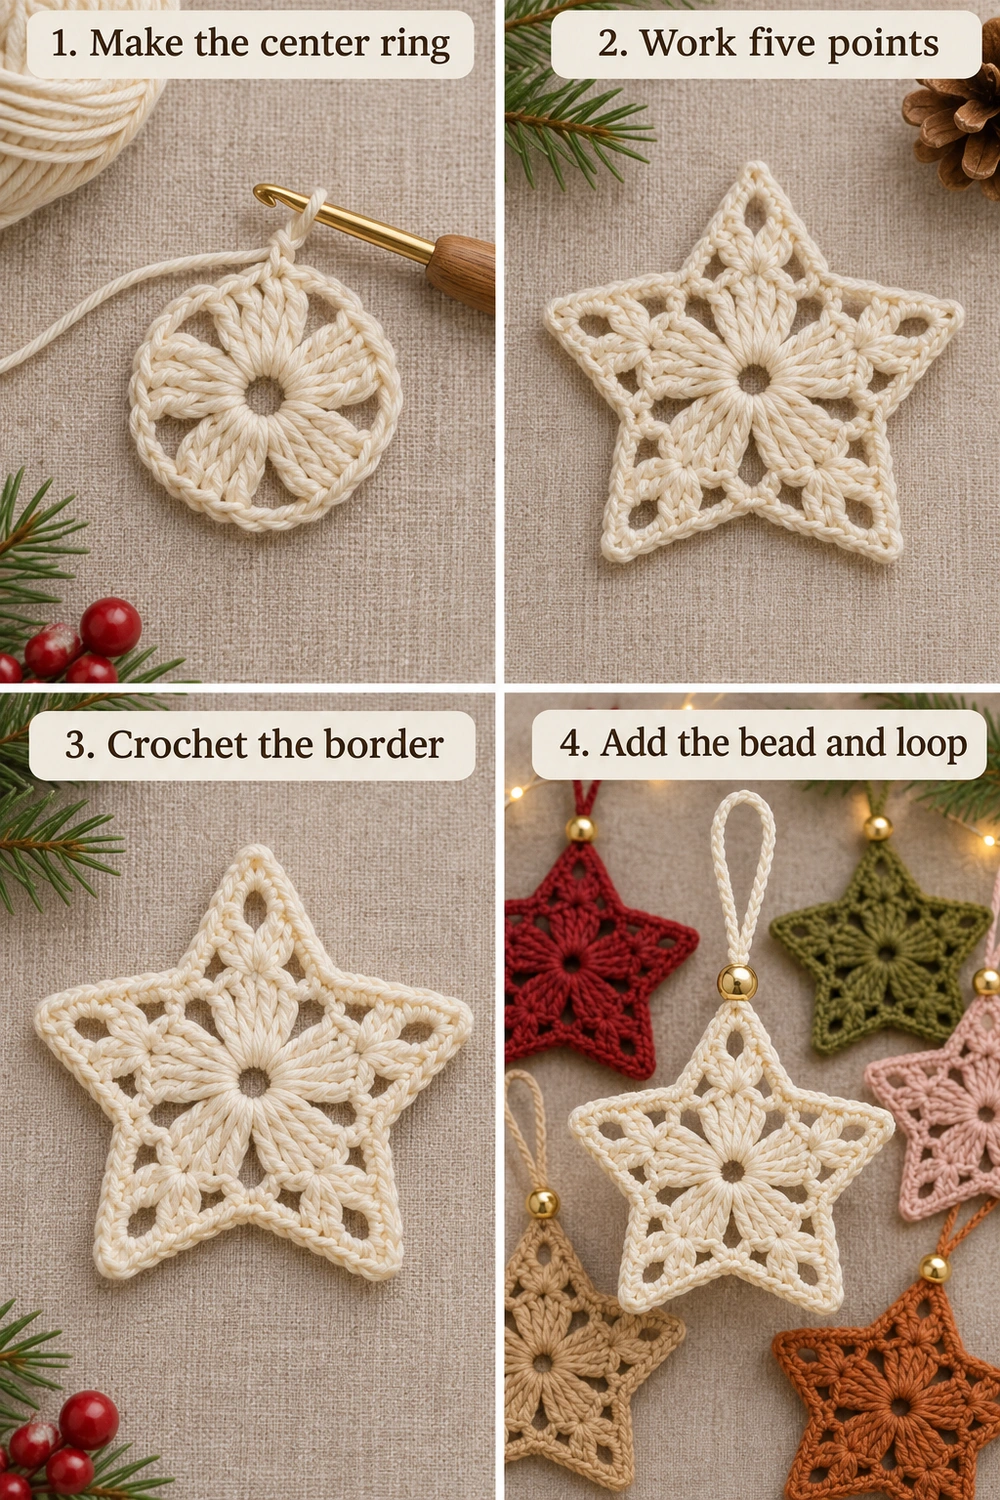
4. Add a Matching Loop and Gold Bead
- Make a separate chain about 12 cm long in the same yarn and leave a tail at each end. Fold it in half and test whether the folded chain passes through the bead.
- Pass the folded end through the bead and slide the bead toward the two loose ends. Stitch both ends through one tip’s ch-2 space and into the nearby edging stitches. Weave in the tails securely.
- If the bead hole is too narrow, use a thinner matching cotton cord or attach the loop by itself. Set the bead against the tip before hanging the star.
More Christmas Crochet Patterns
Pair the stars with the blue lace snowflake and the granny stitch gingerbread ornament.
Responsivo Post 02 – P2
Christmas Lace Star Visual Guide
The tutorial shows the center, points, edging, and hanger. The two tabletop diagrams illustrate the star’s shape and placement. Follow the written rounds for exact stitch counts.
More Free Crochet Patterns
Find your next handmade project with these lovely patterns.
Granny Stitch Gingerbread Crochet Pattern – Free Ornament Guide
View Pattern →
Blue Lace Snowflake Crochet Pattern – Free Ornament Guide
View Pattern →
Crescent Moon and Star Crochet Pattern – Free Ornament Guide
View Pattern →
CONTENT END 1
