
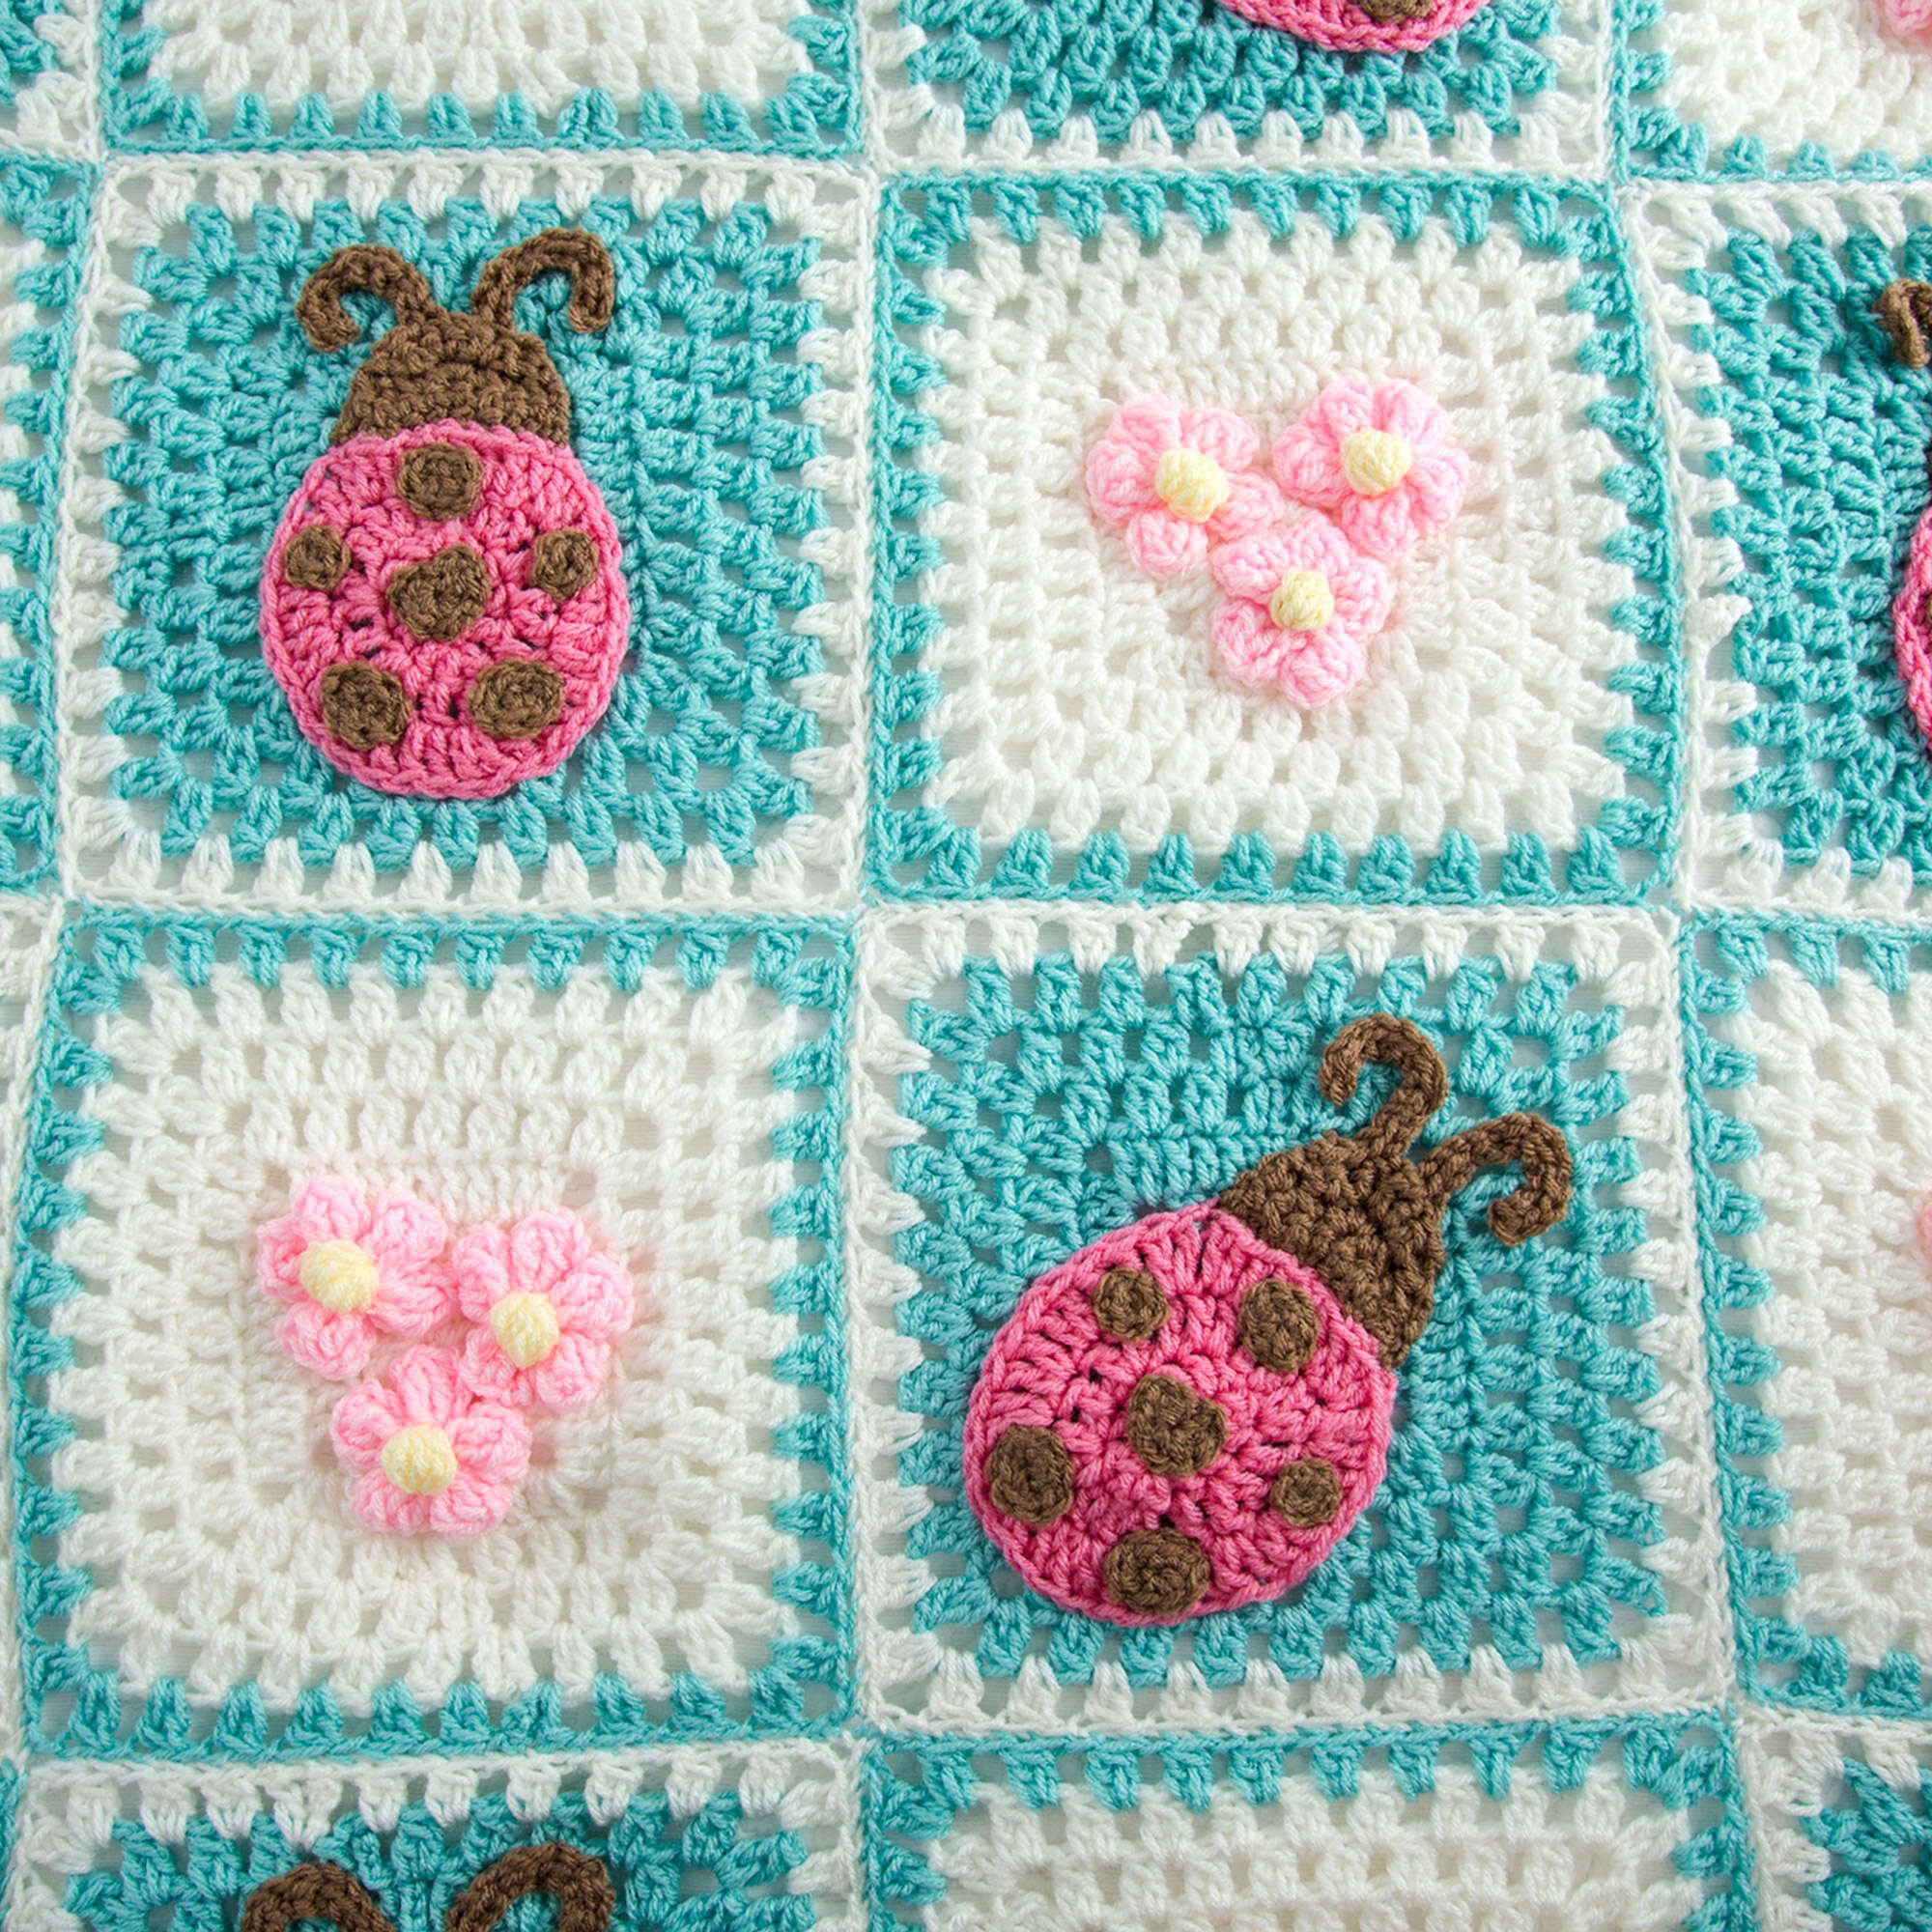
The Bugs and Blooms Crochet Blanket is a delightful and vibrant project designed to bring a splash of color and whimsy to any space. Featuring an array of cheerful ladybugs and flowers, it’s perfect for children and adds a playful touch to a nursery or living room. This blanket is constructed using a combination of colorful squares and adorable appliqué designs that will surely brighten your day.
You’ll be creating a total of 30 squares—15 in Soft White and 15 in Aruba Sea—along with 15 charming ladybugs and 45 beautiful flowers. This pattern involves a series of straightforward crochet techniques, including double crochet stitches and color changes. As you crochet, feel free to refer to the accompanying images for guidance on the assembly process.
Project Details
- Crochet terminology: US terminology
- Skill level: Intermediate
- Finished size: Approximately 48” x 60”
- Construction method: Squares and appliqués sewn together
Materials and Tools
| Yarn option | Yarn and specifications | Amount |
|---|---|---|
| Color A | RED HEART® Super Saver, 505 Aruba Sea | 3 skeins |
| Color B | RED HEART® Super Saver, 316 Soft White | 3 skeins |
| Color C | RED HEART® Super Saver, 706 Perfect Pink | 1 skein |
| Color D | RED HEART® Super Saver, 373 Petal Pink | 1 skein |
| Color E | RED HEART® Super Saver, 360 Café Latte | 1 skein |
| Color F | RED HEART® Super Saver, 322 Pale Yellow | 1 skein |
- Susan Bates® Crochet Hooks: 5.5mm and 3.75mm (for ladybug spots only)
- Yarn needle
Crochet Patterns — No Ads. No Clutter.
Browse the Crochet Library →
Abbreviations
| Abbreviation | Meaning |
|---|---|
| ch | chain |
| dc | double crochet |
| sl st | slip stitch |
| sc | single crochet |
| st | stitch |
| tr | treble crochet |
| Cl | cluster |
Preparation and Techniques
Working in a Spiral
This pattern combines joined rounds for squares and spirals for ladybug bodies. It is essential to ensure proper joins to maintain the shape of your pieces.
Changing Yarn Colors
When changing colors, be sure to seamlessly transition by finishing the last stitch of the previous color before dropping it to begin the next one. This will help to maintain a clean edge and prevent loose threads.
Joining Rounds
Most rounds in this pattern are closed with a slip stitch into the top of the beginning chain. Ensure to count your stitches before closing the round to catch any mistakes early.
Complete Pattern Instructions
SQUARE I (make 15)
With Color A, ch 5; join with sl st in first ch to form a ring.
| Round | Instructions | Stitches |
|---|---|---|
| Round 1 | Ch 3 (counts as first dc here and throughout), 2 dc in ring, 3 times, ch 3; join with sl st in top of beginning ch | — 12 dc and 4 corner ch-3 spaces. |
| Round 2 | Ch 3, dc in next 2 dc, (2 dc, ch 3, 2 dc) in next corner ch-3 space, 3 times; join with sl st in top of beginning ch | — 28 dc and 4 corner ch-3 spaces. |
| Round 3 | Ch 3, dc in next 4 dc, (2 dc, ch 3, 2 dc) in next corner ch-3 space, 3 times, dc in last 2 dc; join with sl st in top of beginning ch | — 44 dc and 4 corner ch-3 spaces. |
| Round 4 | Ch 3, dc in next dc (beginning ch-3 and following dc count as first 2-dc Cl), 2 times, ch 1, skip next dc, (2-dc Cl, ch 3, 2-dc Cl) in next corner ch-3 space, 5 times, ch 1, skip next dc, (2-dc Cl, ch 3, 2-dc Cl) in next corner ch-3 space; repeat from * 2 more times, 2 times, ch 1, skip last dc; join with sl st in top of beg ch | — 28 clusters. |
| Round 5 | Slip st in next dc, (slip st, ch 3, dc) in next ch-1 space, [*ch 1, 2-dc Cl in each ch-1 space; rep from* to next corner ch-3 space, ch 1, (2-dc Cl, ch 3, 2-dc Cl) in next corner ch-3 space] 4 times, **ch 1, 2-dc Cl in each ch-1 space; repeat from** to end of round, ch 1; join with sl st in top of beginning ch | — 32 clusters. |
| Round 6 | Repeat Round 5—36 clusters. | |
| Round 7 | With right side facing, draw up a loop of B in first ch-1 space, ch 3, dc in same ch-1 space, [*ch 1, 2-dc Cl in each ch-1 space; repeat from* to next corner ch-3 space, ch 1, (2-dc Cl, ch 3, 2-dc Cl) in next corner ch-3 space] 4 times, **ch 1, 2-dc Cl in each ch-1 space; repeat from** to end of round, ch 1; join with sl st in top of beginning ch | — 40 clusters. |
SQUARE II (make 15)
Make same as Square I using Color B for Rounds 1–6 and Color A for Round 7.
LADYBUG (make 15)
Body (make 1 for each ladybug)
With Color C, ch 8.
| Round | Instructions | Stitches |
|---|---|---|
| Round 1 | Dc in 4th ch from hook (beginning ch counts as first dc), dc in next 3 ch, 3 dc in last ch; working across opposite side of foundation ch, dc in next 3 ch, dc in next ch; join with sl st in top of beginning ch | — 12 dc. |
| Round 2 | Ch 3 (counts as first dc here and throughout), dc in same st as joining, 2 dc in next dc, 5 times; join with sl st in top of beginning ch | — 19 dc. |
| Round 3 | Ch 3, 2 dc in each dc around; join with sl st in top of beginning ch | — 37 dc. |
Fasten off.
Head & Antenna (make 1 for each ladybug)
With Color E, ch 10.
| Row | Instructions | Stitches |
|---|---|---|
| Row 1 | Sc in 2nd ch from hook and in each ch across, turn | — 9 sc. |
| Row 2 | Ch 1, twice, 2 sc in next sc, twice, turn | — 6 sc. |
| Row 3 | Ch 1, sc2tog, 2 sc in each of next 2 sc, sc2tog, turn | — 6 sc. |
| Row 4 | Slip st in first 2 sts, ch 14 for antennae, slip st in 2nd ch from hook and in each ch across, slip st in next 2 sc of head, ch 14 for antennae, slip st in 2nd ch from hook and in each ch across, slip st in last 2 sc of head. |
Fasten off, leaving a long tail for sewing head to body.
Oval Spot (make 3 for each ladybug)
With the smaller hook and Color E, ch 3.
| Round | Instructions | Stitches |
|---|---|---|
| Round 1 | Work 2 sc in 2nd ch from hook, 3 sc in last ch; working across opposite side of foundation ch, 2 sc in next ch; join with sl st in first sc. | — 6 sc. |
Fasten off, leaving a long tail for sewing spot to body.
Round Spot (make 2 for each ladybug)
With the smaller hook and Color E, ch 2.
| Round | Instructions | Stitches |
|---|---|---|
| Round 1 | Work 5 sc in 2nd ch from hook; join with sl st in first sc. | — 5 sc. |
