
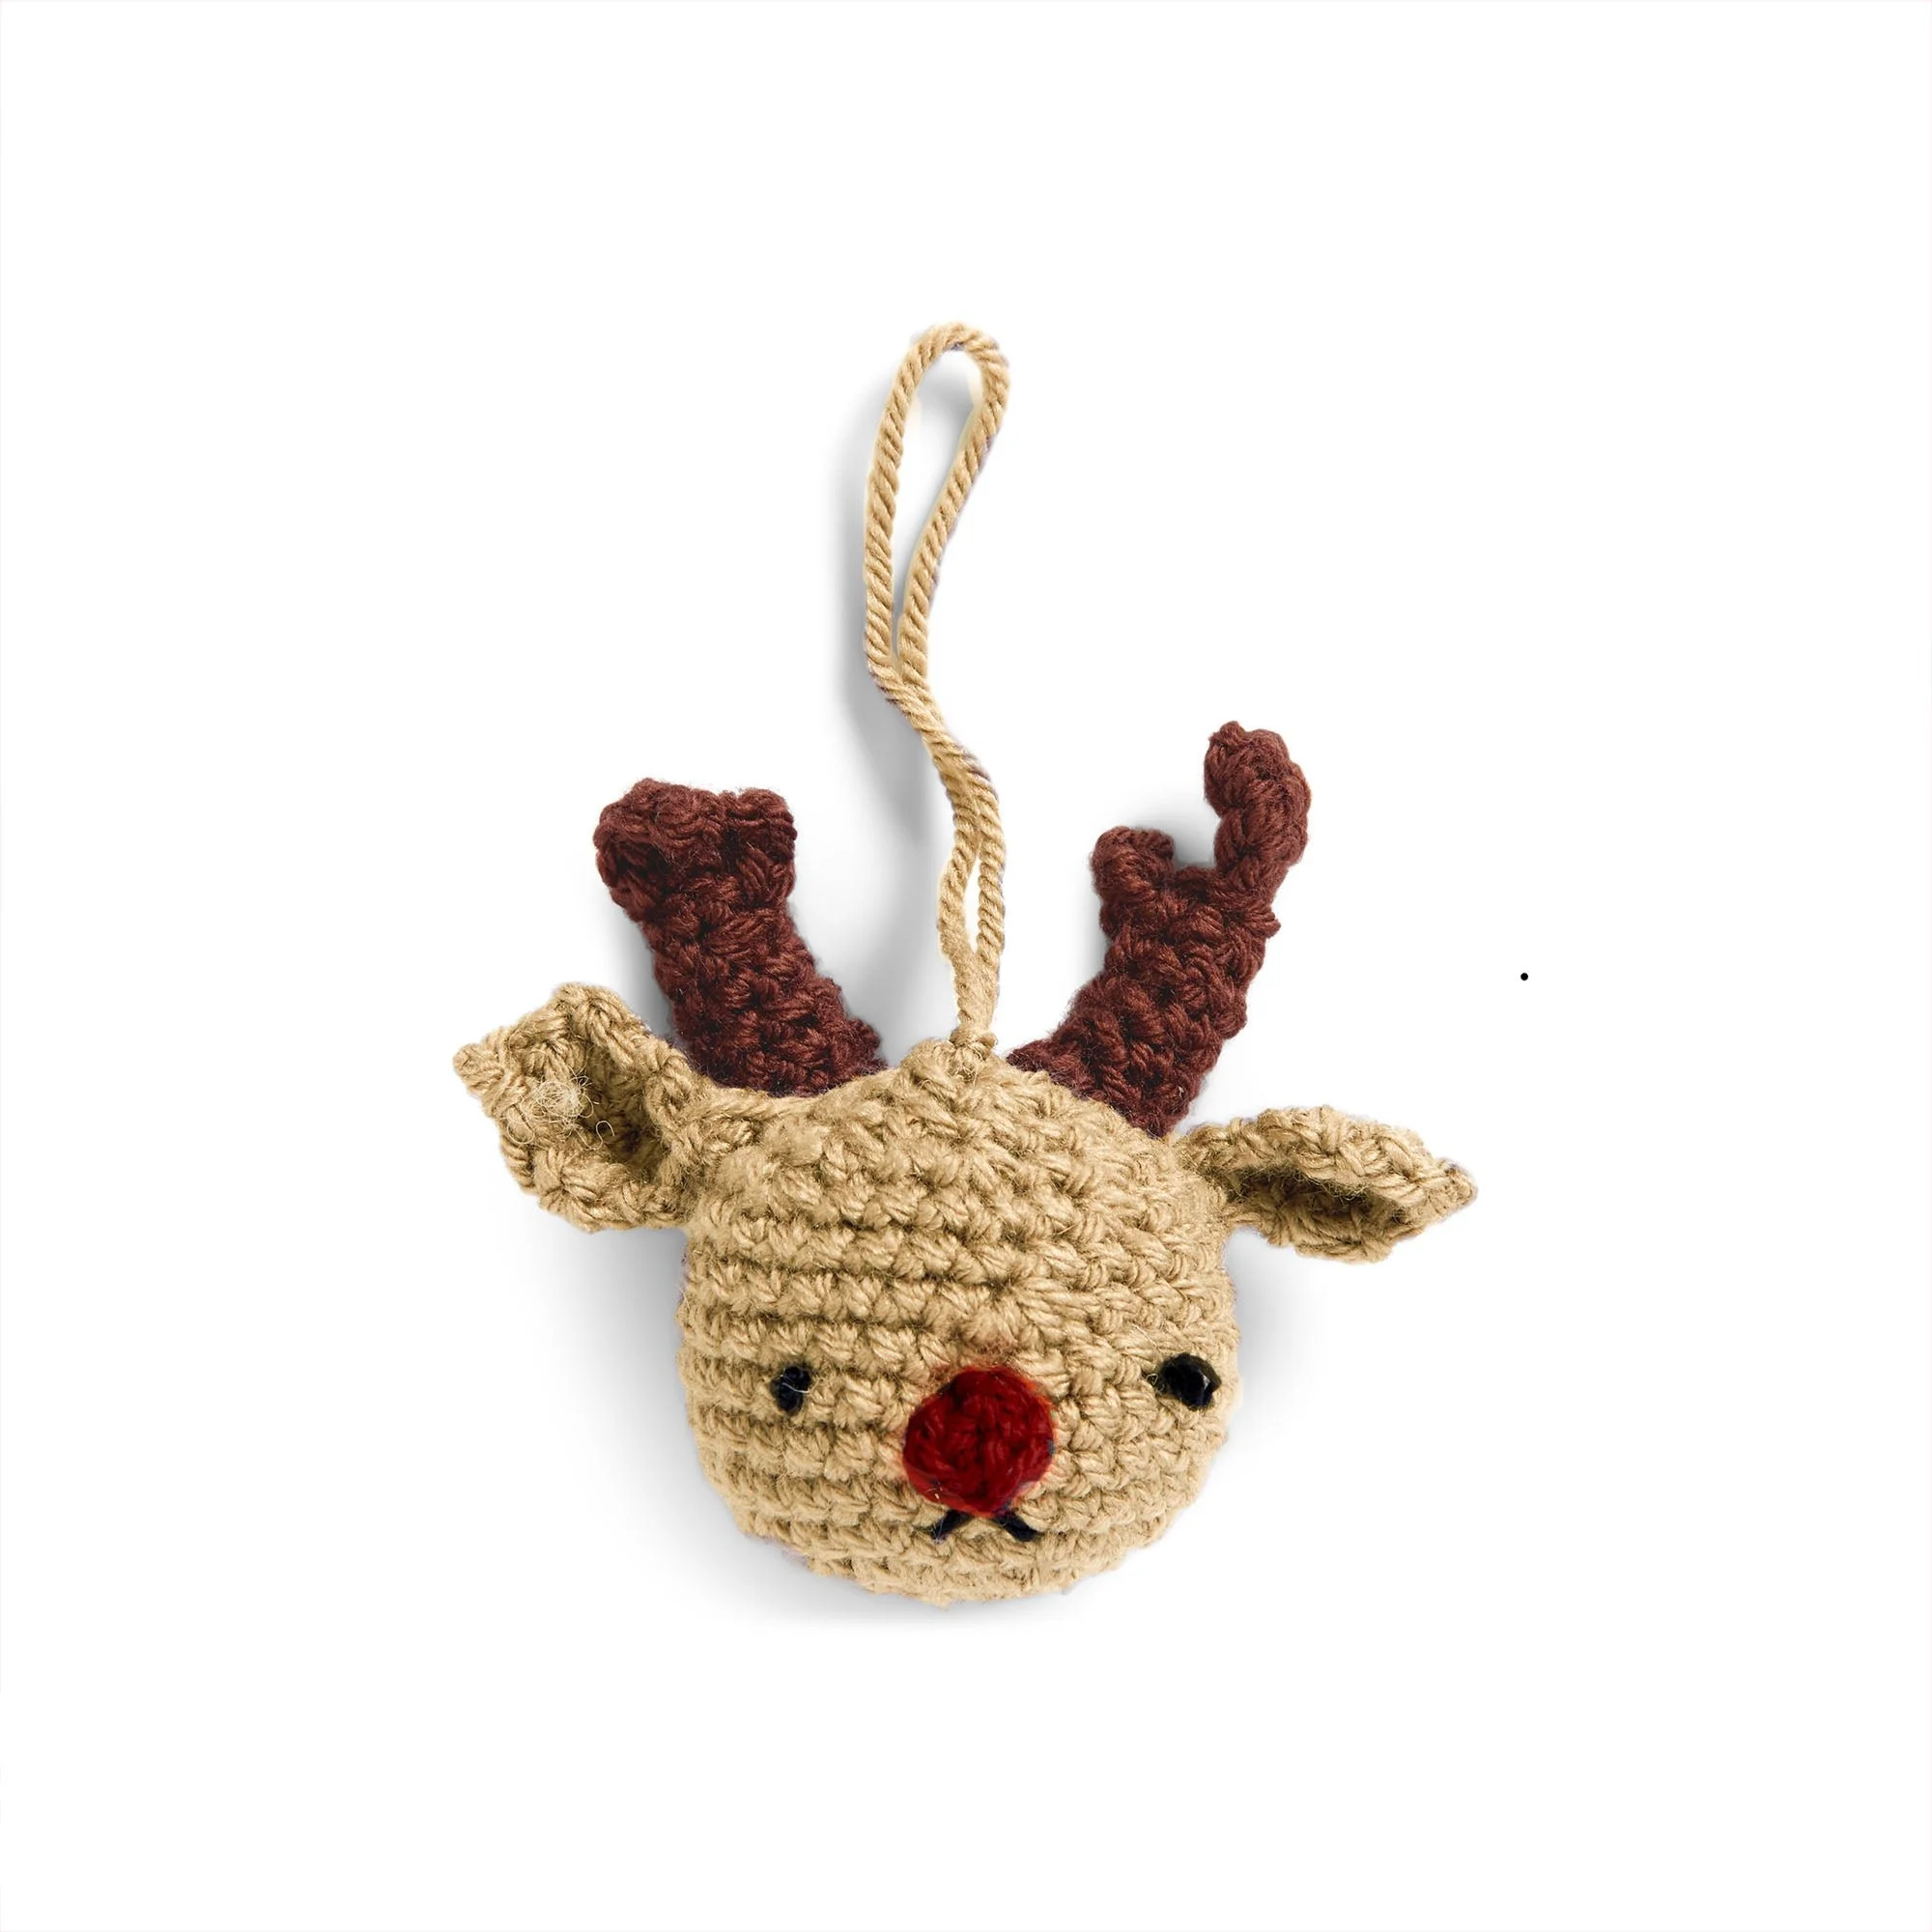
Welcome to the 2024 Advent Calendar Crochet Reindeer Pattern! This delightful little reindeer makes a charming decoration for the holiday season, perfect for an advent calendar or as a festive ornament. With its adorable features, including antlers and a cute nose, it’s a delightful project to crochet. This pattern guides you step-by-step through the process of making the head, ears, and antlers, using simple stitches suitable for crocheters at an easy skill level. Follow along with the written instructions and the provided diagrams to create your own little reindeer companion.
Project Details
- Crochet terminology: U.S. terminology
- Skill level: Easy
- Finished size: Approximately 5.5 inches tall (including ears)
- Construction method: Worked in rounds, amigurumi method
Materials and Tools
| Yarn option | Yarn and specifications | Amount |
|---|---|---|
| Contrast A (Tan) | Medium Weight (#4) yarn | 1 ball or 27 yds / 25 m |
| Contrast B (Brown) | Medium Weight (#4) yarn | 1 ball or 10 yds / 9 m |
| Contrast C (Red) | Medium Weight (#4) yarn | 1 ball or 2 yds / 1.75 m |
- Crochet hook: Size U.S. G/6 (4 mm) Susan Bates® Silvalume® crochet hook (or size needed to obtain gauge)
- Susan Bates® yarn needle
- Susan Bates® stitch marker
- Polyester stuffing
- Small amount of black yarn
- Alternate: Key chain clasp
Abbreviations
| Abbreviation | Meaning |
|---|---|
| ch | chain |
| sl st | slip stitch |
| sc | single crochet |
| sc2tog | single crochet 2 together |
| sc3tog | single crochet 3 together |
| PM | place marker |
| Magic Loop | A technique to start a round crocheting project. |
Preparation and Techniques
Working in a Spiral
Crochet Patterns — No Ads. No Clutter.
Browse the Crochet Library →
This pattern utilizes continuous rounds, meaning you will not join rounds but simply continue crocheting in a spiral. Place a stitch marker in the first stitch of each round to keep track of where your rounds begin.
Complete Pattern Instructions
Head
With A, make a magic loop.
| Round | Instructions | Stitches |
|---|---|---|
| 1st rnd | Ch 1. 8 sc in loop. PM in last st. Pull magic loop tight. | 8 sc |
| 2nd rnd | 2 sc in each sc around. | 16 sc |
| 3rd rnd | (1 sc in next sc, 2 sc in next sc) 8 times. | 24 sc |
| 4th rnd | (1 sc in each of next 2 sc, 2 sc in next sc) 8 times. | 32 sc |
| 5th to 7th rnds | 1 sc in each sc around. | 32 sc |
| 8th rnd | 1 sc in each of next 15 sc, sc2tog, PM, 1 sc in each of next 15 sc. | 31 sc |
| 9th rnd | 1 sc in each of next 14 sc, sc3tog, 1 sc in each of next 14 sc. | 29 sc |
| 10th rnd | 1 sc in each of next 27 sc, sc2tog. | 28 sc |
| 11th rnd | (1 sc in each of next 5 sc, sc2tog) 4 times. | 24 sc |
| 12th rnd | (1 sc in next sc, sc2tog) 8 times. | 16 sc |
| 13th rnd | (1 sc in each of next 2 sc, sc2tog) 4 times. | 12 sc |
| 14th rnd | Stuff head firmly, then sc2tog 6 times. Fasten off, leaving a long tail. | 6 sc |
Ears (make 2)
With A, and leaving a long tail, ch 4.
| Row | Instructions | Stitches |
|---|---|---|
| 1st row | (RS) 1 sc in 2nd ch from hook, 1 sc in each ch to end of chain. Turn. | 3 sc |
| 2nd row | Ch 1. 1 sc in each sc across. Turn. | 3 sc |
| 3rd row | Ch 1. 2 sc in first sc, 1 sc in next sc, 2 sc in last sc. Turn. | 5 sc |
| 4th row | Ch 1. 1 sc in each sc across. Turn. | 5 sc |
| 5th row | Ch 1. 1 sc in first sc, sc3tog, 1 sc in last sc. Turn. | 3 sc |
| 6th row | Ch 1. Sc3tog. Fasten off. | — |
Fold the ear in half so the first and last sts of the 1st row meet. Use the long tail to sew through both thicknesses of the 1st row of the ear to secure. Attach one ear to either side of the head with the marker centered between them.
Antlers (make 2)
Note: Join all rnds with sl st to first st.
With B, and leaving a long tail, ch 6. Sl st in first ch to form a ring.
| Rnd | Instructions | Stitches |
|---|---|---|
| 1st rnd | Ch 1. 1 sc in each ch around. Join. | 6 sc |
| 2nd to 4th rnds | Ch 1. 1 sc in each sc around. Join. | 6 sc |
| 5th rnd | Ch 1. 1 sc in first sc, ch 3, 1 sc in 2nd ch from hook, 1 sc in next ch, sc2tog, 1 sc in each of next 3 sc. Join. | 7 sc |
| 6th rnd | Ch 1. 1 sc in first sc, skip next 2 sc, 1 sc in sc2tog, 1 sc in next sc, sc2tog. Join. | 4 sc |
| 7th row | Ch 4, 2 sc in 2nd ch from hook, 1 sc in each of next 2 ch. Sl st in next sc, leave rem sts unworked. Fasten off, leaving long tail. | — |
Stuff the antlers lightly. Using the long tails, sew one antler to either side of the head, behind the ears as shown.
Nose
With C, and leaving a long tail, ch 2.
| Rnd | Instructions | Stitches |
|---|---|---|
| 1st rnd | 6 sc in 2nd ch from hook. Join with sl st to first sc. Fasten off. | 6 sc |
Using the long tail, sew the nose to the front of the head, centered below the marker, over the 5th to 7th rnds of the head.
Hanging Loop
Cut a strand of A 5″ long. Fold the strand in half and tie the ends to form a hanging loop. Pull the hanging loop halfway through the top of the reindeer head, then pull the hanging loop through itself and tighten to secure.
Alternate: With A and yarn needle, pass the yarn through the top of the reindeer head and the base of the provided keychain clasp. Whipstitch and tie securely as close to the top of the reindeer head as possible and weave in ends.
