
Rnd 20: Rep Rnd 14. (60 sts)
Rnd 21: Ch 1, sc in each dc and each ch-1 sp around. Join. (40 + 20 = 60 sc)
Rnds 22–23: Ch 1, sc in each st around. Join. (60) Fasten off. Thread a 24 in (61.0 cm) length of Color A for sewing.
The joins of all rounds line up at the center back. Mark rim sts 53–60 and 1–8, which is 16 sts. Mark the same 16 sts on Rnd 10 of the base.
Decorations
Bow (Color C): Ch 50. Sl st in the back bump of the 2nd ch from hook and in each ch across. (49 sl st) The cord is about 12.5 in (31.8 cm) long. Tie it into a bow about 3 in (7.6 cm) wide.
Bell (Color B, make 2):
- Rnd 1: 6 sc in MR. (6)
- Rnd 2:3 times. (9)
- Rnd 3:3 times. (12)
- Rnd 4: Sc in each st. (12)
- Rnd 5:6 times. (18)
- Rnd 6: Sl st in each st. (18)
Fasten off. Tie a large knot in the starting tail and let it hang just inside the bell as a clapper. Each bell is about 1 in (2.5 cm) tall and 1.4 in (3.6 cm) across the opening.
Pine Sprig (Color D, make 2 long and 2 short):
Long sprig: Ch 15 and sl st in 2nd ch from hook. *Ch 5, sl st in 2nd ch from hook and in the next 3 ch to make a needle, then sl st in the next spine ch; rep from * 12 more times. Rotate the work and rep from * 13 times along the unused loops of the spine. (26 needles) Each long sprig is about 3.5 in (8.9 cm).
Short sprig: Work the same way on ch 11, with 9 needles per side. (18 needles) Each short sprig is about 2.5 in (6.4 cm).
Make All Pieces
Color A: 1 panel, plus the bases and lower scales of all 3 pockets
Color B: the cream scale round and rim of all 3 pockets, plus 2 bells
Color C: 1 bow
Color D: 4 sprigs
Layout (measured from the top edge of the finished panel):
Joining
Sew each pocket to the panel. Leave the panel’s live loop alone for now. The border goes on after the pockets are attached, and it adds 0.25 in (0.6 cm). That means the rim marks on the unbordered panel are 4.75 in, 12.25 in, and 19.75 in (12.1 cm, 31.1 cm, and 50.2 cm) from the top edge.
Method: Use a whipstitch with Color A.
Stitch-to-stitch logic: The 16 marked rim sts sit across the center 16 rounds of the panel, which are Rnds 1–8 on each side of the foundation chain. Sew 1 rim st to 1 panel round, so the count is 16 to 16. The pocket back is 4 in (10.2 cm) wide and the 16 panel rounds measure about 3.75 in (9.5 cm). That small amount of ease keeps the rim curved instead of flat.
Next, sew the 16 marked base sts in the same way, 3.5 in (8.9 cm) below the rim line. Tack the back wall to the panel at the halfway point.
Tension: Pull each stitch snug, but don’t pucker it. The panel should stay flat behind the pocket.
Checkpoint: The panel still measures 6 in (15.2 cm) across. Each pocket sits about 0.6 in (1.5 cm) in from each side edge.
Border
Border gauge: This is the same sc gauge as the panel. One sc round plus one sl st round adds 0.25 in (0.6 cm) to each edge.
Border Rnd 1 (Rnd 14):Pick up the live loop. Ch 1. For each end, work 3 times, which gives 42 sts per end. Work sc in each of the 70 sts on each side. Join. (224 sts: 70 + 42 + 70 + 42)
Border Rnd 2: Sl st in BLO of the next 21 sts, which brings you to the center of End A. Ch 14 for the hanging loop. Sl st in BLO of the next 203 sts. Join. (224 sl st; the loop is not counted) Fasten off.
Go back to the loop and work 20 sc over the ch 14 to strengthen it. Sew the ends of this reinforcement to the panel.
Why the math works: A flat circle in sc grows by 6 sts per round. The two rounded ends together form one circle split in half, so 3 increases per end per round keep them flat. The sides are straight and stay at 70 sts. Working the sl sts in the back loops leaves a neat, raised edge that looks like a chain.
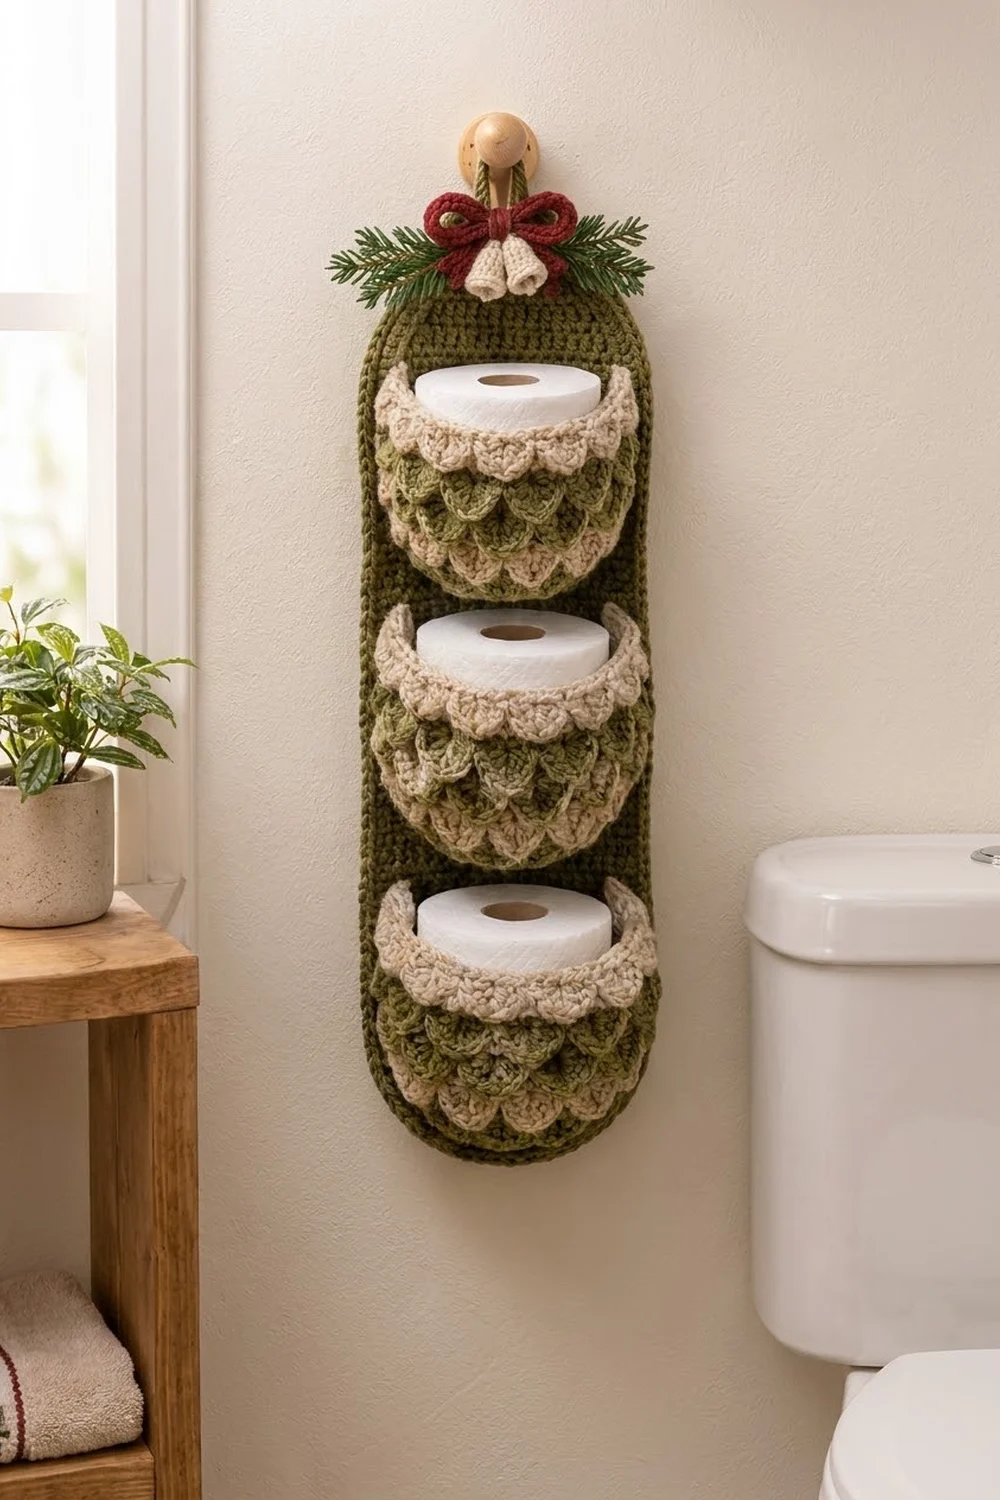
Decorations: Fan 2 sprigs to each side just below the loop. Sew the bow over the sprig stems, then hang the 2 bells beneath the knot.
Final Blocking
- Fill each pocket with a roll so the cups keep their round shape.
- Spray the whole piece lightly with water until it is damp.
- Lay the piece flat and pin the panel to 6.5 in x 24.5 in (16.5 cm x 62.2 cm).
- Shape each scale so it lies smoothly over the round below it.
- Fluff the bow loops and spread the sprig needles.
- Leave the piece to dry completely before you hang it.
Final Quality-Control Checklist
- The panel measures 6.5 in x 24.5 in (16.5 cm x 62.2 cm).
- Every scale round has 10 scales, and every posts round has 60 sts.
- The pocket rims sit at 5 in, 12.5 in, and 20 in (12.7 cm, 31.8 cm, and 50.8 cm) from the top.
- The pockets are level and centered.
- The hanging loop is centered and reinforced.
- All yarn ends are woven in.
Troubleshooting
The panel ends ruffle: You have too many sts at the ends. Recount the 3 increases per end.
The panel ends cup: Your tension is too tight on the ends. Go up a hook size for the end sections only.
The scales flare out: Work the dc around the posts more firmly.
The roll won’t fit: Go up a hook size for the pockets.
The panel sags: Pull the joining stitches firmer, or slide a strip of plastic canvas behind the panel.
Care
Hand wash in cool water and lay flat to dry. Reshape the pockets with rolls while they are damp.
Final Notes
Everything depends on gauge. At 16 sc and 17 rnds = 4 in (10.2 cm), the panel reaches 6 in x 24 in (15.2 cm x 61.0 cm). The border brings it to 6.5 in x 24.5 in (16.5 cm x 62.2 cm). The 60-st pockets come out 4.75 in (12.1 cm) across, so a 4.25 in (10.8 cm) roll fits every time.
Happy crocheting!
