
WINGS
Each wing has its own scheme.
RIGHT WING (by the observer)
1: 2 loops, 6sc in 2nd loop from hook (amigurumi ring) (6l)
2: х2 (8l)
3: х4 (12l)
4: 12sc (12l)
5: х4 (16l)
6: 16sc (16l)
7: х2 (18l)
8: 18sc (18l)
9: х2 (20l)
10: 20sc (20l)
11: х2 (18l)
12: 10sc, 3 loops, turning, 2sc, sl st in the same loop (in which the last sc was
crocheted before the chain, we got a feather), 8sc (18l)
Attention! Further, the loops of the feathers of the previous round should be
skipped and not taken into account when calculating the total number of loops in a
round.
13: х2 (16l)
14: 10sc, 3 loops, turning, 2sc, sl st in the same loop, 6sc (16l)
15: х2 (14l)
16: 10sc, 4 loops, turning, 3sc, sl st in the same loop, 4sc (14l)
17: х2 (12l)
18: 10sc, 4 loops, turning, 3sc, sl st in the same loop, 2sc (12l)
19: х2 (10l)
20: 10sc, 4 loops, turning, 3sc, sl st in the same loop, sc (10l)
21: х5 (5l)
Cut and fix the thread, leaving a long end for sewing. Don’t close the hole.
LEFT WING (by the observer)
1: 2 loops, 6sc in 2nd loop from hook (amigurumi ring) (6l)
2: х2 (8l)
3: х4 (12l)
4: 12sc (12l)
5: х4 (16l)
6: 16sc (16l)
7: х2 (18l)
8: 18sc (18l)
9: х2 (20l)
10: 20sc (20l)
11: х2 (18l)
12: 8sc, 3 loops, turning, 2sc, sl st in the same loop (in which the last sc was crocheted
before the chain, we got a feather), 10sc (18l)
Attention! Further, the loops of the feathers of the previous round should be
skipped and not taken into account when calculating the total number of loops in a
round.
13: х2 (16l)
14: 7sc, 3 loops, turning, 2sc, sl st in the same loop, 9sc (16l)
15: х2 (14l)
16: 6sc, 4 loops, turning, 3sc, sl st in the same loop, 8sc (14l)
17: х2 (12l)
18: 5sc, 4 loops, turning, 3sc, sl st in the same loop, 7sc (12l)
19: х2 (10l)
20: 4sc, 4 loops, turning, 3sc, sl st in the same loop, 6sc (10l)
21: х5 (5l)
Cut and fix the thread, leaving a long end for sewing. Don’t close the hole.
Mark with the needle for cutting the location of the wings between 5 and 6 round of
the body, the distance between them is approx 18 stitches
WIRE FRAME TO THE WINGS
Insert the yarn needle into the body at the wings attachment point. Take a piece of
wire (approximately 40 cm – 15.7 inches long). Pull the wire through the body use a
needle. Pull the crocheted wings to the wire
Bite off excess wire and bend the end into a “loop” using round-nose pliers. Trim the thread. Pass the thread through all the loops using the yarn
needle. Tighten and secure.
Move the thread to the base of the win. Sew the wing to the body
Do the same steps with the second wing.
TAIL
Attention! Crochet the tail through back loops only.
1: 9 loops, turning, 8sc (starting from the 2nd loop from the hook) (8l)
2-9: 1 loops, turning, 8sc only through back loops (8l)
Cut and fix the thread, leaving a long end for sewing. Pull the thread through 5 side
loops with a needle. Tighten and secure the thread.
Sew the tail to the body to give the toy balance
SPOTS
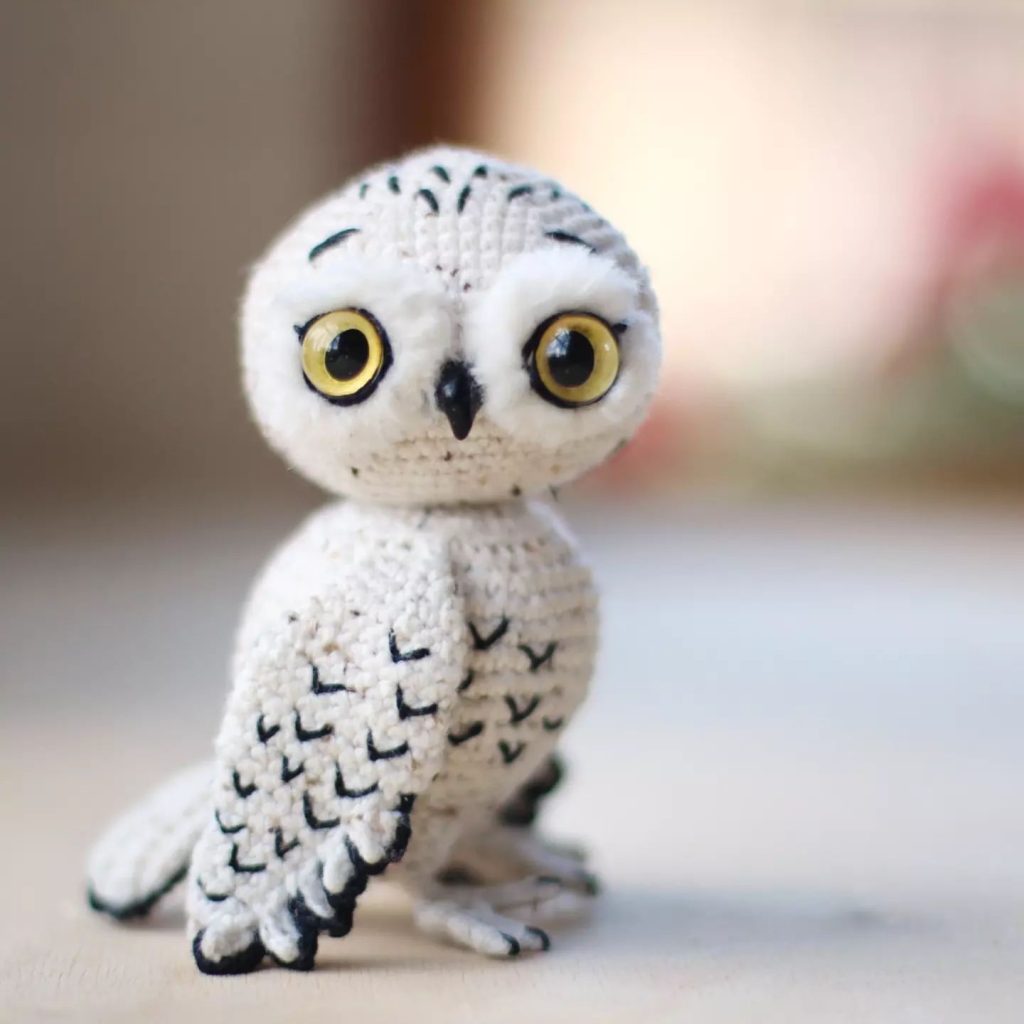
For my owl, I embroidered spots with black threads floss, I only used toning to draw
claws on the feet.
OPTION 1: TONING
Attention! Before drawing spots on a toy, first practice on a sample).
For toning, use black acrylic paint for textile and a round 3/0 synthetic paint brush.
To make the spots look as natural as possible, make them of different sizes.
OPTION 2: EMBROIDERY
The spots can be embroidered with black threads of mouline. To embroider a check
mark, you need to make a straight stitch, then insert the needle in the middle 1 row
lower and fasten the thread.
Embroider the spots on the head with straight stitches. Embroider
the check marks on the belly and on both sides of the wings.
Crochet the feathers on the wings around with a 1,5 mm hook:
Right wing: x2, x3, sl st
Left wing: x3, x3, sl st
Embroider the check marks on the back.
Crochet the tail around with a 1,5 mm hook:
Tail: sl st, 9 loops, sl st, 2 loops, x3, sl st, 2 loops, sl st, 9 loops, sl st
Draw the claws on the feet.
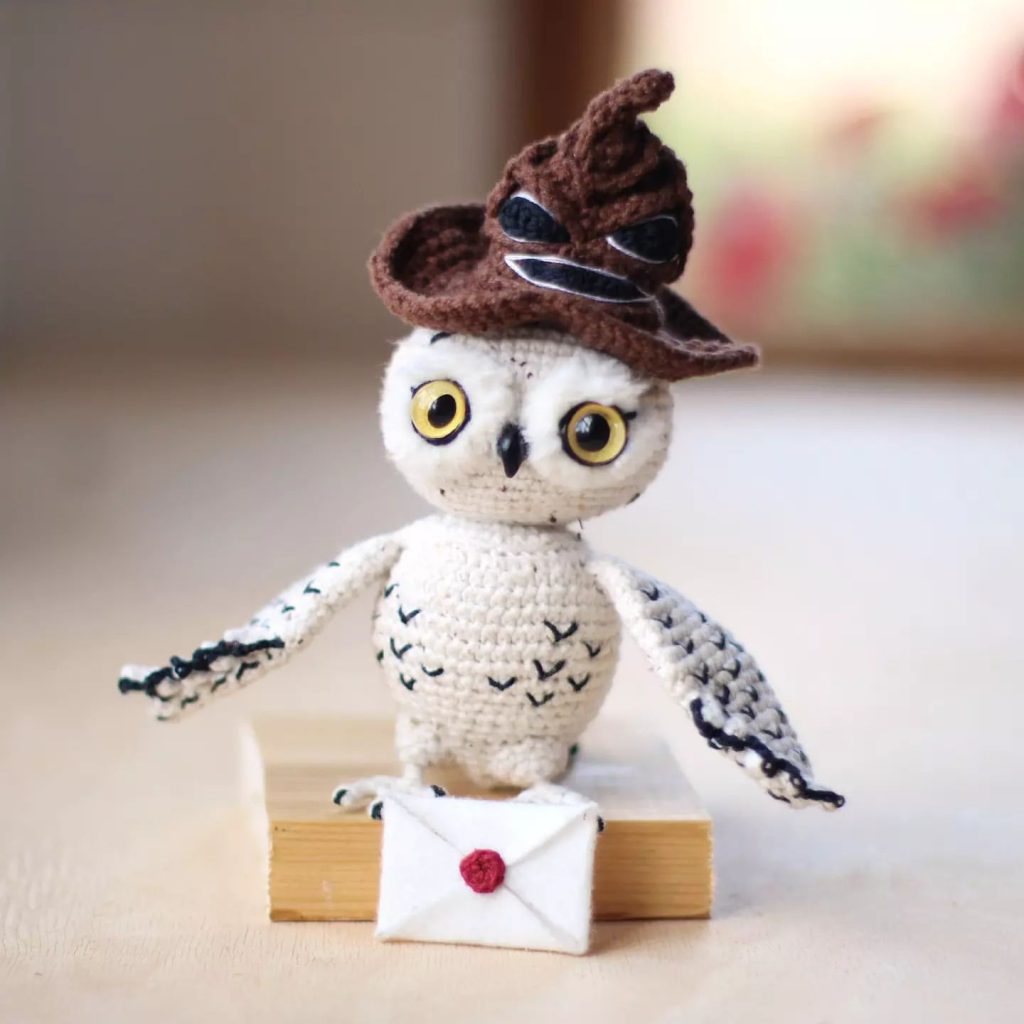
HAT
1: 2 loops, 3sc in 2nd loop from hook (amigurumi ring) (3l)
2: 3sc (3l)
3: inc, 2sc (4l)
4: 4sc only through back loops (4l)
5: inc, 2sc, inc (6l)
6: х3 (9l)
In the next round, go to the 4th round to crochet a fold, and then come back.
7: 4sc through front loops left in the 4th round. Come back to crochet
8th round.
8: х3 (12l)
9: 12sc only through back loops (12l)
10: х6 (18l)
In the next round, go to the 9th round to crochet a fold, and then come back.
11: 12sc through front loops left in the 9th round. Come back to
crochet 12th round.
12: х6 (24l)
13: 24sc only through back loops (24l)
14: 6sc, 12dc, 6sc (24l)
In the next round, go to the 13th round to crochet a fold, and then come back.
15: 24sc through front loops left in the 13th round. Come back to
crochet 16th round.
16: 6sc, 12dc, 6sc (24l)
17: 24sc only through back loops (24l)
18: 24sc (24l)
In the next round, go to the 17th round to crochet a fold, and then come back.
19: 24sc through front loops left in the 17th round. Come back to
crochet 20th round.
20: 24sc (24l)
21: х6 only through back loops (30l)
In the next round, go to the 21th round to crochet a fold, and then come back.
22: 24sc through front loops left in the 21th round. Come back to
crochet 23th round.
23: х6 (36l)
24: х12 (48l)
25: х24 (72l)
26-27: 72sc (72l)
28: 72 sl st (72l)
Cut and fix the thread, leaving a long end. Hide the thread in the crocheted fabric,
then move it inside the hat. Do not cut the thread.
Crochet the eyes and the mouth with 1.5 mm hook using black threads floss.
EYES, 2 pcs
1: 8 loops, turning, tr in the 3rd loop from the hook, 2dc, sc, 2 sl st (6l)
MOUTH
1: 11 loops, turning, 3 sl st, 4sc, 3sl st (10l)
Sew the eyes and mouth to the hat
Embroider the outline around the eyes and mouth using white threads floss – make
one stitch, divide it in half, placing one on top and other on the bottom, tighten the
stitch.
Attach the thread (that we left earlier) to the upper fold above the eye with sl st.
Crochet 3 loops, attach the thread to the lower fold under the eye with sl
st. Repeat the same steps for the other eye.
Fasten and cut the thread. Try on a hat for an owl
LETTER
Cut a rhombus out of paper according to the dimensions shown in the drawing
below.
Circle the rhombus on the white felt and cut it out. Glue double tape
in the center of the rhombus and fold the envelope.
STAMP
Crochet a stamp with 1.5 mm hook using black threads floss.
1: 2 loops, 6sc in 2nd loop from hook (amigurumi ring) (6l)
Cut and fix the thread, leaving a long end for sewing.
Sew the stamp carefully to the envelope
Congratulations, you did a great job and created a small miracle! Embrace your owl!
More Amigurumi Owl İdeas
300 x 250 3
CONTENT END 1
