
The wall is about 3.75 in (9.5 cm) tall. A standard roll, about 4.1 in (10.4 cm) across and 4.3 in (10.9 cm) tall, sits inside with its top just showing.
Diamond Lattice (cream, surf sl st)
Lay the wall flat with the RS facing you. Every diagonal line moves 1 st over for each row it climbs, and stops when it reaches Row 14 or a side edge.
Right-leaning lines: Start between Rows 1 and 2 at sts 1, 7, 13, 19, 25, 31 and 37. Then add one partial line starting at the left edge on Row 8. That makes 8 lines.
Left-leaning lines: Start at sts 42, 36, 30, 24, 18, 12 and 6. Then add one partial line starting at the right edge on Row 8. That also makes 8 lines.
With lines 6 sts apart, you get 7 diamond repeats across 42 sts. Each diamond is 6 sts x 6 rows, or 1.5 in x 1.33 in (3.8 cm x 3.4 cm). One diamond is centered between sts 21 and 22, with its widest point at Row 7–8. Keep each loop the length of one sc so the wall doesn’t pucker.
Star Appliqué (make 3, cream)
Rnd 1: Magic ring, ch 1, work 5 sc in the ring, sl st to join. (5)
Rnd 2: Ch 1, inc in each st, sl st to join. (10)
Rnd 3 (points): Ch 4, sl st in 2nd ch from hook, sc in next ch, hdc in next ch, skip next st of Rnd 2, sl st in next st. Repeat from * 4 more times. (5 points)
Each point uses 2 sts of Rnd 2, so 5 x 2 = 10 ✓. The star is about 2 in (5.1 cm) across. Leave a long tail for sewing.
Sew the star over the center diamond, with its middle between sts 21 and 22 at Row 7–8. Tuck a pinch of cream yarn scraps under the center as you sew so it sits slightly raised.
Make All Pieces
- Green: 1 panel, 3 pocket bases with walls, 1 strap
- Cream: 3 rims, 3 lattices, 3 stars
Layout (front view):
Strap (green): Ch 7. Sc in 2nd ch from hook and in each ch across (6). Work 17 more rows of 6 sc, for 18 rows in total. The strap measures 1.5 in x 4 in (3.8 cm x 10.2 cm).
Joining
Use a tapestry needle and green yarn to whipstitch the pockets on. Catch one full row-end or stitch from the pocket and one stitch from the panel with each pass.
Base to panel: Each pocket’s straight edge has 28 row-ends. Sew it across 25 panel stitches, which is 6.25 in (15.9 cm). Match one row-end to one stitch, but put 2 row-ends into panel stitches 7, 13 and 19 of the 25. That gives 25 + 3 = 28 ✓.
Bottom pockets: These sit along Row 4, where the panel has 58 sts. From the left, the layout is 3 sts margin, 25 sts Pocket B, 2 sts gap, 25 sts Pocket C, 3 sts margin: 3 + 25 + 2 + 25 + 3 = 58 ✓.
Top pocket: This sits along Row 25, where the panel has 44 sts. Skip 9 sts, sew to the next 25 sts, and leave 10 sts. The half-stitch offset doesn’t show.
Wall sides: Each wall side has 16 row-ends. Sew them one-to-one up 16 panel rows, then tack the rim end at the 17th row.
The panel edge moves inward as you go up. On the bottom pockets, angle each outer side seam inward by 4 sts, or 1 in (2.5 cm), so it stays 2 sts inside the panel edge. On the top pocket, sew both sides straight up.
Tension: Pull each stitch snug but not tight, so the panel stays flat.
Size checkpoint: After joining, the panel should still measure 15 in x 18 in (38.1 cm x 45.7 cm). If it doesn’t, loosen any seams that are pulling.
Border
Border gauge: 4 sc per inch along every edge.
Round 1 (green): With the RS facing, join yarn at the bottom right corner.
- Bottom edge: 3 sc in the corner st, sc in the next 58 sts, 3 sc in the last st. (64)
- Left slanted side: (Sc in the next 19 row-ends, skip 1 row-end) 4 times, then sc in the last row-end. That covers 81 row-ends. (77)
- Top edge: 3 sc in the first st, sc in the next 4 sts, 3 sc in the last st. (10)
- Right slanted side: Repeat the left side. (77)
Sl st to the first sc. Total: 64 + 77 + 10 + 77 = 228 sts.
Round 2: Ch 1, rev sc in each st around. (228) Fasten off.
Why the math works: This is a single panel, so the bottom count comes from its own 60 sts plus 4 extra corner stitches. Each slanted side is about 19.2 in (48.8 cm) long, because the edge rises 18 in (45.7 cm) while moving in 6.75 in (17.1 cm). At 4 sts per inch, that needs 77 sts. One sc in every row-end would give 81, which would ruffle, so you skip 4 row-ends. The border adds 0.5 in (1.3 cm) on every side, so the panel becomes 16 in x 19 in (40.6 cm x 48.3 cm).
Strap and ring: Fold the strap around the wooden ring. Sew both ends to the back of the panel tip, overlapping each end by 1 in (2.5 cm). This leaves about 1 in (2.5 cm) of loop showing above the point.
Final Blocking
- Lightly mist the whole piece with water.
- Lay it face up on a blocking mat.
- Pin the base to 16 in (40.6 cm) and the height to 19 in (48.3 cm).
- Pin both slanted sides straight from the bottom corners to the tip.
- Stuff each pocket with a towel or a roll so it dries rounded.
- Gently straighten the lattice lines and star points with your fingers.
- Let it dry completely before you remove the pins.
Final Quality-Control Checklist
- The panel measures 16 in x 19 in (40.6 cm x 48.3 cm) and lies flat.
- Each pocket base is 6.2 in (15.7 cm) wide and fits a roll.
- The lattice forms 7 even diamonds across each wall.
- Each star is centered on its middle diamond.
- The rims are fully cream with a neat rope edge.
- The border has 228 sts and its corners lie flat.
- The strap is sewn securely and the holder hangs straight.
- All ends are woven in.
Troubleshooting
- The pocket base cups: Your tension is tight. Go up a hook size, or add 1 more increase in Row 12.
- The pocket base ruffles: Stagger the increase positions from row to row.
- The lattice puckers: Your loops are too short. Redo the line with slightly longer slip stitches.
- The roll won’t fit: Check that the base reached 42 sts and 6.2 in (15.7 cm).
- The slanted edges wave: Skip 1 extra row-end per side in Round 1.
- The holder tilts on the wall: Re-center the strap on the panel tip.
Care
Hand wash in cool water and lay flat to dry, shaping the pockets as described above. Don’t tumble dry, because heat can distort the dense panel.
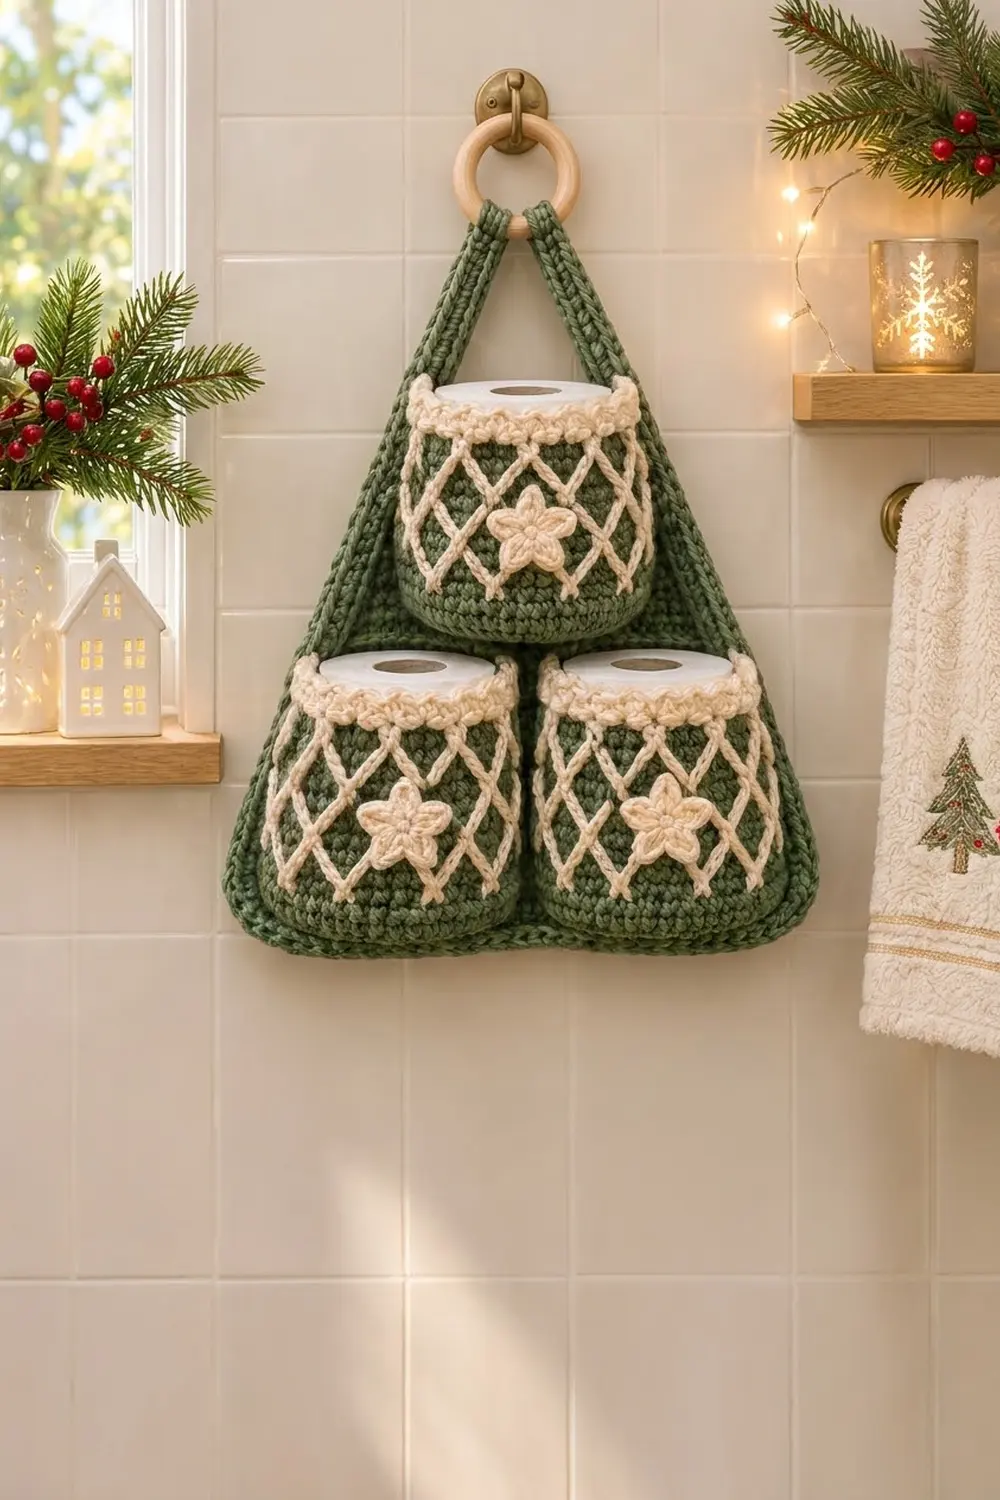
Final Notes
The measurement chain runs like this. Your gauge of 16 sc x 18 rows = 4 in (10.2 cm) gives a 42-stitch pocket base 6.2 in (15.7 cm) wide. The 60-stitch panel is 15 in (38.1 cm) wide and narrows evenly to 6 sts at 18 in (45.7 cm) tall. The 228-stitch border brings it to 16 in x 19 in (40.6 cm x 48.3 cm). If you check each step against these numbers, the three pockets will line up neatly and hold their rolls.
Happy crocheting!
