
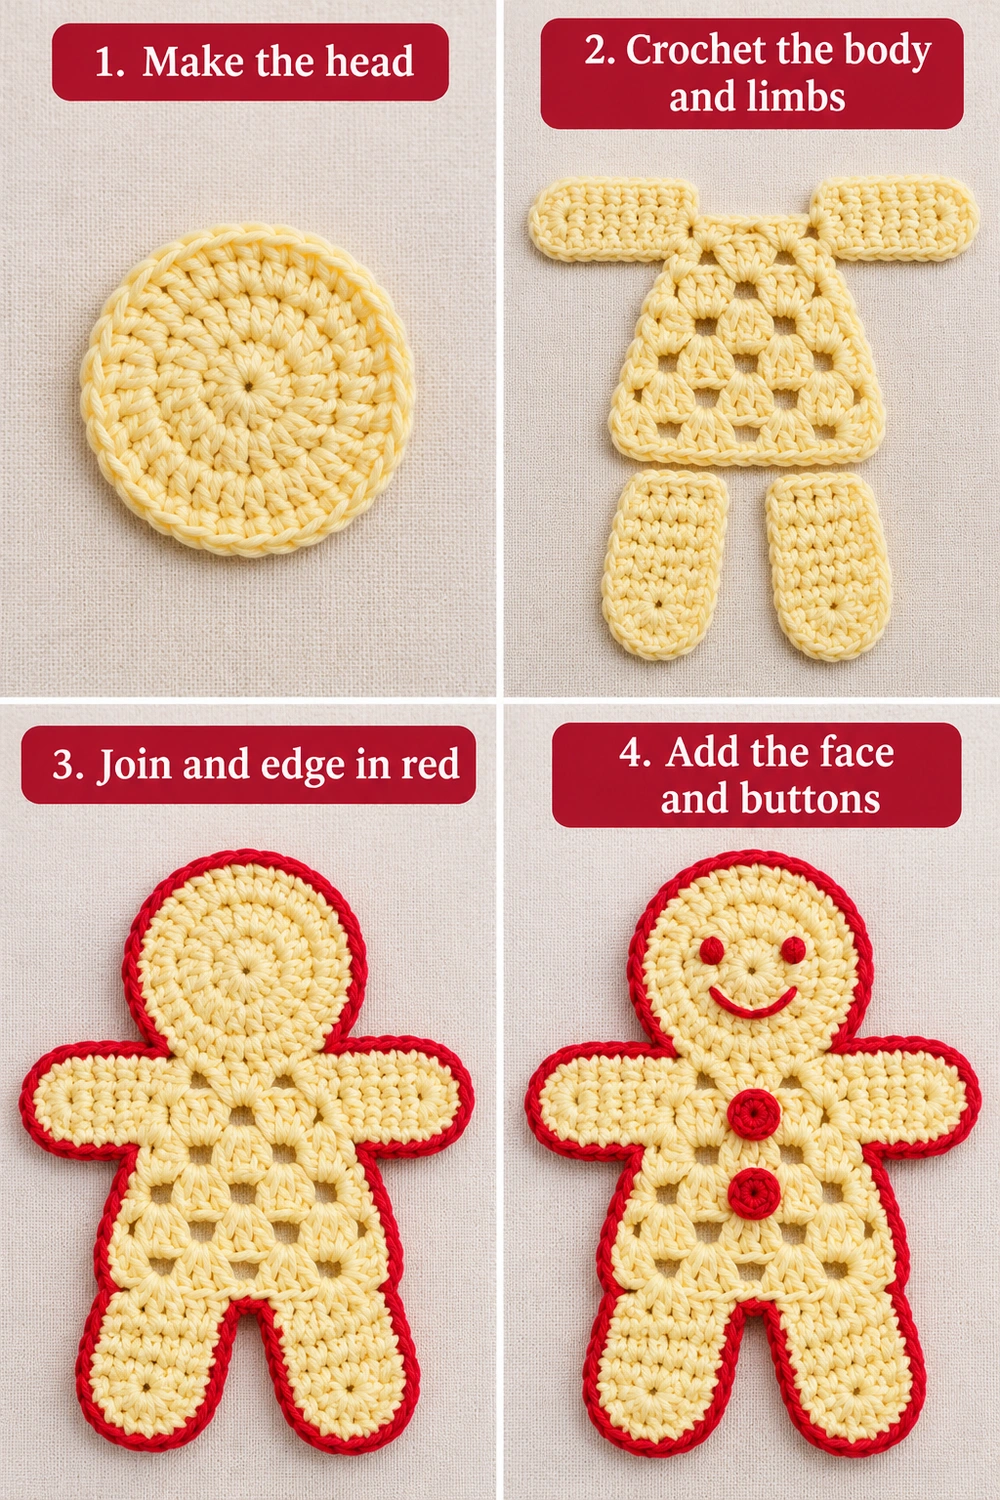
- Place the head above the torso, overlapping the lower edge of the circle just enough to sew it to the center of the torso’s upper edge.
- Lay one arm on each side just below the head. Turn the panels so their longer dimension extends horizontally. Sew their inner ends to the sides of the torso, leaving the outer ends free.
- Pin both legs to the lower torso with a visible gap between them. Angle them slightly outward and sew the overlapping top edge of each leg to the torso. Check that the arms and legs are level before weaving in the tails.
4. Crochet the Red Outline
Join red yarn to an exposed edge stitch near the neck. Ch 1, then work sc around the full outside silhouette, including the space between the legs. Work through both layers where a seam meets the outside edge. Place roughly 2 sc in each dc row end as a starting point, adjusting the spacing so the border lies flat.
Responsivo Post 02 – P2
Ease around the ends of the arms and feet with an extra sc where needed. Work a loose sl st into the deepest part of each inside corner if the border bunches. Join to the first sc and fasten off. The exact total varies with the overlap and where you insert the hook along row ends.
5. Add the Red Face, Buttons, and Loop
Embroider two small filled dots on the upper half of the head using red yarn. Use several short backstitches to make a curved smile below them. Keep the embroidery relaxed so it does not pull the head out of shape.
For each button, work 6 sc into an MR with red. Close the ring and join with a sl st to the first sc. Fasten off with a sewing tail. Make two and sew them in a vertical line down the center of the torso.
For the optional hanging loop, join red at the top of the head, ch 18, then sl st back into the same stitch. Weave in all ends. Dampen and pin flat to dry, shaping the round head and each limb.
Try the flat gingerbread person with a red bow for another ornament in the same shape.
Granny Stitch Gingerbread Visual Guide
The tutorial shows the assembly sequence. The two tabletop diagrams show the overall silhouette, edging, and placement of the face and buttons.
More Free Crochet Patterns
Find your next handmade project with these lovely patterns.
Christmas Lace Star Crochet Pattern – Free Five-Point Ornament Guide
View Pattern →
Blue Lace Snowflake Crochet Pattern – Free Ornament Guide
View Pattern →
Crescent Moon and Star Crochet Pattern – Free Ornament Guide
View Pattern →
CONTENT END 1
