
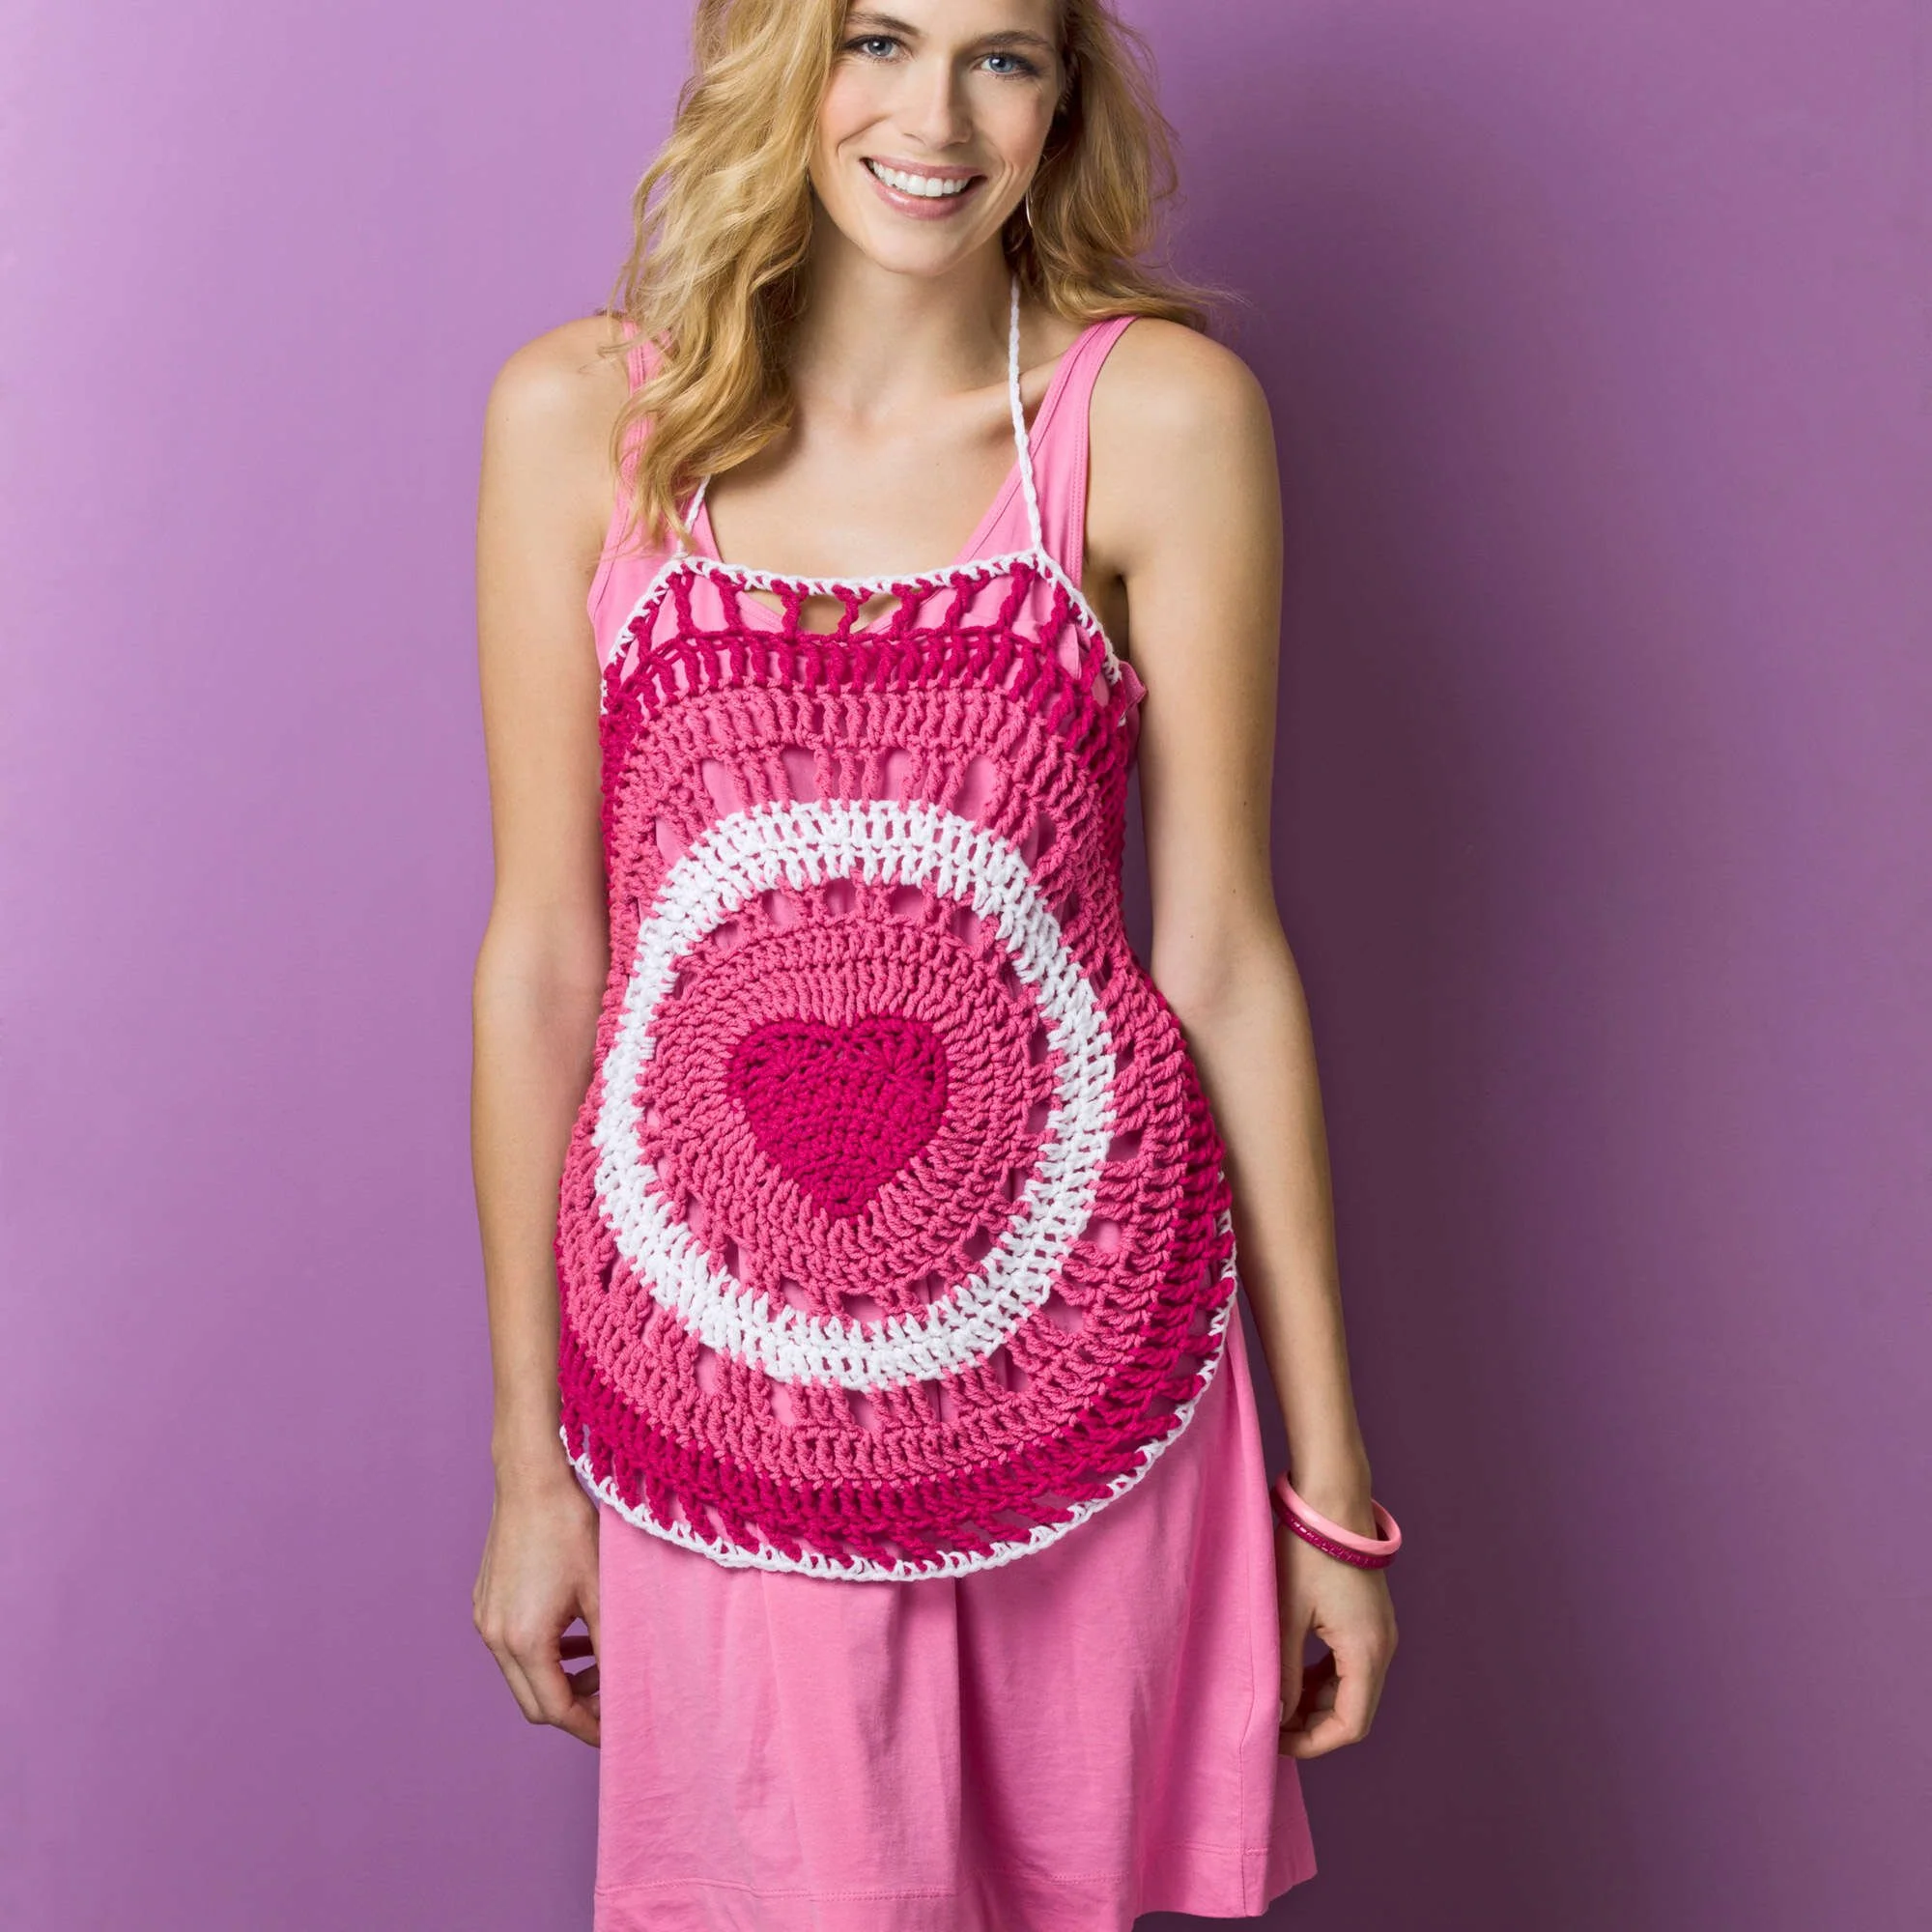
The Crochet Heartfelt Halter is a charming and playful garment perfect for summer days. Featuring a lovely heart motif at its center, this halter will showcase your crochet skills while providing a stylish and comfortable fit. Made with vibrant RED HEART® yarn, it’s both eye-catching and soft against the skin. You’ll create this piece using basic stitches and clever techniques, making it an excellent choice for Crocheters eager to enhance their skills. Follow the written directions alongside any photos provided for a smooth crocheting experience!
Project Details
- Crochet terminology: US Terms
- Skill Level: Intermediate
- Finished Size: Varies by size; refer to the pattern for specific dimensions
- Construction Method: Worked in rounds
Materials and Tools
| Yarn Option | Yarn and Specifications | Amount |
|---|---|---|
| A | RED HEART® “With Love®”, Hot Pink 1701 | 1 skein |
| B | RED HEART® “With Love®”, Candy Pink 1703 | 1 skein |
| C | RED HEART® “With Love®”, White 1001 | 1 skein |
- Crochet Hook: 8mm
- Yarn Needle
- Stitch Markers
Abbreviations
| Abbreviation | Meaning |
|---|---|
| ch | chain |
| hdc | half double crochet |
| dc | double crochet |
| tr | triple crochet |
| sc | single crochet |
| slip st | slip stitch |
Preparation and Techniques
Working in Rounds
Crochet Patterns — No Ads. No Clutter.
Browse the Crochet Library →
This pattern uses joined rounds starting from Round 8. To maintain the integrity of the shape, always join each round with a slip stitch to the top of the beginning chain.
Changing Yarn Colors
When changing colors, be sure to leave a sufficient tail on both ends for weaving in. It’s best to change colors at the end of a stitch for a cleaner finish.
Complete Pattern Instructions
Center Heart
| Row | Instructions | Stitches |
|---|---|---|
| 1 | With A, make an adjustable ring. Ch 2 (does not count as a st here and throughout), 3 hdc in ring, turn. | 3 hdc |
| 2 | Ch 2, 2 hdc in first st, hdc in next st, 2 hdc in last st, turn. | 5 hdc |
| 3–5 | Ch 2, 2 hdc in first st, hdc in each st across to last st, 2 hdc in last st, turn. | 11 hdc at end of Row 5 |
| 6 | Ch 2, turn, hdc in each st across, turn. | – |
| 7 | Skip first 2 sts, (2 dc, 2 tr, 2 dc) in next st, skip next 2 sts, slip st in next st, skip next 2 sts, (2 dc, 2 tr, 2 dc) in next st, skip last 2 sts, slip st in top of beginning ch. | – |
Begin Working in Rounds
| Round | Instructions | Stitches |
|---|---|---|
| 8 | Ch 1, do not turn. Work 7 sc evenly spaced across side edge, 3 sc in adjustable ring at point, 7 sc evenly spaced across other side edge. Then: 2 sc in each of next 2 dc, 2 sc in each of next 2 tr, 2 sc in each of next 2 dc, slip st in next slip st, 2 sc in each of next 2 dc, 2 sc in each of next 2 tr, 2 sc in each of next 2 dc. Join with slip st in first sc. | 42 |
| 9 | With Right Side facing, join B with slip st, ch 4 (counts as first tr), tr in same st as join, tr in next 2 sts, *2 tr in next st, tr in next 2 sts; repeat * around; join with slip st in top of beginning ch. | 56 |
| 10 | Ch 3 (counts as dc), dc in each tr around, join with slip st in top of beginning ch. | – |
| 11 | Ch 3, dc in same st as join, *ch 3, skip next dc, dc in next 2 dc; repeat * around to last dc, ch 3, skip last dc, join with slip st in top of beginning ch. | 38 dc and 19 ch-3 spaces |
| 12 | With Right Side facing, join C, ch 3, dc in next dc, 2 dc in next ch-3 space, *dc in next 2 dc, 2 dc in next ch-3 space; repeat from * around; join with slip st in top of beginning ch. | 76 |
| 13 | Ch 3, dc in next 2 dc, 2 dc in next dc, *dc in next 3 dc, 2 dc in next dc; repeat * around; join with slip st in top of beginning ch. | 95 |
| 14 | With Right Side facing, join B, ch 4, tr in same st, tr in next dc, *ch 2, skip next dc, tr in next 3 dc; repeat * around; join with slip st in top of beginning ch. | 72 tr and 24 ch-2 spaces |
| 15 | Ch 4, tr in next 2 tr, 2 tr in next ch-2 space, *tr in next 3 tr, 2 tr in next ch-2 space; repeat * around; join with slip st in top of beginning ch. | 120 |
| 16 | With Right Side facing, join A, ch 4, tr in each tr around, join with slip st in top of beginning ch. | – |
| 17 (18, 19) | Ch 6 (counts as tr, ch-2), skip next tr, *tr in next tr, ch 2, skip next tr; repeat * around; join with slip st in 4th ch of beginning ch. | 60 (70, 70) tr and 60 (70, 70) ch-2 spaces |
| 18 (19, 20) | With Right Side facing, join C, ch 1, sc in same st, 2 sc in next ch-2 space, *sc in next tr, 2 sc in next ch-2 space; repeat from * around; join with slip st in first sc. | 180 (210, 210) |
Assembly and Finishing
Ties
Place two markers to indicate the front neck, about 8” apart and centered above the heart. With C:
- Ch 50, and join with a slip st in the first marked st (for the first neck tie).
- Working in sts of the last round, slip st in each st for about 9 (9½, 10”).
- Ch 80 (for first back tie).
- Fasten off, and repeat this process for the second neck tie (joining to the second marked st) and the second back tie.
