
Edging totals: ten sc and three picots around each red point; six connecting sc between points. Overall, 66 sc, 18 picots, and twelve ch-3 connecting spaces. The chains inside the 18 picots are additional to those connecting spaces. Joining sl st are not counted.
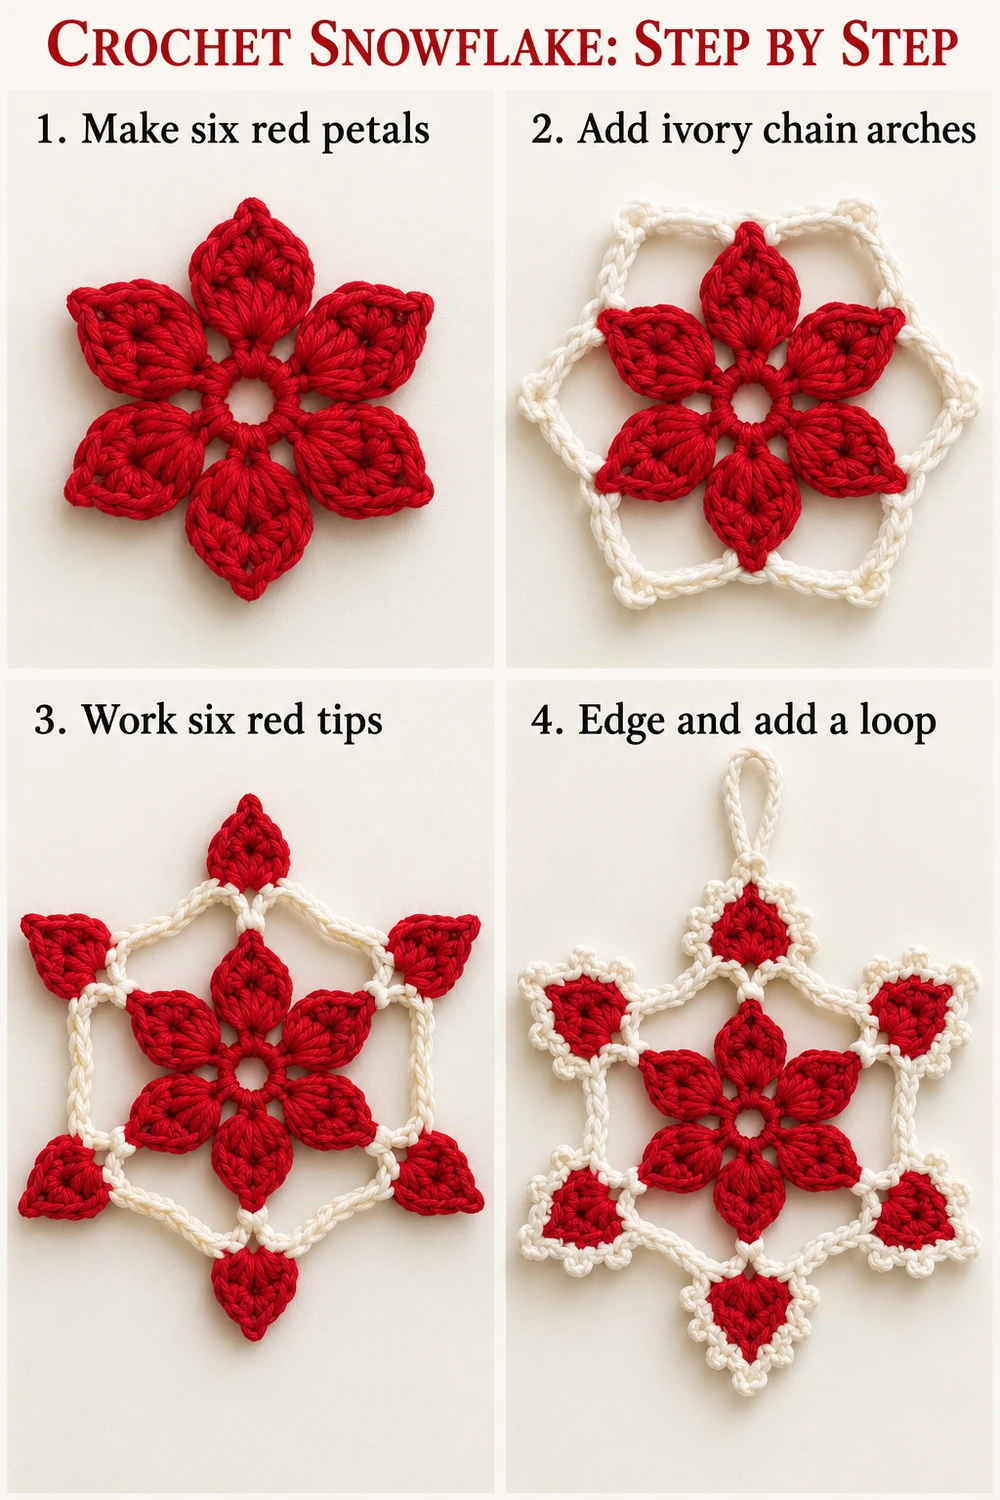
Avoid working an extra sc into the red joining sl st or the initial ch 1. The red point has only eight base stitches and its ch-2 tip space. The ivory border adds two sc into that tip space, giving ten around the point.
5. Ivory Hanging Loop
With ivory, ch 35, then fasten off leaving long tails at both ends. Fold the chain into a loop and sew both ends to the back of the upper point, catching the ivory tip edging and the adjacent red tr tops. Use several small passes spread across dense stitches.
Keep the attachment behind the ornament and weave both ends securely into the back. Do not rely on a single picot as the attachment point. The loop is separate from the decorative edging and does not change the border totals.
Block and Finish
Dampen the ornament gently and blot excess water. Pin the six outer tips at equal distances from the center. Spread the red center petals, open the twelve ivory arches, and smooth the picots without pulling the white chains taut.
Keep the center ring visible and the six points balanced. Let the piece dry fully before lifting it. Test cotton-compatible stiffener on a sample first if you prefer a firmer ornament, then follow the product directions. Keep the openings clear.
This is a hanging decoration with a long loop. Display it away from young children and pets. Spot-clean gently, reshape while damp, and dry flat. Store between tissue to protect the picot tips.
Reading the Two Complete Charts
Both charts show the entire six-point ornament: the red clustered center, twelve ivory arches, six red points, and the continuous picot border. One complete chart sits above the finished ornament photograph in each image. Color distinguishes the red crochet from the ivory sections; the legend uses US terms.
The six red points are joined separately before the continuous ivory edging is worked. Dashed marks near the top indicate sewing for the hanging loop. Use the exact written stitch totals when working a point; decorative symbol spacing does not set the finished dimensions.
Tips and Questions
Why are my red petals separate dc? The center uses four unfinished tr closed together. Finish all four partial stitches with one final pull-through so each petal has one top.
How do I find the correct arches? Mark the first ch-5 loop inside each pair of sc worked into one red ch-4 space. These six marked arches receive the red points. The other six receive the ivory border connecting sc.
Why does the edge ripple? Confirm ten edging sc per red point, not twelve, and keep every connecting section to ch 3, sc, ch 3. Light blocking helps distribute the lace; avoid stretching only one point.
Can I make the ornament smaller? Use finer cotton and a matching hook while keeping the same repeats. Make a center sample first because smaller hooks can make tall clusters hard to work.
Can I change the colors? Yes. Red center petals and red outer points with an ivory framework match the reference. Keep both colors in the same yarn weight for an even outline.
More Free Christmas Crochet Patterns
- Yellow Five-Point Star
- Lace Bell Ornament
- Three-Tier Lace Christmas Tree
Save This Pattern
Save this red-and-ivory snowflake for your Christmas crochet collection. Happy crocheting from Lovely Amigurumi!
Tutorial, Two Complete Charts, and Pinterest Gallery
All six 1000 × 1500 images appear here at the end: one visual tutorial, two complete chart-above-photo guides, and three Pinterest images.
More Free Crochet Patterns
Find your next handmade project with these lovely patterns.
Christmas Lace Star Crochet Pattern – Free Five-Point Ornament Guide
View Pattern →
Granny Stitch Gingerbread Crochet Pattern – Free Ornament Guide
View Pattern →
Blue Lace Snowflake Crochet Pattern – Free Ornament Guide
View Pattern →
CONTENT END 1
