
333
new link ads
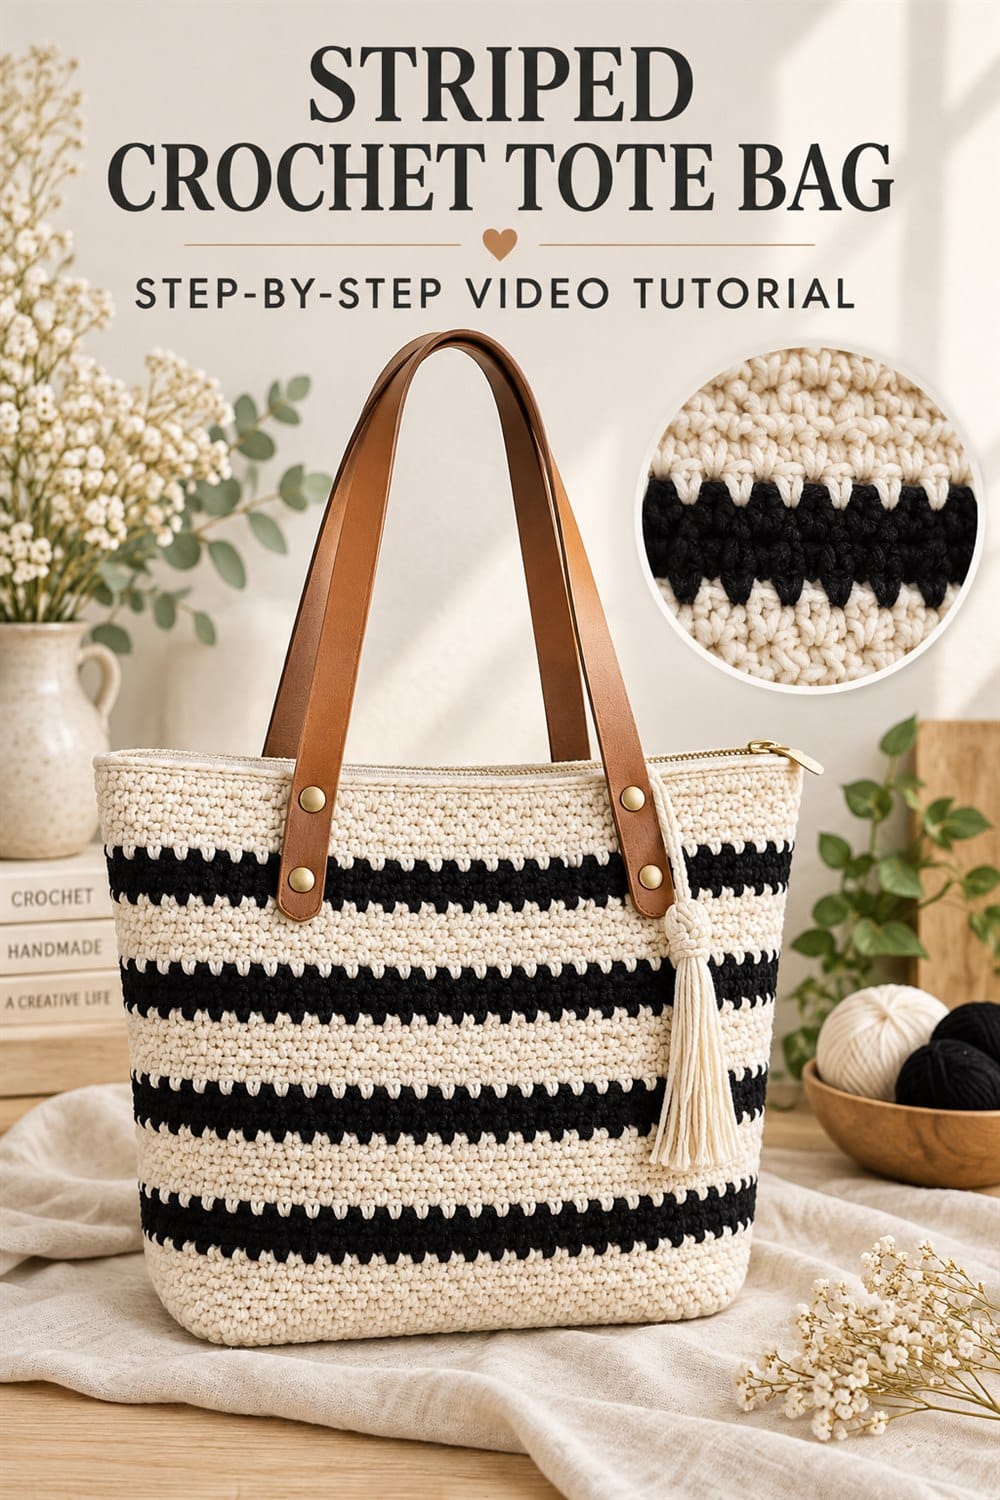
A striped crochet tote bag is a practical project with a polished, graphic finish. This cream-and-black design combines a roomy everyday shape with bold contrast bands, subtle pointed texture, warm leather handles, a zip-top opening, and a soft tassel. The result feels modern enough for errands, market trips, commuting, or gifting while still celebrating handmade crochet.
This English guide supports the full video tutorial below. Use it to plan your yarn, understand the construction sequence, and identify the details that make the finished bag sturdy and neat. Yarn thickness, hook choice, tension, and desired size can change the required counts, so follow the creator’s video demonstrations for exact stitch totals and repeat placement.
Striped Crochet Tote Bag Video Tutorial
Why This Crochet Tote Design Stands Out
The simple two-color palette makes this striped crochet tote easy to coordinate with neutral wardrobes. Cream forms the main body, while black stripes create strong horizontal lines. Small pointed or tooth-like stitch details soften the transition between colors and add texture without making the bag overly ornate. Tan leather handles introduce warmth and give the tote a finished, boutique-inspired appearance.
A rectangular body offers useful capacity, and a firm lower section helps the tote keep its shape. The zipper makes it more secure than an open market tote. A matching tassel is optional, but it echoes the cream yarn and gives the hardware a decorative finish.
Suggested Materials and Tools
- Sturdy cream yarn for the main bag body
- Black yarn of the same weight and similar fiber content
- A crochet hook suited to the yarn and a firm bag fabric
- Stitch markers for corners, joins, and handle placement
- Yarn needle and sharp scissors
- Tan leather or faux-leather shoulder handles
- Strong sewing thread or waxed cord
- A zipper sized to the finished opening
- Optional fabric and interfacing for a lining
- Cardboard or a tassel maker
Choose yarn that tolerates regular handling. Cotton, cotton-blend, or firm synthetic bag yarns show stitch definition and resist excessive stretching. Make a swatch before beginning. A tote benefits from denser fabric than a drapey garment, but the hook should still move comfortably through every stitch.
Understanding the Stripe and Texture
The visual rhythm depends on even cream sections separated by narrow black bands. The pointed detail appears where a contrasting stitch is worked into or around the neighboring row, producing small accents. Watch placement carefully and check the front after every repeat. Consistent spacing matters more than speed.
For clean color changes, complete the final yarn-over of the last stitch with the new color. Keep unused tails inside, secure them without bulky knots, and weave them through matching-color stitches. If carrying yarn along an edge, do not pull tightly because that can shorten one side and distort the opening.
Step-by-Step Construction Overview
- Make a gauge swatch. Test the cream body stitch and black textured stripe, then measure the relaxed fabric.
- Begin the base. Work a firm foundation in the shape demonstrated by the instructor and keep it flat.
- Establish the body. Build upward in cream while marking the round beginning or side seams.
- Add the first band. Change to black cleanly and follow the video for pointed accent placement.
- Repeat the sequence. Count cream rows between black bands so spacing remains balanced.
- Shape the upper section. Maintain an even circumference unless the tutorial specifies shaping.
- Reinforce the opening. Add firm finishing rounds to support the zipper and handles.
- Install the zipper. Pin or clip it evenly before sewing and align both ends.
- Attach the handles. Measure from both side edges and secure every point with strong thread.
- Finish the tote. Weave in ends, add a tassel, and insert an optional lining.
How to Keep the Tote Straight
Uneven sides usually come from missed stitches, accidental increases, or tight color carries. Count at the end of every section and place markers at structural points. Lay the work flat regularly and compare both side edges. If the body leans, check where rounds join and make sure the first stitch has not shifted.
Tension may change when switching colors. Work both with the same relaxed hand. If one yarn is thinner, a small hook adjustment or extra strand may help, but test that choice in a swatch first.
