
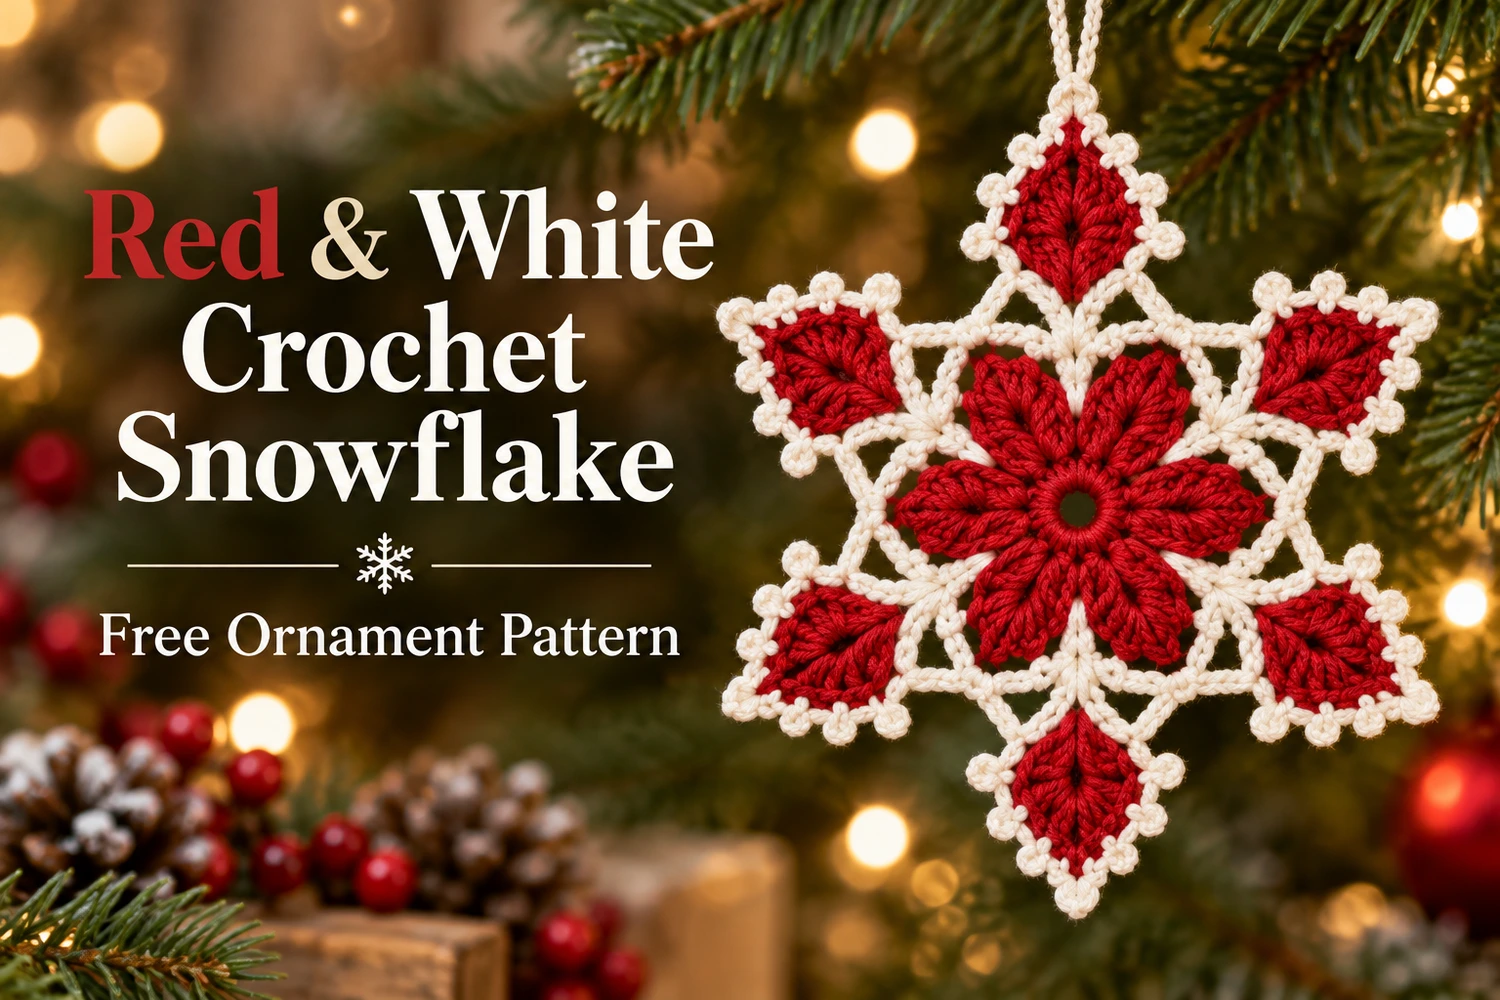
This Red and White Snowflake Crochet Pattern makes a flat Christmas ornament with six red petals around an open center, airy ivory chain arches, and six red outer tips framed with ivory picots. An ivory hanging loop finishes the top, following the festive red-and-cream reference.
The center is worked first, followed by the ivory framework. Six red points are then added to alternating arches, and one continuous ivory edging connects their scalloped outlines. The ornament stays unstuffed so the open spaces remain visible.
Pattern Information
- Skill level: intermediate; clusters, color changes, working into chain spaces, and picot edging.
- US crochet terminology. The ornament has six points, not five.
- Estimated width: 12–16 cm with sport cotton and a 2.5 mm hook; actual dimensions depend on tension.
- Colors: Christmas red and warm ivory.
- Construction: one clustered center, twelve ivory arches, six separately joined red points, one continuous edging, and a hanging chain.
This is an image-inspired adaptation. Counts and repeats have been reviewed, but the pattern has not been physically crocheted or independently tested. The written instructions define this construction; the images illustrate the intended appearance.
Materials
- Sport cotton: approximately 10 g red and 10–15 g ivory.
- 2–2.5 mm hook suited to your yarn.
- Tapestry needle, scissors, and six removable stitch markers.
- Blocking mat and rustproof pins.
- Optional fabric stiffener suitable for cotton decorations.
Abbreviations
- ch: chain; sl st: slip stitch; sc: single crochet.
- hdc: half double crochet; dc: double crochet; tr: treble crochet.
- sp: space; st: stitch; Rnd: round.
- 4-tr cl: four treble crochet stitches worked together in the same space, as explained below.
- Picot: ch 3, sl st in the first of those three chains. The picot does not consume another base stitch.
Special Stitch: Four-Treble Cluster
Yarn over twice, insert the hook into the ring, yarn over and pull up a loop, then (yarn over, pull through two loops) twice. Leave the final loop of this unfinished tr on the hook. Repeat this partial tr three more times into the same ring. You now have five loops on the hook; yarn over and pull through all five. This makes one 4-tr cl with a single shared top.
Responsivo Post 01 – P1
Each cluster counts as one petal, not four finished top stitches. Do not substitute four separately completed tr: the shared top creates the raised petal shape. Work with relaxed tension so the cluster is full rather than tightly pinched.
Red and White Snowflake Crochet Pattern
1. Red Center: Six Petals
With red, ch 6 and join with a sl st to the first chain, making an open ring. Keep the ring open rather than pulling it closed.
Rnd 1: ch 4 for height; this starting chain does not count as a stitch. Work one 4-tr cl into the ring, ch 4. Repeat (one 4-tr cl into the ring, ch 4) five more times. Join with a sl st to the top of the first cluster. Fasten off.
Total: six cluster petals and six ch-4 spaces. The starting ch 4 sits behind the first petal and is not a seventh petal or an extra space. Spread the six petals evenly around the open ring.
2. Ivory Framework: Twelve Arches
Join ivory with a sl st in any red ch-4 space. Ch 1, which does not count as a stitch. In this same space work sc, ch 5, sc, ch 5. Repeat (sc, ch 5, sc, ch 5) in each of the next five red ch-4 spaces. Join with a sl st to the first sc. Fasten off.
Total: twelve sc and twelve ch-5 arches. There are two sc anchors in each red ch-4 space. One ch-5 arch loops between those two anchors; the next travels to the first anchor in the following space.
Mark the first arch made within each pair of sc anchors. There should be six marked arches alternating with six unmarked connecting arches. The red outer points go into the marked arches only. Keep the unmarked arches free for the final border anchors.
3. Six Red Outer Points
With red, join with a sl st in a marked ch-5 arch. Ch 1; this does not count. Work (sc, hdc, dc, tr, ch 2, tr, dc, hdc, sc) all in that arch. Fasten off, leaving a tail to weave through the back of the point.
Responsivo Post 02 – P2
Repeat with a new strand of red in each of the other five marked arches. Do not join the red points across the unmarked arches; the ivory edging will connect them.
Each point: eight stitches — two sc, two hdc, two dc, and two tr — plus one ch-2 tip. All six: 48 stitches and six ch-2 tip spaces. The height rises toward the two tr stitches and falls again toward the final sc.
Lay the ornament flat and check the alternating layout: red point, empty ivory arch, red point, empty ivory arch, continuing around six times. Weave the red tails through dense stitches on the back without pulling the open arches shut.
4. Continuous Ivory Picot Edging
Join ivory with a sl st to the first sc of any red point, at the base of its rising side. Ch 1, which does not count as a stitch.
Edge one point: sc in each of its first three stitches (sc, hdc, dc). Sc in the next tr and make a picot. In the ch-2 tip space work (sc, picot, sc). Sc in the next tr and make a picot. Sc in each of the remaining three stitches (dc, hdc, sc).
Connect to the next point: ch 3, sc into the intervening unmarked ivory ch-5 arch, ch 3. Continue directly into the first sc of the next red point and repeat the same point edging.
Repeat until all six points are edged and all six intervening ivory arches have one connecting sc. After the final ch 3, join with a sl st to the first edging sc. Fasten off and weave in the ends.
