
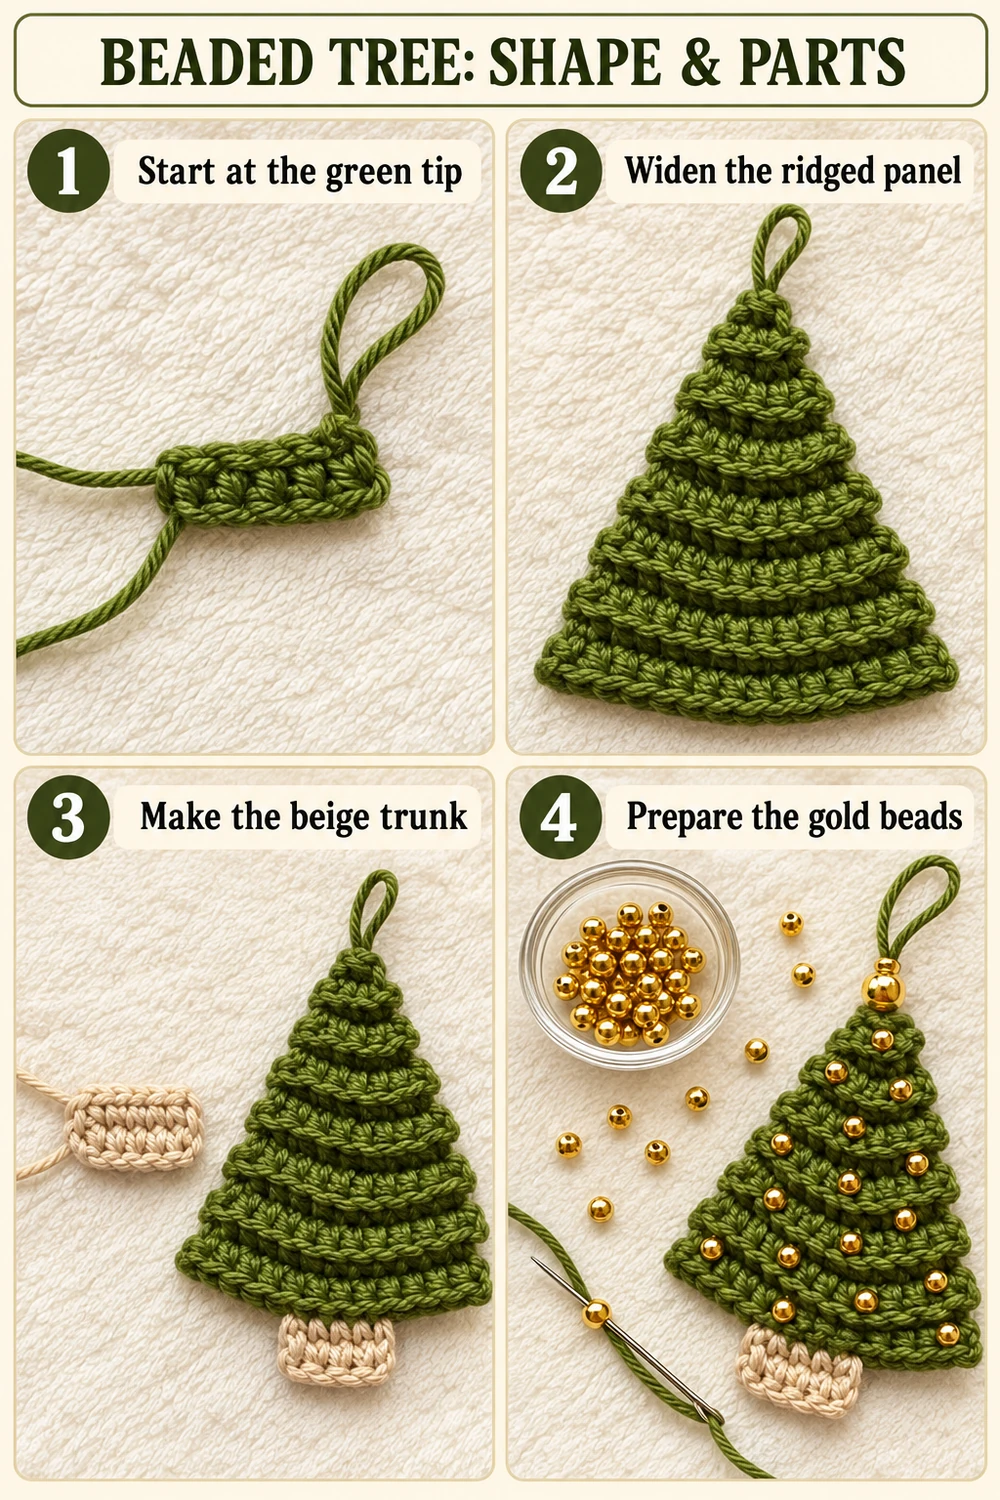
With fine strong thread, bring the needle up through a dense stitch area, pass through one bead, and take the needle back through the crochet close to the entry point. Repeat through that bead at least twice more so it lies securely against the fabric.
Secure the thread on the back before moving to the next bead. If carrying the thread, weave it through the back of dense stitches rather than leaving a long exposed float. Vary the bead positions slightly for the scattered ornament look. Do not pull the thread tight enough to pucker the panel.
Add the Green Loop and Larger Gold Bead
Cut approximately 25 cm of matching green yarn. Use the tapestry needle to pass it through several dense stitches at the top of the tree, just below Row 1. Make a second pass along the same path to reinforce the attachment.
Bring the two free ends together above the tip and thread both through the larger gold bead. Slide it down until it rests just above the green point. Tie a snug stopper knot immediately above the bead if its hole is large enough to slide over the yarn freely.
Tie the two ends together higher up to form the hanging loop. Adjust the loop length for your branch, tighten the knot, and trim excess yarn. Gently tug the loop and check that the bead stays at the base. If doubled yarn will not pass through the bead, choose a bead with a larger hole or omit it; keep the reinforced loop.
Finishing and Display
Check every bead and the trunk seam. Lay the tree flat once more, smooth the sides, and remove any visible thread ends. Repeat in the same green yarn to make a matching set of three.
Hang each tree so the front faces outward. Store the ornaments flat with the loops untangled and the beads protected. Avoid soaking the finished beaded ornament; spot clean gently if the yarn and bead finish allow it.
Photo Tutorials and Stitch Chart
The photo-and-chart image shows the finished tree above a stitch-count guide for Rows 1–5. Each T symbol means one finished hdc. It shows row totals rather than connected stitch placement; follow the written increase instructions and continue through Row 13.
Tips and Troubleshooting
- Panel widens unevenly: mark both edges and increase in the first and last stitch only on even rows.
- An extra stitch appears: do not crochet into the ch-2 turning chain.
- Ridges disappear: check that you are using BLO after turning each row.
- Beads pull the fabric inward: loosen the sewing thread and use several gentle passes.
- Trunk leans: pin its center in line with the top tip before sewing.
Frequently Asked Questions
Are the beads crocheted into the rows?
No. This version sews them on after blocking, which lets you place them freely without pre-stringing the yarn.
Can I use thicker yarn?
Yes. Use a matching hook and the same row counts. The tree will be larger; choose bead sizes and loop length to suit the finished panel.
Can I make it without beads?
Yes. Leave it plain or embroider small gold dots. The trunk and green hanging loop stay the same.
More Free Christmas Crochet Patterns
- Christmas Wreath Ornament Crochet Pattern
- Mini Santa Hat Applique Crochet Pattern
- Christmas Bell Ornament Crochet Pattern
Save This Pattern
Save this Beaded Christmas Tree Ornament Crochet Pattern for a set of handmade holiday decorations. Happy crocheting from Lovely Amigurumi!
Beaded Tree Tutorials, Stitch Chart, and Pinterest Gallery
Two photo tutorials and one photo-and-chart image come first, followed by three Pinterest images. All six images are grouped here at the end.
More Free Crochet Patterns
Find your next handmade project with these lovely patterns.
Christmas Lace Star Crochet Pattern – Free Five-Point Ornament Guide
View Pattern →
Granny Stitch Gingerbread Crochet Pattern – Free Ornament Guide
View Pattern →
Blue Lace Snowflake Crochet Pattern – Free Ornament Guide
View Pattern →
CONTENT END 1
