
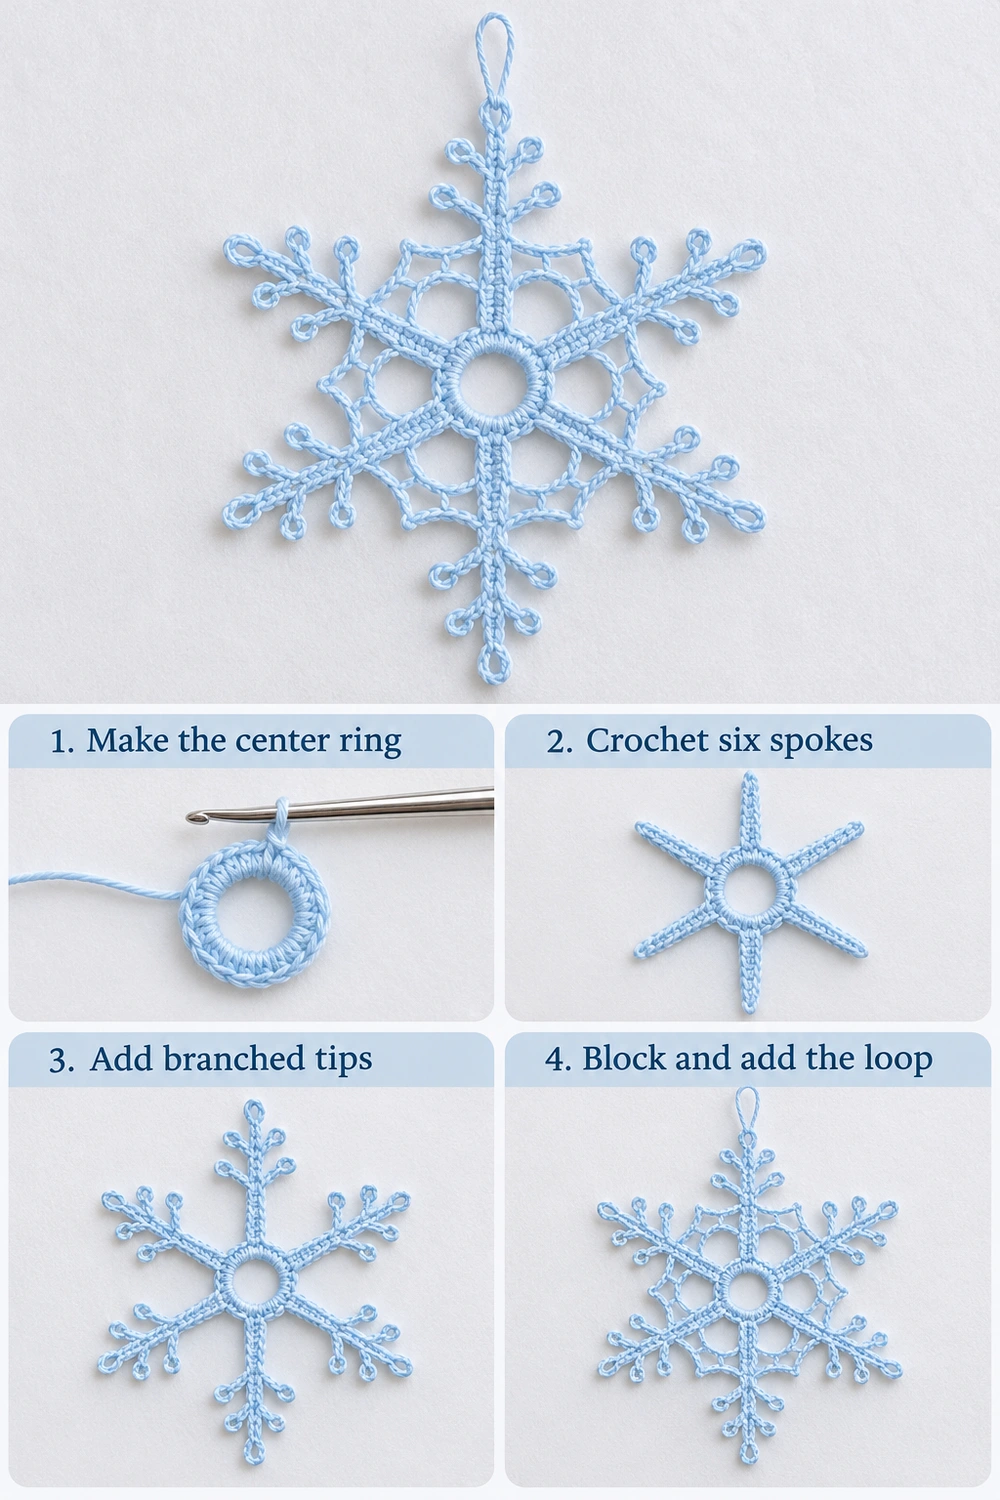
3. Complete the Six-Point Round
Round 3: Sl st into the first ch-2 space and work 1 sc there. Make one branched spoke using the steps above. Then ch 3, work 1 sc into the next ch-5 arch, and ch 3. Repeat five times. Join with a sl st to the first sc of the round. (6 spokes, 6 arch anchors, and 12 ch-3 connector spaces)
Fasten off and weave in the ends through the center stitches. Count the six spokes and check that each one has three pairs of branches before pinning.
4. Block and Add the Hanging Loop
- Dampen the snowflake and lay it on a blocking mat. Pin the center ring into a circle.
- Pin the six tip picots at equal distances from the center. Start with opposite tips, then adjust the remaining points to keep the spacing even.
- Pin each pair of branch loops open and angle them slightly toward the tip. Shape the connecting arches and allow the cotton to dry completely.
- For a hanger, join blue cotton to the tip picot of one spoke, ch 18 loosely, and sl st back into the same picot. Fasten off and weave in both tails. Adjust the chain length to suit where you will hang it.
For a smaller ornament, use a finer cotton and a matching hook. Keeping the same sequence preserves the sixfold shape.
Responsivo Post 02 – P2
For another hanging project in blue, try the crescent moon and star.
Blue Lace Snowflake Visual Guide
The four-step tutorial shows how the ornament comes together. The two tabletop diagrams show the six-point layout. Use the written spoke instructions for the exact chain lengths.
More Free Crochet Patterns
Find your next handmade project with these lovely patterns.
Christmas Lace Star Crochet Pattern – Free Five-Point Ornament Guide
View Pattern →
Granny Stitch Gingerbread Crochet Pattern – Free Ornament Guide
View Pattern →
Crescent Moon and Star Crochet Pattern – Free Ornament Guide
View Pattern →
CONTENT END 1
