
- Round 10: 4 B, 4 C; rep 6 times.
- Round 11: 1 C, 4 B, 4 C; rep 5 times, then 4 B, 3 C.
- Round 12: 2 C, 4 B, 4 C; rep 5 times, then 4 B, 2 C.
- Round 13: 3 C, 4 B, 4 C; rep 5 times, then 4 B, 1 C.
- Round 14: 4 C, 4 B; rep 6 times.
- Round 15: 1 B, 4 C, 4 B; rep 5 times, then 4 C, 3 B.
- Round 16: 2 B, 4 C, 4 B; rep 5 times, then 4 C, 2 B.
- Round 17: 3 B, 4 C, 4 B; rep 5 times, then 4 C, 1 B.
- Rounds 18–20: Rep Rounds 10–12.
Each round starts its color sequence one stitch later than the round before. That shift is what makes the stripes slant. Every round adds up to 48: for example, Round 11 is 1 + 40 + 4 + 3 = 48.
Fasten off B.
Checkpoint: The sides measure 3 in (7.6 cm) tall above the base fold. That is 12 rounds (Rounds 9–20) ÷ 4 rounds per inch. You should see six diagonal B stripes and six diagonal C stripes.
Rim
Round 21 (C): Ch 1, sc in each st, sl st to join. (48 sts)
Round 22 (C): Sl st in the first sc. Sk the next sc, 5 dc in the next sc, sk the next sc, sl st in the next sc; rep 12 times. Work the final sl st into the first sl st. (12 scallops: 60 dc + 12 sl st)
Each scallop uses 4 sts, and 12 × 4 = 48. Fasten off, leaving a long C tail.
Checkpoint: The finished pocket is 3.75 in (9.5 cm) tall. That is 3 in of sides, plus 0.25 in (0.6 cm) for Round 21, plus 0.5 in (1.3 cm) for the scallops.
Make All Pieces
- Backing panel: 1, in B
- Pockets: 3, each using B for the base, Round 9, and stripes, and C for the stripes and rim
Layout (front view, bottom = Row 1):
Each pocket covers 15 rows, and 15 rows ÷ 4 = 3.75 in. The full stack adds up to 5 + 15 + 2 + 15 + 2 + 15 + 2 = 56 rows.
Joining
You join the pockets by sewing them onto the panel with a whipstitch in B.
- Mark the back. On Round 9 of each pocket, place markers 16 sts apart. These 16 sts become the flat back of the pocket, about 4.6 in (11.7 cm) wide. Pick a spot where a stripe meets the base cleanly.
- Position the pocket. Line up the Round 9 fold with the lowest row assigned to that pocket. Pocket 1 starts at Row 3, Pocket 2 at Row 20, and Pocket 3 at Row 37. Center the 16 back sts on the 21-st panel, which leaves 2.5 sts, about 0.7 in, of panel on each side.
- Sew the bottom. Whipstitch each of the 16 marked Round 9 sts to one panel st along that row. Work one stitch to one stitch.
- Sew the sides. From each marker, sew straight up the pocket wall, one stitch per round. Join each round to the matching panel row, up through Round 21. Leave the scallops free.
- Leave the front open. The other 32 sts curve outward to hold the roll.
Tension: Pull each whipstitch just snug. If you sew too tightly, the panel puckers. If you sew too loosely, the pocket sags away from the panel when it is full.
Checkpoint: The panel still measures 6 in × 14 in (15.2 cm × 35.6 cm) and lies flat.
Border
Border gauge: This is the same as the panel gauge, 3.5 sc per inch. Along the side edges, which are row ends, work 7 sc for every 8 rows. That matches 3.5 sts per inch (7 per 8 rows = 3.5 per 4 rows) and keeps the edge from rippling.
The counts below are sc per side. Corner ch-1 sps are separate and not included.
Round 1 (B): Pick up the live loop at the top left corner, with the right side facing.
- Ch 1, sc in the side of each of the first 7 rows, then sk 1 row. Rep down the side for 49 sc, then ch 1 at the corner.
- Sc in each foundation ch across the bottom for 21 sc, then ch 1.
- Work up the other side the same way for 49 sc, then ch 1.
- Sc in each st across the top for 21 sc, then ch 1. Sl st to the first sc.
(140 sc + 4 corner ch-1 sps)
Round 2 (B): Ch 1, sc in each sc, and work (sc, ch 1, sc) in each corner sp. Sl st to join. (Top 23, sides 51, bottom 23 = 148 sc + 4 corner ch-1 sps)
Why the math works: The 49 sc on each side match 56 rows × 7/8. That gives 49 ÷ 3.5 = 14 in, which is exactly the panel’s length. The 21 sc across the top and bottom equal the panel’s 21 sts.
Round 2 adds 1 sc at each end of every side. A side therefore grows to 23 sc plus two corner chains, about 25 st widths. That is 25 ÷ 3.5 ≈ 7 in. The long sides become 51 sc plus two corner chains, about 53 st widths: 53 ÷ 3.5 ≈ 15 in.
Hanging tabs: With the right side facing, count the 23 top sc from right to left.
- First tab: Join B in sc 3. Row 1: ch 1, sc in sc 3–7. (5 sts) Rows 2–14: ch 1, turn, sc across. (5 sts) Fasten off with a long tail.
- Second tab: Work the same way over sc 17–21.
This leaves 2 sc at each corner and 9 sc between the tabs (2 + 5 + 9 + 5 + 2 = 23). Each tab is 3.5 in (8.9 cm) long.
Fold each tab to the back and sew its last row 0.5 in (1.3 cm) below the top edge. The finished loop fits a rod up to 1 in (2.5 cm) thick.
Final Blocking
- Weave in all ends inside the same color so none show on the front.
- Lightly mist the panel until it is damp, not soaked.
- Pin it to 7 in × 15 in (17.8 cm × 38.1 cm), with the corners square.
- Stuff each pocket with a toilet roll wrapped in plastic so the pockets dry round.
- Pin each scallop open so it curves evenly.
- Let everything dry completely, about 12–24 hours, before you unpin it.
Final Quality-Control Checklist
- [ ] Panel is 7 in × 15 in (17.8 cm × 38.1 cm) and lies flat
- [ ] Each pocket has 48 sts, six B stripes, and six C stripes slanting the same way
- [ ] Each rim has 12 even scallops
- [ ] Pockets are centered, with gaps of 0.5 in (1.3 cm) between them
- [ ] Border sides have no rippling or pulling
- [ ] Tabs are the same length and sewn securely
- [ ] No carried strands show through on the front
- [ ] Each pocket holds a standard roll
Troubleshooting
- The stripes look vertical instead of diagonal. You probably started every round the same way. Check the 1-stitch shift at the start of each round.
- The carried color shows through. Keep the unused strand along the top of the stitches and tighten your sc slightly.
- The base ruffles. Your gauge is too loose. Go down a hook size for Rounds 1–8.
- The border waves. You worked too many sts along the sides. Follow the 7-per-8-rows rule.
- The pockets sag. Add a second line of stitching on the sides, or block with the rolls inside.
- The scallops won’t stand up. Block them pinned upward, or work the scallops with a hook half a size smaller.
Care
Hand wash in cool water, or machine wash on the gentle cycle in a mesh bag. Reshape the holder and dry it flat.
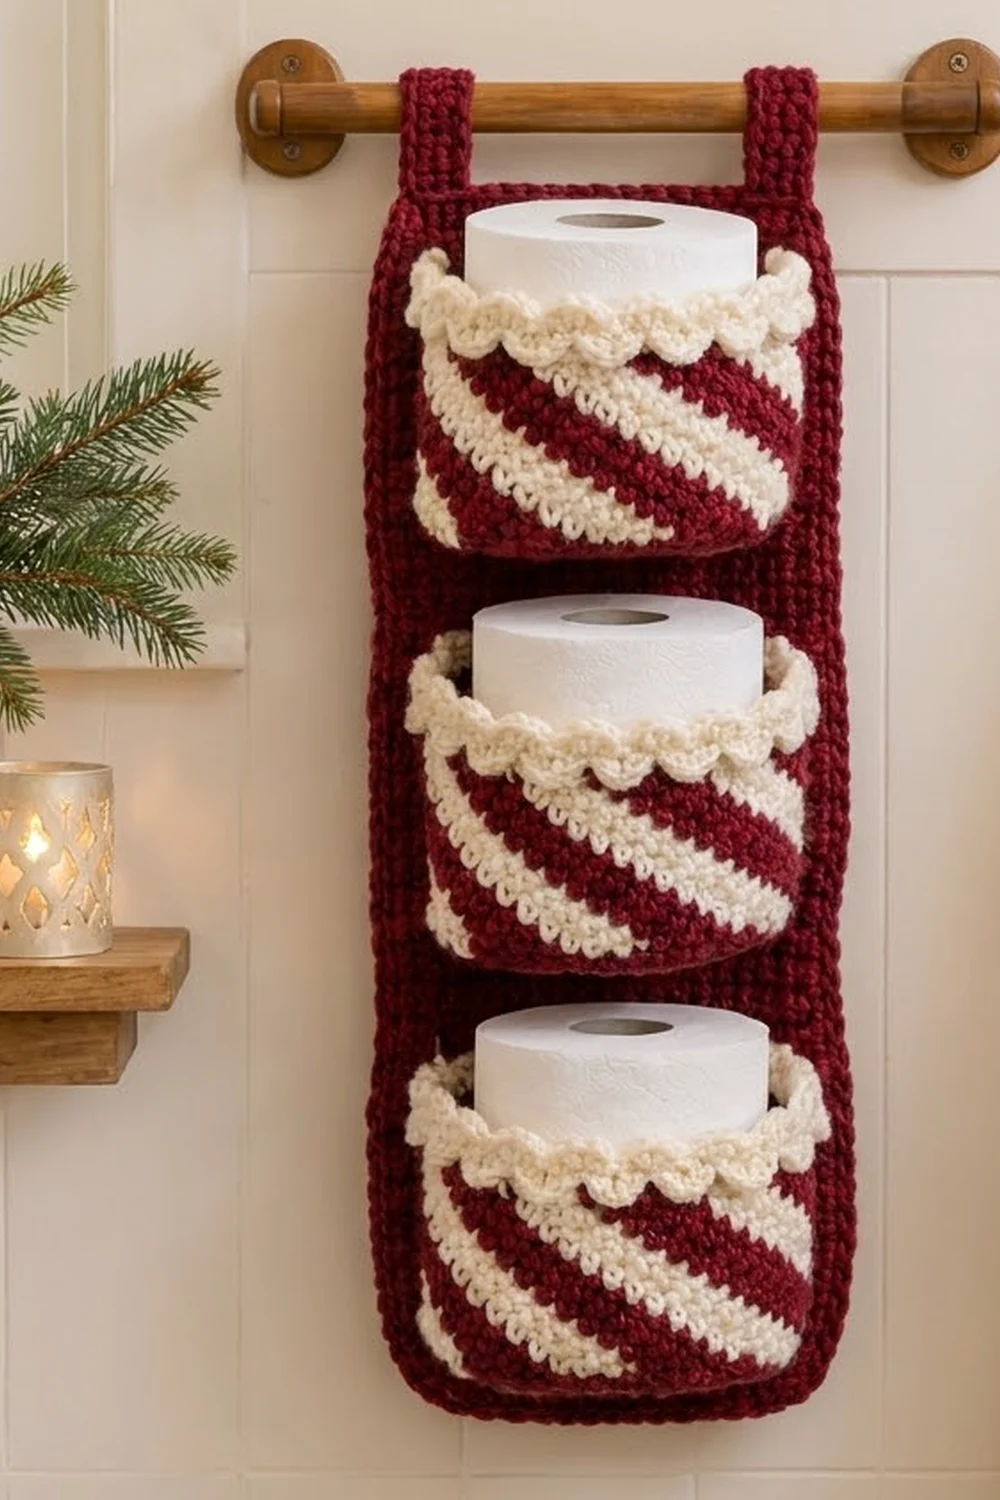
Final Notes
Everything in this pattern follows from one gauge: 14 sc and 16 rows to 4 in (10.2 cm).
- The panel is 21 sts × 56 rows, which makes 6 in × 14 in (15.2 cm × 35.6 cm).
- Each pocket uses 48 sts, which gives a 4.4 in (11.2 cm) base and a 3.75 in (9.5 cm) height.
- Three pockets take 45 of the panel’s 56 rows, leaving exact margins and gaps.
- The two-round border adds 0.5 in (1.3 cm) on every side, for a final 7 in × 15 in (17.8 cm × 38.1 cm).
If you check each measurement as you go, the pockets will line up straight and the holder will hang square.
Happy crocheting!
