
Each repeat uses two stitches of R1 and makes one point: 10 base stitches produce five points. The ch-2 picot sits at each tip; its sl st is made into the chain, while the final sl st of the repeat goes into the next R1 stitch. Fasten off and flatten gently. If the star cups, loosen the stitches rather than adding extra points.
Create the Sleepy Cat Face
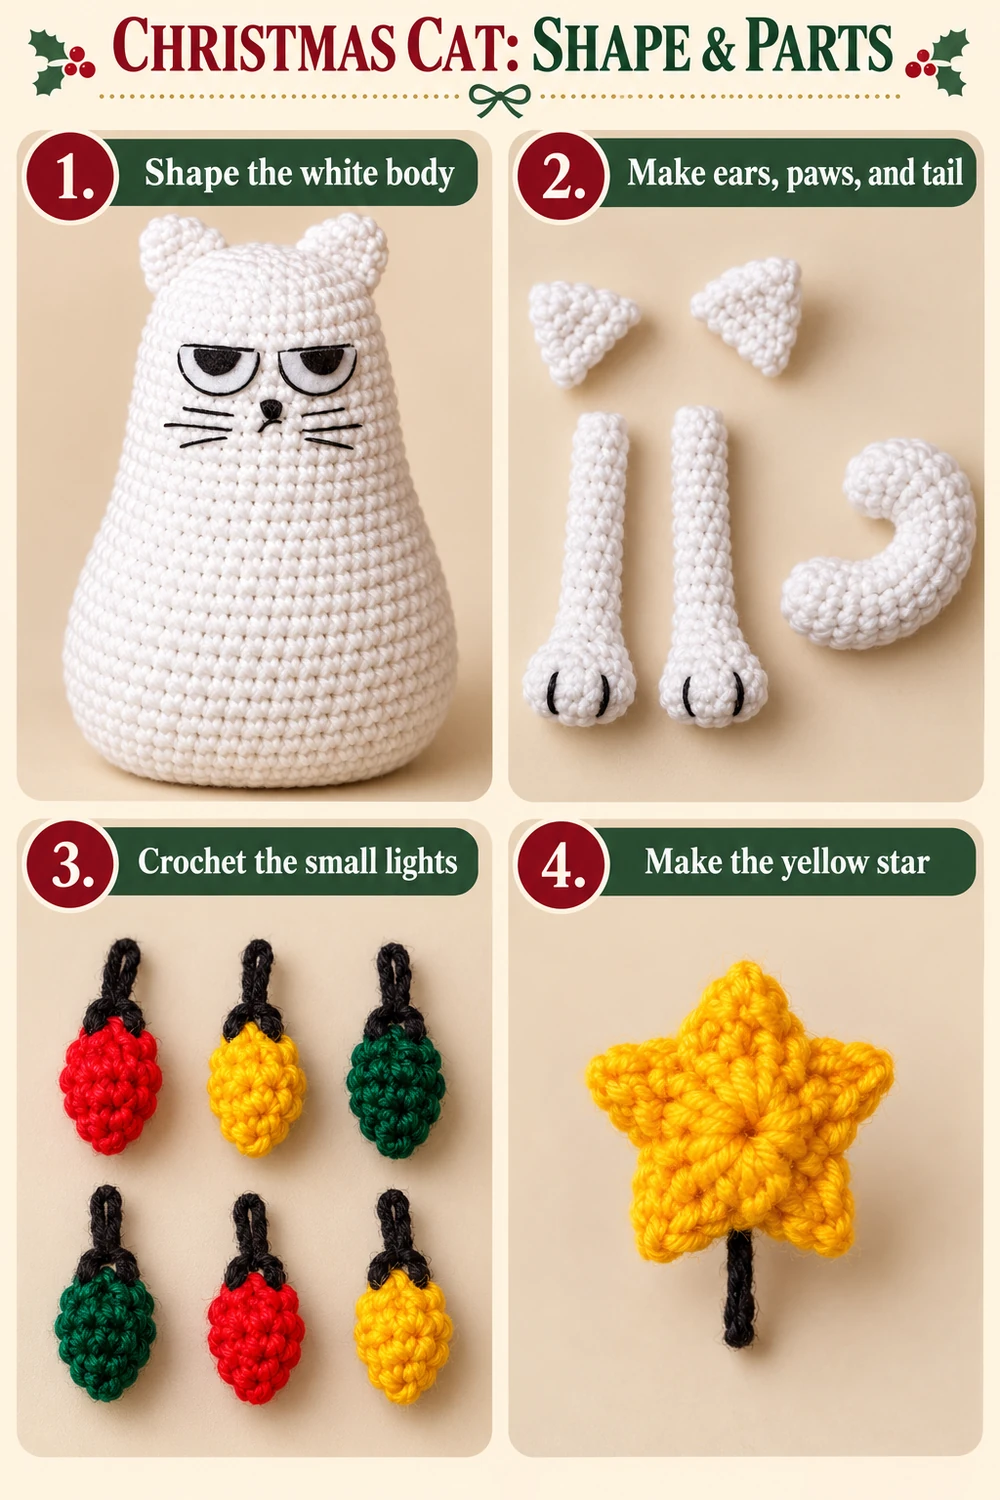
Cut two small white half-oval felt eye shapes, approximately 18–22 mm wide, with straight upper edges. Cut smaller black semicircle pupils and place them beneath the upper edges. Outline the white lower curves and straight upper eyelids with black sewing thread. Make the eye size proportional to your actual head.
Pin the eyes on the upper front around R24–27, leaving a small gap between them. Sew all edges securely. Embroider a small black triangular nose below the gap and a short split mouth. Add three short whisker lines on either side. Keep the eyelids nearly horizontal for the reference’s unimpressed expression.
Attach the Christmas Light Garland
With black yarn, crochet a chain long enough to wrap around your stuffed cat twice in a gentle downward spiral. Measure against the actual body rather than using a fixed chain count. Leave sewing tails at both ends.
Pin the first wrap below the face around R18–20 and the second around R8–11, connecting them along the back. Space the twelve bulbs along the cord, alternating green, yellow, and red. Sew each bulb socket to the cord, then tack the cord to the body at every bulb and between bulbs as needed. Secure both ends at the back. Do not leave long loose loops.
Attach the Star and Finish
Sew the bottom of the yellow star directly to the crown between the ears. A few short black yarn stitches may show as the connector, but the star must also be anchored firmly through head stitches. Use several passes and weave the ends deeply into the stuffing. Do not suspend the star on a long loose strand.
Check all seams, smooth the body, and position the paws and tail. A flat lower body helps the cat sit, although it may need a shelf or display support because the narrow paws extend below the base.
Tips and Troubleshooting
- Body looks lumpy: add stuffing in small tufts and massage it evenly before closing.
- Ears lean unevenly: pin both first, check from the front, then sew.
- Lights look oversized: use less stuffing or a finer yarn for the bulbs.
- Garland slips: add hidden tacking stitches at every bulb socket.
- Star curls: keep R2 loose and damp-shape the star flat before attachment.
Frequently Asked Questions
Can I make this without felt?
Yes. Embroider the white eye shapes and black half-closed pupils directly onto the head. Keep the long eyelids straight to preserve the expression.
Are the lights functional?
No. They are small crocheted decorations, with no electrical parts.
Can I use plush yarn?
Yes, but the cat will be much larger and the small details may lose definition. Use a matching smaller hook for dense stitches and adjust the felt eyes to fit.
More Free Christmas Crochet Patterns
- Mini Santa Hat Applique Crochet Pattern
- Christmas Star Keychain Crochet Pattern
- Christmas Wreath Ornament Crochet Pattern
Save This Pattern
Save this Christmas Cat with Lights Crochet Pattern for a playful handmade holiday decoration. Happy crocheting from Lovely Amigurumi!
Christmas Cat Tutorials, Star Chart, and Pinterest Gallery
The six images below include two photo tutorials, a finished-cat photo above the star chart, and three Pinterest images. The chart covers the yellow star only; the cat and light bulbs use the written rounds above.
More Free Crochet Patterns
Find your next handmade project with these lovely patterns.
Christmas Lace Star Crochet Pattern – Free Five-Point Ornament Guide
View Pattern →
Granny Stitch Gingerbread Crochet Pattern – Free Ornament Guide
View Pattern →
Blue Lace Snowflake Crochet Pattern – Free Ornament Guide
View Pattern →
CONTENT END 1
