
Ch 7, then sc in the second chain and across . Work two more rows of 6 sc, turning with ch 1. Wrap this short strip around the pinched bow center and sew the ends at the back. Sew a small cluster of ivory pearls over the front wrap, catching the dense wrap stitches with multiple thread passes.
7. Three Five-Point Ivory Stars
Use ivory and work joined rounds without turning.
- R1: 10 hdc in MR; close and join.
- R2: repeat five times: sl st in next stitch; in the next stitch work (hdc, dc, tr, ch 2, tr, dc, hdc). Join to the first worked valley sl st.
- R3: ch 1; sc into each of the 35 worked stitches of R2, including its five valley slip stitches. In each ch-2 tip space work (sc, ch 2, sc). Skip the extra round-joining slip stitch. Join and fasten off.
Weave in the ends and lightly block the five points. Make three stars. The stars are flat and do not need stuffing. The full base chart below belongs to the wreath ring; follow these separate star instructions for the pendants.
8. Hanging Cords and Assembly
Attach a strong green hanging loop directly around the covered support hoop at twelve o’clock. Sew it through several dense foundation stitches and use multiple passes. The loop must carry the hoop itself, not only a lace shell.
Suspend the two green bells from cream cords attached to the covered hoop under the bow position. Add an ivory pearl above each bell if desired. Set the two bell crowns at similar heights and angle their openings slightly outward. Secure the cords at their crowns and at the hoop. The large bow will hide the upper joins.
Sew the bow center firmly to the covered hoop at the top. Use at least three separated attachment points so it cannot rotate. Let its tails frame the bell cords without covering both bells.
Attach the three stars to the covered hoop near five, six, and seven o’clock. Use cream cords approximately 4–6 cm long for the two side stars and 8–10 cm for the center star, measured between wreath and star after attachment. Place one pearl on each side cord and two on the longer center cord. Anchor both ends through dense crochet and the support hoop area rather than the outer lace alone.
Lay the wreath flat and adjust the cord lengths before fastening permanently. The center star should hang below both side stars. Check every bead, clapper, and suspension join with a gentle tug over a soft surface. Conceal the remaining tails on the back.
Photo and Full Crochet Chart
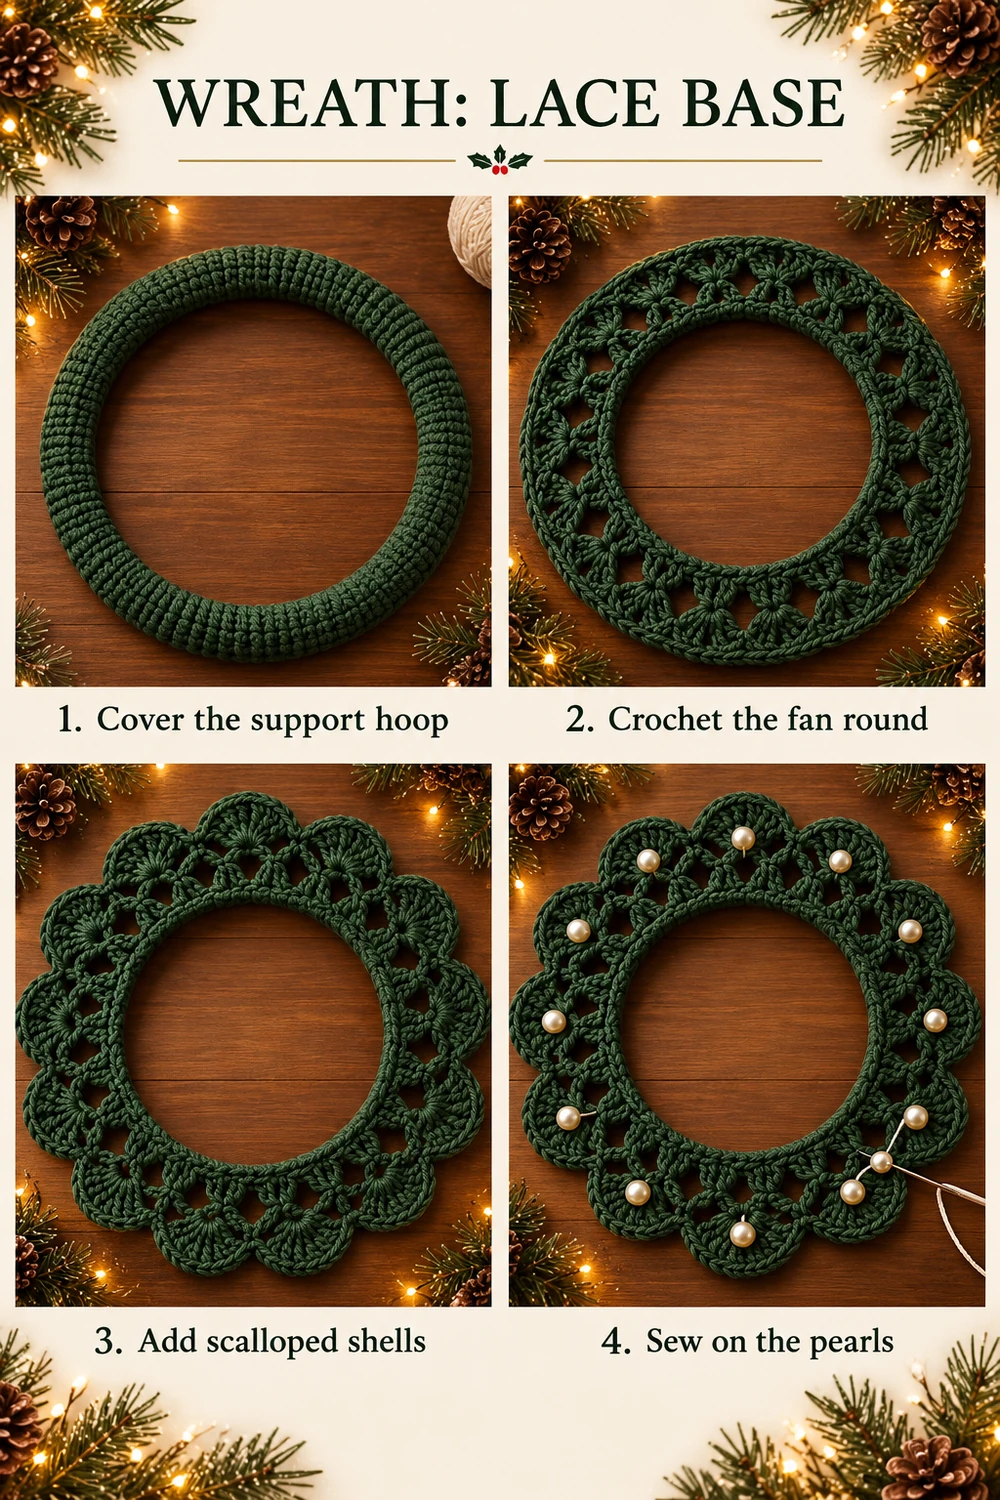
The third instructional image below places the finished wreath photograph above a complete connected chart of all three wreath rounds, with the full sixteen-repeat circle and an English legend. The foundation is worked around the support hoop, which is shown as an open ring. Bow, bells, and five-point stars follow their separate written directions above.
Finishing Tips
- Keep all sixteen shells evenly distributed before sewing beads.
- Use lightweight pearls so the lace retains its shape.
- Sew the loop and pendants to the covered support hoop, not a single chain arch.
- Do not stuff the hollow crochet bells.
- Keep the two side star cords equal in length.
- Spot-clean carefully and protect metal clappers and beads from prolonged soaking.
Frequently Asked Questions
Can I leave out the metal bells?
Yes. Use a small gold-colored yarn ball as the clapper or leave the hollow bells plain. The two green crochet bells remain the same.
Can I omit the pearls?
Yes. The crochet structure and hanging arrangement do not depend on them. Sew the bow center neatly and use plain cream cords for the pendants.
Can I make it without the support hoop?
This version is designed around a hoop. It supports the weight of the bow, beads, and pendants. Omitting it can distort the circular lace.
More Free Christmas Crochet Patterns
- Christmas Bell Ornament Crochet Pattern
- Embroidered Christmas Star Crochet Pattern
- Granny Reindeer Ornament Crochet Pattern
Save This Pattern
Save this Christmas Wreath with Bells and Stars Crochet Pattern for an elegant green-and-ivory holiday decoration. Happy crocheting from Lovely Amigurumi!
Photo Tutorials, Full Wreath Chart, and Pinterest Gallery
The two photo tutorials and finished-wreath photo with its complete base chart come first, followed by three Pinterest images. All six images are grouped here at the end.
More Free Crochet Patterns
Find your next handmade project with these lovely patterns.
Christmas Lace Star Crochet Pattern – Free Five-Point Ornament Guide
View Pattern →
Granny Stitch Gingerbread Crochet Pattern – Free Ornament Guide
View Pattern →
Blue Lace Snowflake Crochet Pattern – Free Ornament Guide
View Pattern →
CONTENT END 1
