
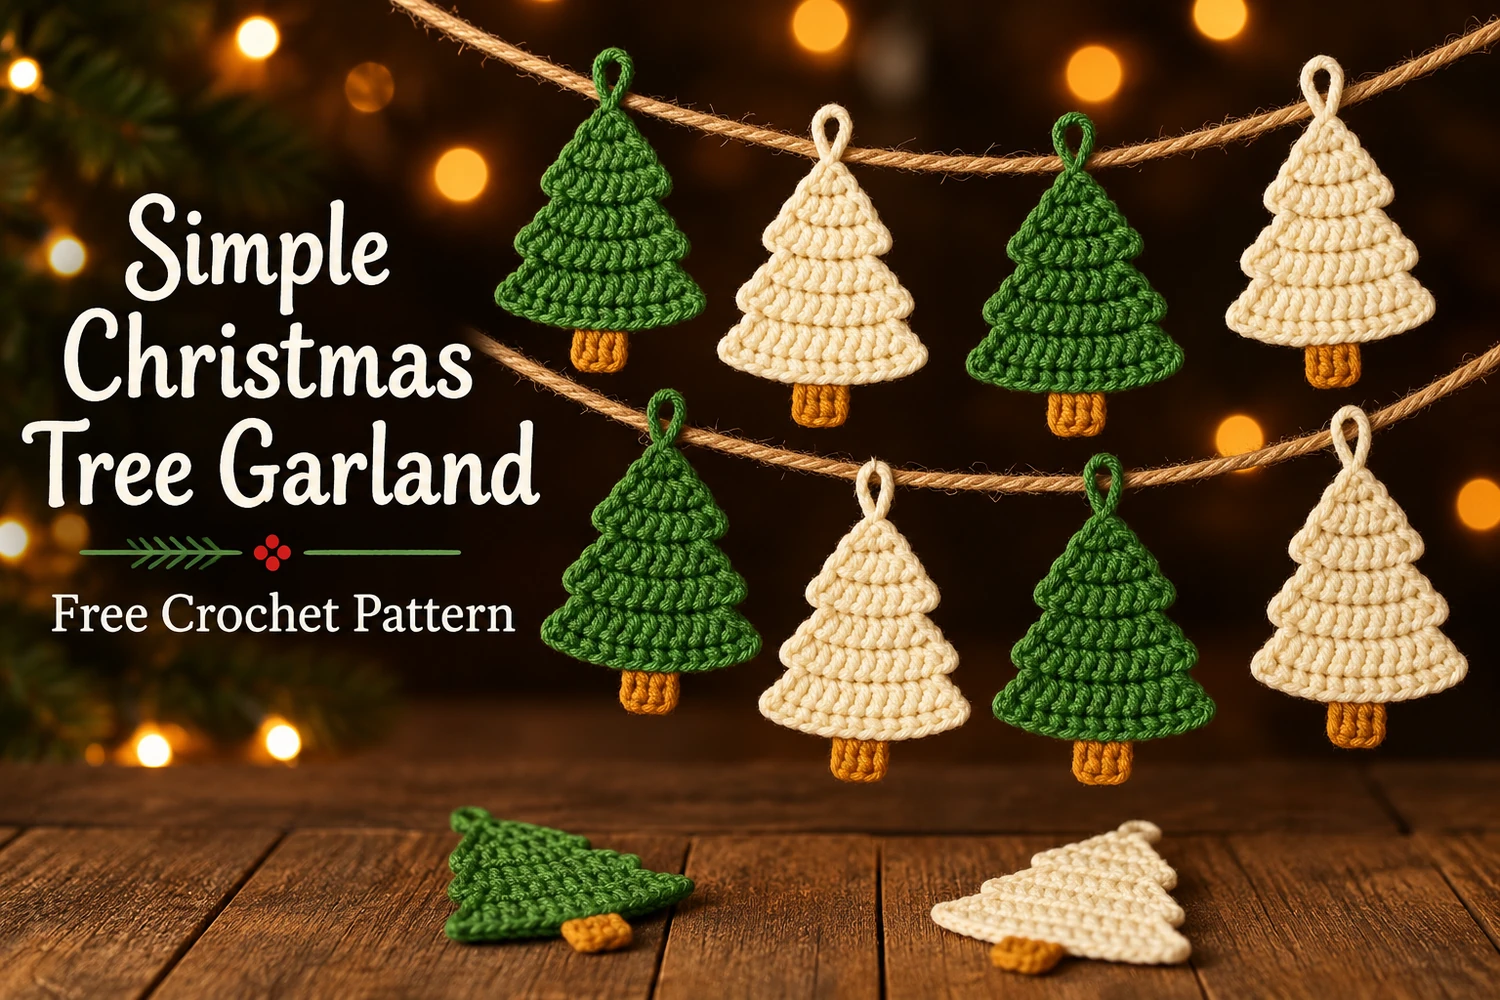
This Simple Christmas Tree Garland Crochet Pattern makes a rustic bunting of flat green and cream trees with golden-brown trunks. Each tree has three stepped branch tiers, a small matching hanging loop, and an undecorated finish that follows the reference.
Crochet each tree from the tip downward in one connected piece. Short slip-stitch steps move the next tier inward, then increases widen the branches again. Make four green and four cream trees and arrange them on two lengths of jute cord.
Pattern Information
- Skill level: confident beginner; double-crochet increases and simple row shaping.
- Terminology: US crochet terms.
- Construction: flat unstuffed tree with three connected tiers, a separately joined trunk, and a sewn loop.
- Estimated size: 9–12 cm tall including the trunk, depending on yarn and tension.
- Garland: eight trees, four green and four cream, on two strands of four.
This is an image-inspired adaptation. Stitch counts have been reviewed, but the pattern has not been physically crocheted or independently tested. Follow the written instructions for exact stitch placement; the photos illustrate the intended appearance.
Materials
- DK cotton yarn: approximately 35–45 g each of forest green and cream for eight trees.
- Approximately 10 g mustard or golden-brown cotton for the trunks.
- 3 mm crochet hook, or a size that makes a firm, flat fabric.
- Two lengths of jute cord, each approximately 100–120 cm, adjusted for your display.
- Tapestry needle, scissors, stitch markers, blocking mat, and rustproof pins.
No stuffing, wire, beads, stars, or embroidery are needed. Choose the same yarn weight for both tree colors and the trunks. The finished appearance should stay simple, with the rows and stepped silhouette as the main details.
Responsivo Post 01 – P1
Stitches and Abbreviations
- ch: chain.
- sl st: slip stitch.
- sc: single crochet.
- dc: double crochet.
- 2 dc in one stitch: a double-crochet increase.
- R: row. Counts in brackets are the counted stitches of that row.
Work in turned rows. The ch 2 used before a dc row does not count as a stitch. Work into the first actual dc unless the row specifically tells you to step inward. The shaping slip stitches in R4 and R7 do not count toward those rows, and you must not work into them on the following row.
Before starting each inward step, count the stitches from the edge where your hook currently sits after turning. A marker in the third stitch helps locate the new working edge. Leave the stated stitches at the opposite end unworked.
Simple Christmas Tree Garland Crochet Pattern
1. Top Branch Tier — Rows 1–3
- R1: ch 3; work 2 dc into the third chain from the hook. The other two chains provide height and do not count.
- R2: ch 2, turn; 2 dc in each of the two stitches.
- R3: ch 2, turn; 2 dc in the first stitch, 1 dc in each of the next 2 stitches, 2 dc in the last stitch.
The first three rows form the small top tier. Keep the tip narrow and do not add an extra dc into a turning chain. Before moving on, check that the six stitches of R3 are distinct and easy to count.
2. Middle Branch Tier — Rows 4–6
- R4: turn without making a chain. Sl st into the first two stitches of R3. Ch 2; work 2 dc into the third stitch and 2 dc into the fourth stitch. Leave the last two stitches unworked.
- R5: ch 2, turn; 2 dc in the first dc, 1 dc in each of the next 2 dc, 2 dc in the last dc.
- R6: ch 2, turn; 2 dc in the first dc, 1 dc in each of the next 4 dc, 2 dc in the last dc.
The two unused stitches at each side of R3 create the first pair of branch shelves. In R5, work only across the four dc of R4. Ignore both the slip stitches and the ch 2 that moved you to the narrower center.
3. Bottom Branch Tier — Rows 7–10
- R7: turn without making a chain. Sl st into the first two stitches of R6. Ch 2; work 2 dc into the third stitch, 1 dc into each of the fourth and fifth stitches, and 2 dc into the sixth stitch. Leave the final two stitches unworked.
- R8: ch 2, turn; 2 dc in first dc, 1 dc in each of the next 4 dc, 2 dc in last dc.
- R9: ch 2, turn; 2 dc in first dc, 1 dc in each of the next 6 dc, 2 dc in last dc.
- R10: ch 2, turn; 2 dc in first dc, 1 dc in each of the next 8 dc, 2 dc in last dc.
Fasten off and weave in the tree-color tails on the back. The completed row-count sequence is 2, 4, 6, 4, 6, 8, 6, 8, 10, 12 dc. There are three visibly stepped tiers, all joined as one piece. No additional border is needed.
4. Golden-Brown Trunk
Place the tree with the desired front facing you and its tip upward. Count the twelve stitches across the bottom edge from left to right. Join golden-brown yarn to the fifth stitch; the trunk will use the middle four stitches, numbers 5–8.
- Trunk R1: ch 1 (does not count), sc in the joined fifth stitch and in each of the next 3 stitches.
- Trunk R2: ch 1, turn; 4 sc.
- Trunk R3: ch 1, turn; 4 sc.
Fasten off. Weave the joining and finishing tails through the backs of the trunk stitches and nearby tree stitches, changing direction before trimming. Do not add stuffing or fold the trunk into a tube. It stays a small flat rectangle beneath the tree.
5. Matching Hanging Loop
With the same color as the tree, ch 12 and fasten off with long tails. Fold the chain into a small loop. Sew both ends to dense stitches near the apex, catching more than the single foundation chain. Use at least three passes in different directions, then weave in the tails on the back.
Responsivo Post 02 – P2
Keep the loop just large enough to fit over the jute cord. If your cord is especially thick, lengthen the chain by a few stitches. Check that every loop is the same size before fastening the ends, so the trees hang evenly.
6. Block the Trees Flat
Lightly dampen each tree, lay it flat, and smooth the three tiers with your fingers. Pin the outer corners of each branch shelf and the two lower corners without stretching them excessively. Straighten the trunk beneath the center and let the pieces dry fully.
Keep the tier notches open while shaping. If a tree twists, check that you worked only the counted dc after each inward step. An accidental dc into a slip stitch or turning chain can make one side wider. Follow the yarn label before using any heat or steam.
