
Repeat the complete pattern four times in forest green and four times in cream. Use golden-brown trunks for all eight. Work with the same hook and tension; a finished sample makes a useful guide for matching the loop size and branch width.
For the arrangement closest to the reference, put green, cream, green, cream on the upper strand. Put green, cream, cream, green on the lower strand. You can also alternate the colors on both strands if you prefer a regular repeat.
8. Assemble the Two Garland Strands
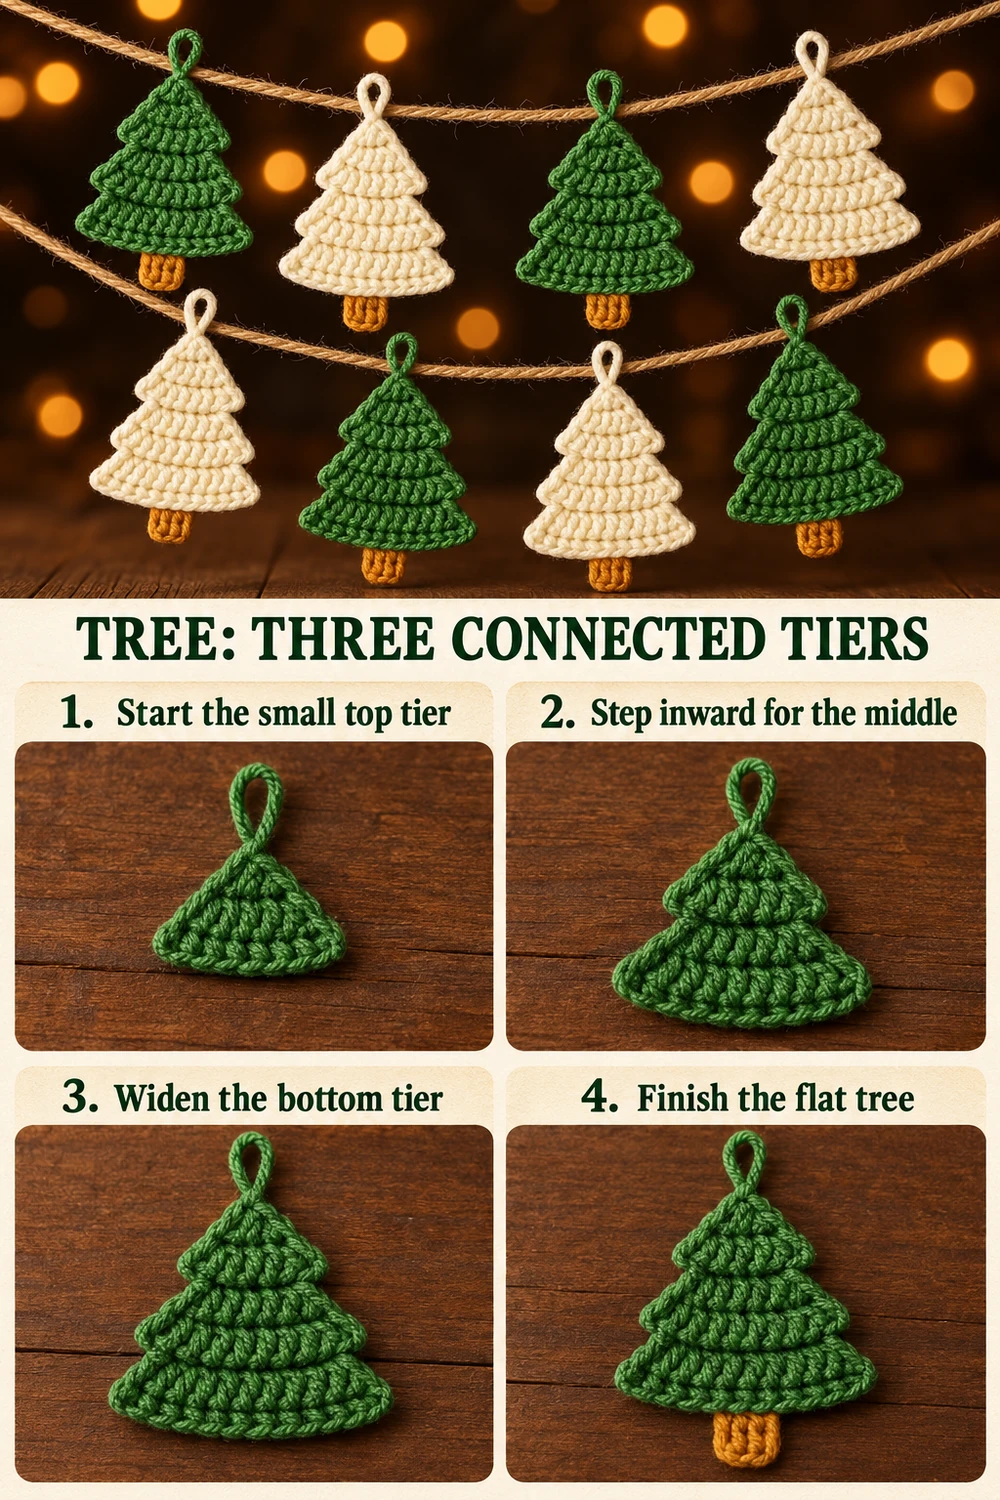
Cut two jute cords approximately 100–120 cm long. Before trimming, allow around 15 cm at each end for tying and adjust the length to your intended display. Thread four tree loops onto each cord, keeping the fronts facing the same direction.
Lay each strand flat and space the trees with approximately 4–6 cm between their widest branch edges. The exact spacing depends on the tree width. Keep enough cord at both ends to tie the garland securely. A shallow curve in the cord recreates the hanging arrangement in the reference.
To prevent the trees from sliding, make small stopper knots in the jute on either side of each loop, or tack the back of the loop to the cord with matching sewing thread. Keep those stitches discreet and avoid pulling the loops tight enough to tilt the trees.
Hang the two strands from suitable supports and check that the trunks point down and the loops carry the weight evenly. Use this as a decorative garland, away from flames, hot surfaces, and the reach of young children or pets.
Photo and Complete Crochet Symbol Chart
The third instructional image at the end places a finished green-and-cream tree photograph above a full connected chart of all ten tree rows and the three trunk rows. It includes the inward slip-stitch steps and an English stitch-symbol legend. Read the numbered tree rows from the tip downward; the chart symbols rotate with that working direction. Arrows alternate across the turned rows. The hanging loop is made separately as written.
Troubleshooting
- The top has a hole: keep the first two dc close together and weave the starting tail neatly through the back of the tip.
- The tiers look like one plain triangle: make the two-stitch inward step at the start of R4 and R7 and leave two stitches unworked at the other end.
- One side becomes wider: do not count the turning ch 2 or the shaping slip stitches as dc.
- The trunk sits off-center: use only bottom stitches 5–8.
- The trees curl: check the row counts and block gently, without stretching the loops.
- The garland sags too far: shorten the display span or add a suitable central support.
Frequently Asked Questions
Are the three tiers separate triangles?
No. Each tree is one connected piece worked from the tip down. The slip-stitch steps create the branch shelves without sewing separate triangles together.
Can I use the trees as individual ornaments?
Yes. Keep the matching loop and hang each tree separately. The crochet instructions remain the same.
Can I make one long strand?
Yes. Measure the combined width of all eight trees, add your preferred gaps, and allow extra cord for tying. Choose the final length after making a sample tree.
Can I make smaller trees?
Use finer cotton and a smaller hook to scale the whole tree while preserving the row counts. Adjust the loop length to the cord you will use.
More Free Christmas Crochet Patterns
- Beaded Christmas Tree Ornament Crochet Pattern
- Embroidered Christmas Star Crochet Pattern
- Granny Reindeer Ornament Crochet Pattern
Save This Pattern
Save this Simple Christmas Tree Garland Crochet Pattern for a cozy green-and-cream holiday display. Happy crocheting from Lovely Amigurumi!
Photo Tutorials, Complete Tree Chart, and Pinterest Gallery
The two photo tutorials and finished-tree photo with its complete crochet chart come first, followed by three Pinterest images. All six images are grouped here at the end.
More Free Crochet Patterns
Find your next handmade project with these lovely patterns.
Christmas Lace Star Crochet Pattern – Free Five-Point Ornament Guide
View Pattern →
Granny Stitch Gingerbread Crochet Pattern – Free Ornament Guide
View Pattern →
Blue Lace Snowflake Crochet Pattern – Free Ornament Guide
View Pattern →
CONTENT END 1
