
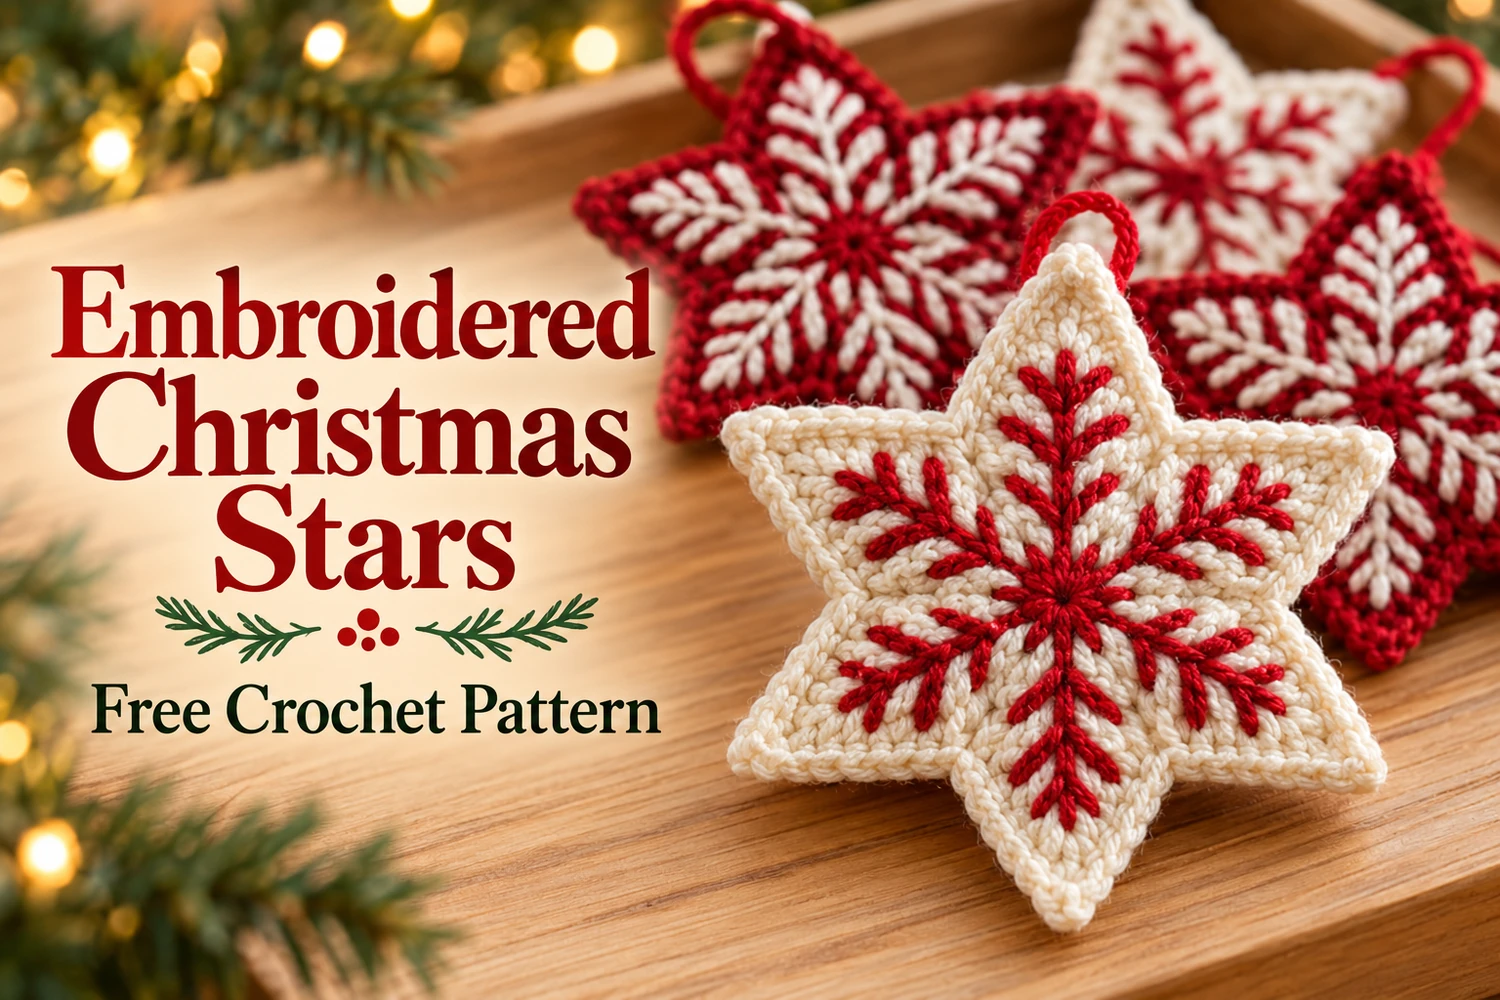
This Embroidered Christmas Star Crochet Pattern creates flat six-point ornaments with a contrasting branched snowflake stitched across the front. Make a cream star with red embroidery or reverse the colors for the deep red stars with cream details shown in the reference.
Crochet the solid center and six pointed fans first, add a matching single-crochet border, then embroider six radial stems and their paired branches. A simple red hanging loop finishes each ornament.
Pattern Information
- Skill level: confident beginner to intermediate; crochet plus simple surface embroidery.
- Terminology: US crochet terms.
- Shape: exactly six points; flat and unstuffed.
- Estimated width: 10–13 cm with DK cotton and a 2.5–3 mm hook. Actual size depends on tension.
- Colorway A: cream base and border, red embroidery and loop.
- Colorway B: red base and border, cream embroidery and red loop.
This is an image-inspired adaptation. The stitch counts have been reviewed, but the pattern has not been physically crocheted or independently tested. Follow the written instructions for exact construction; the photographs illustrate the intended finish.
Materials
- DK cotton yarn: approximately 10–15 g in the base color per star.
- A few meters of contrasting yarn for the snowflake embroidery.
- 2.5–3 mm crochet hook.
- Tapestry needle with an eye large enough for the contrast yarn.
- Scissors, stitch marker, six removable markers or pins, and a blocking mat.
- Optional textile stiffener, suitable for your yarn, if a firmer ornament is desired.
Choose yarns of similar thickness for the red and cream versions. If the embroidery looks bulky, separate a thinner strand or use a slightly finer matching yarn. No stuffing, wire, beads, or felt backing is needed for the basic ornament.
Responsivo Post 01 – P1
Stitches and Abbreviations
- MR: magic ring.
- ch: chain; sl st: slip stitch.
- sc: single crochet; hdc: half double crochet.
- dc: double crochet; tr: treble crochet.
- inc: 2 sc in the same stitch.
- R: round; st(s): stitch(es).
- Instructions in parentheses go into the same stitch when stated. Repeat × 6 means repeat the entire sequence six times.
Use joined rounds without turning. For R1–4, ch 1 before the round; it does not count. Join with a slip stitch into the first sc. These joining stitches do not count. Work the first sc of the next round into the same first stitch. The actual slip stitches within the R5 shaping repeat do count as worked stitches and form the valleys.
For a treble crochet, yarn over twice, insert the hook and pull up a loop, then yarn over and pull through two loops three times. Keep the tall stitches relaxed enough to fan outward while maintaining a firm fabric.
Embroidered Christmas Star Crochet Pattern
1. Solid Center — Rounds 1–4
- R1: 6 sc in MR; close the ring and join.
- R2: ch 1, inc × 6; join.
- R3: ch 1, (sc, inc) × 6; join.
- R4: ch 1, (2 sc, inc) × 6; join.
Lay the circle flat before proceeding. It contains twenty-four stitches, which divide into six groups of four. Each group will produce one complete star point. Mark every fourth stitch if it helps keep the repeats even.
2. Six Pointed Fans — Round 5
Do not make a turning chain. Starting in the first stitch of R4, work this four-stitch repeat six times:
- Sl st into the next stitch — the valley.
- Into the next stitch work (sc, hdc).
- Into the next stitch work (dc, tr, ch 2, tr, dc) — the point.
- Into the next stitch work (hdc, sc).
After the sixth repeat, join with a slip stitch into the first valley slip stitch. Do not count this extra joining stitch as another valley. R5 has 6 worked valley slip stitches, 12 sc, 12 hdc, 12 dc, 12 tr, and six ch-2 tip spaces: 54 worked stitches plus the tip chains. Each repeat consumes exactly four stitches of R4, so all twenty-four are used.
3. Matching Border — Round 6
Ch 1 (does not count). Work 1 sc into every worked stitch of R5, including each of the six valley slip stitches. At every ch-2 tip space, work (sc, ch 2, sc). Do not work into the extra R5 joining slip stitch. Join into the first sc of the border and fasten off.
Border total: 54 sc over the worked R5 stitches, plus 12 sc at the six tips, giving 66 sc and six ch-2 tip spaces. The border stays in the same color as the star. Weave in the base-color ends through the backs of several dense stitches.
4. Block the Six-Point Star
Lightly dampen the star and lay it on a blocking mat. Pin the six tips at evenly spaced positions around the center, stretching only enough to define their shape. Smooth the valleys and center with your fingers. Let the star dry fully before adding embroidery, so the contrast stitches are sized to the finished base.
Responsivo Post 02 – P2
Keep the outline six-pointed. The little ch-2 openings are only the tips; do not pull them into large loops. If the center cups or the edge waves, recount the increases and four-stitch repeats before trying to correct the shape with blocking.
5. Mark the Snowflake Stems
Place one marker along the center line of each point, approximately two border stitches back from the tip. These six marks define the stem ends. Mark the central MR as the shared starting area. The embroidery should stay inside the matching border, leaving the six cream or red tips clearly outlined.
Use three short pairs of branch marks along each radial stem: one near its inner third, one near the middle, and one toward the outer third. The branches angle outward and toward the tip, resembling the small fronds in the reference. Keep the same spacing on all six arms.
6. Embroider the Six Radial Stems
Thread a manageable length of contrasting yarn, approximately 50–60 cm. Secure the tail on the back beneath several stitches without a bulky knot. Bring the needle up near the center and work toward the marked end of the first point with small backstitches. Follow a straight radial line across the base fabric.
Use several stitches rather than one long loose strand. Return the thread to the back through the crochet close to the completed stem, then move to the next arm by weaving through the dense backing stitches. Avoid carrying a long exposed float across the back. Repeat until there are six equally spaced stems.
At the center, let the six lines meet neatly around the closed MR instead of forcing every strand through exactly the same hole. A small overlap at the middle creates the red or cream snowflake hub without building a large raised knot.
