
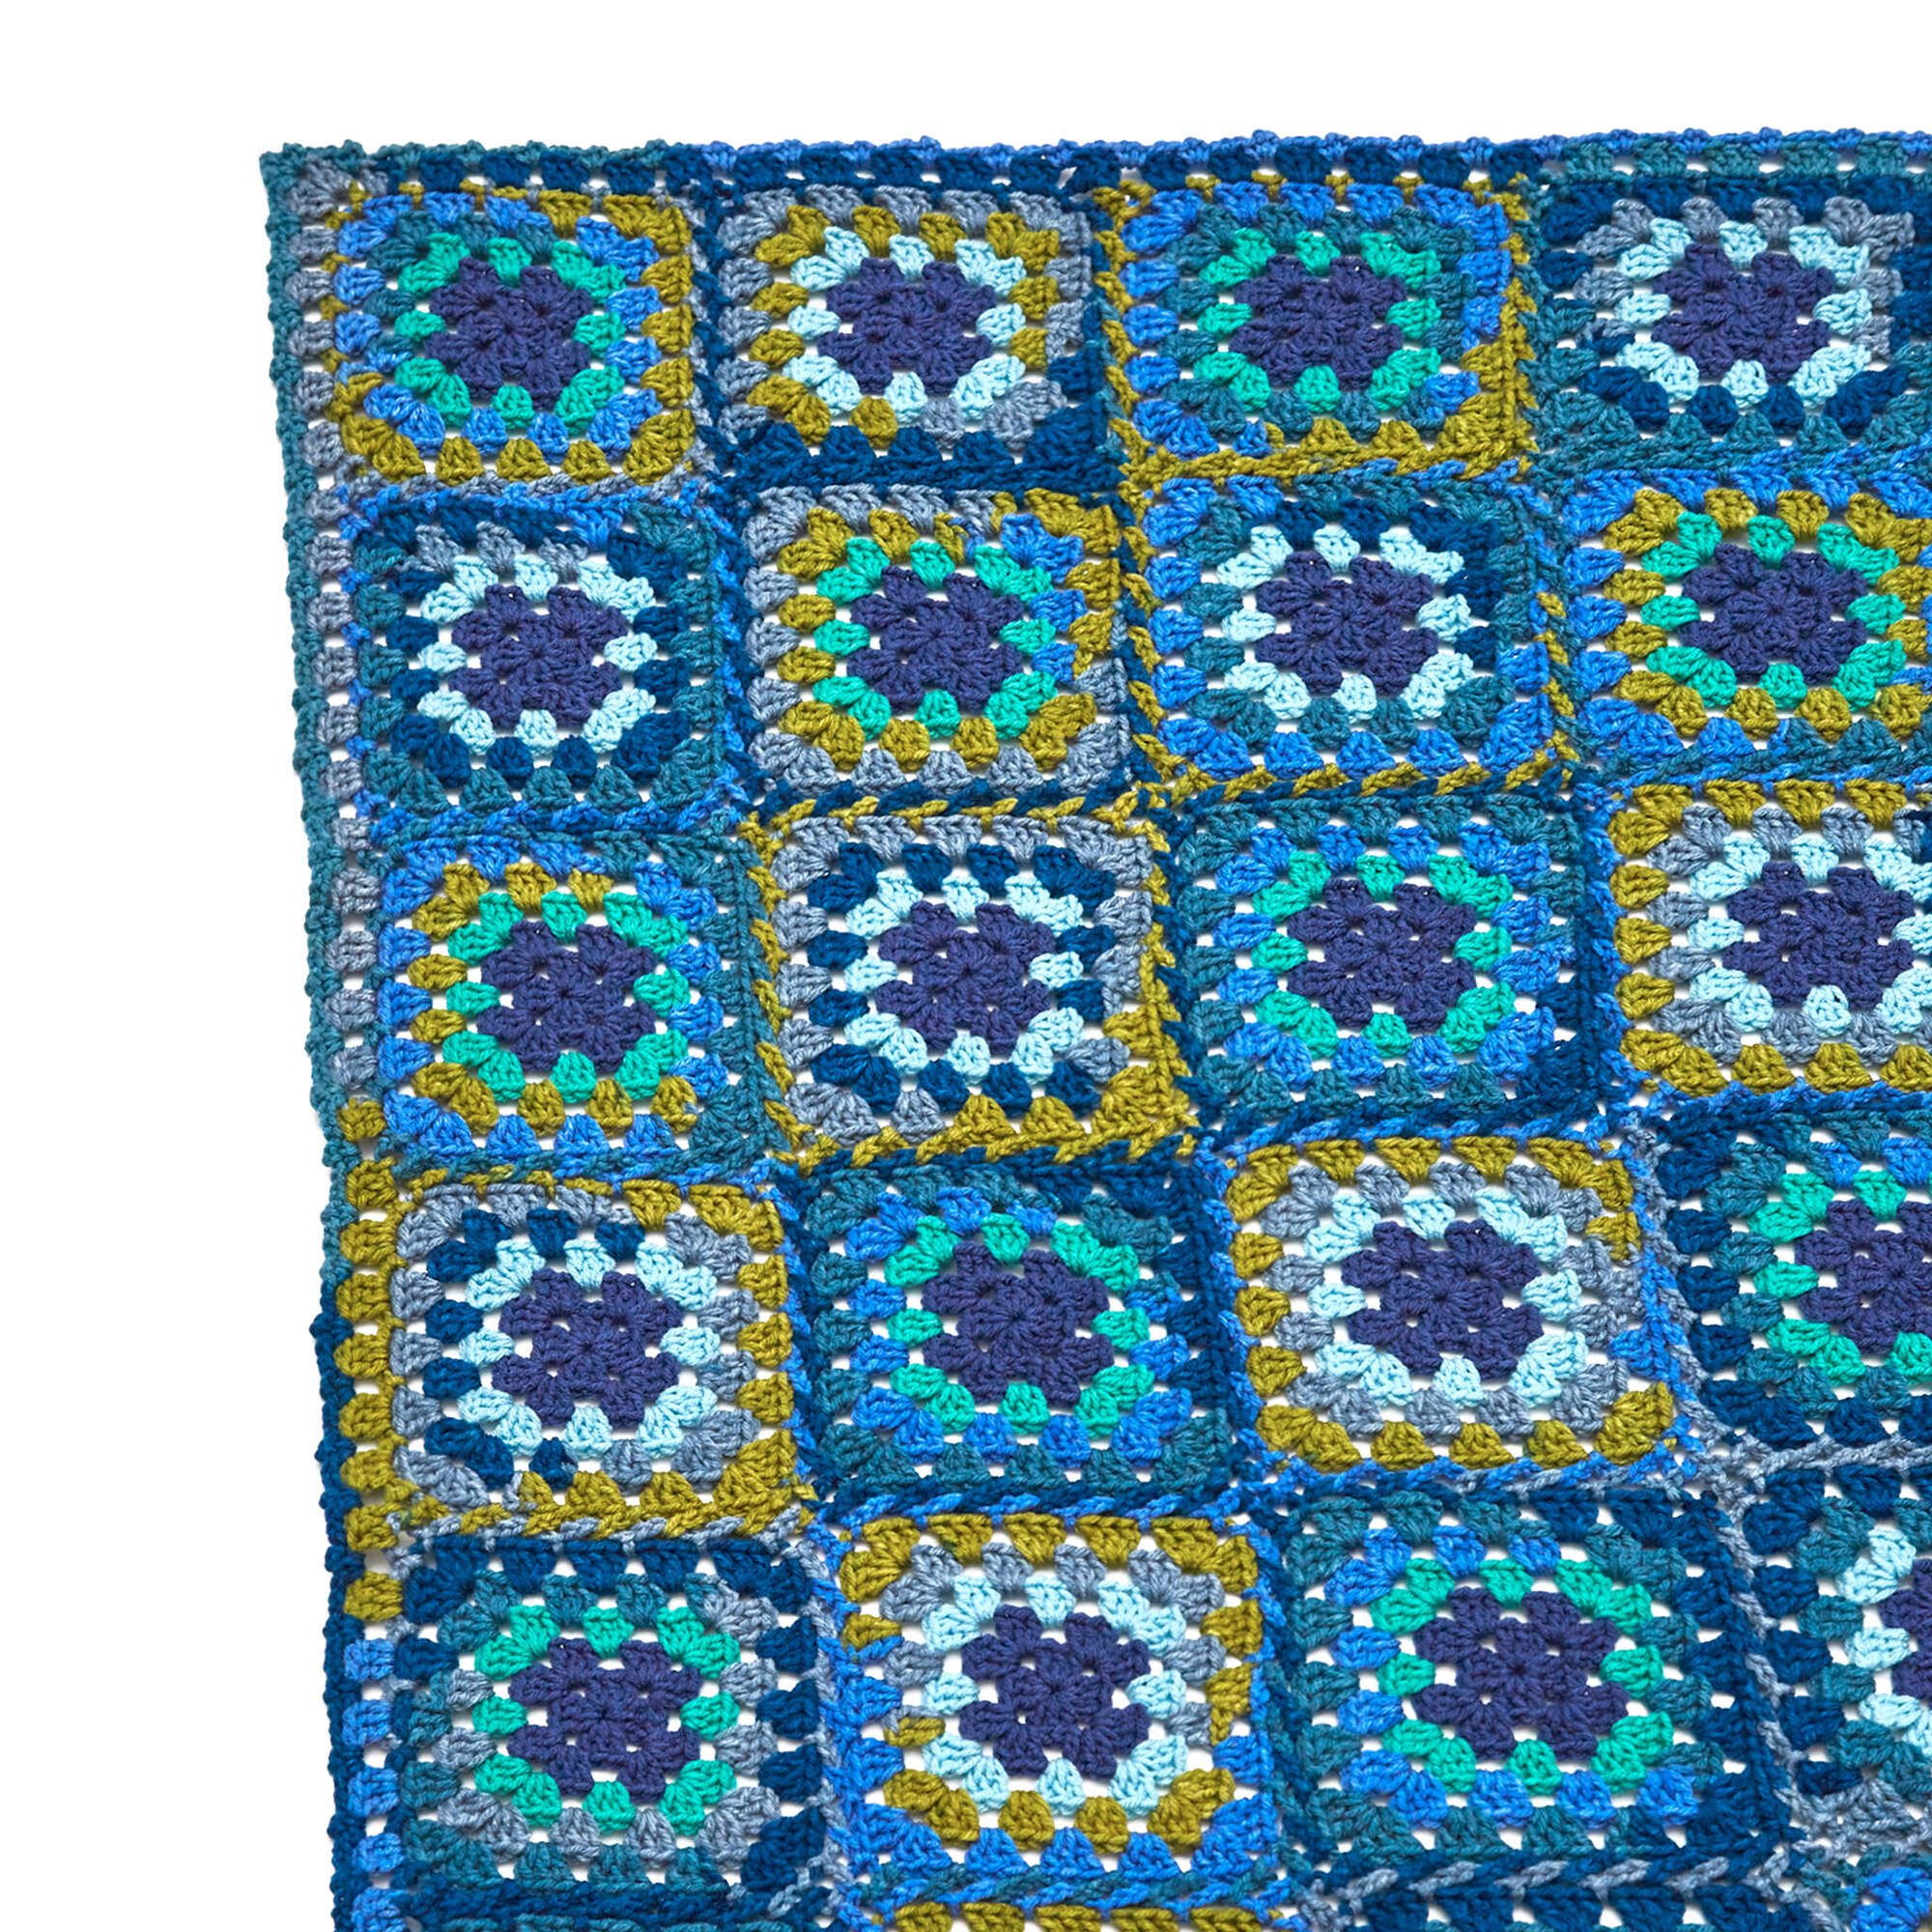
The Crochet Gotta Love Granny Throw Pattern is a beautiful and vibrant throw made from 42 Granny Squares, showcasing an array of colors that create a visually stunning blanket perfect for any home. The unique join-as-you-go technique allows you to assemble the squares as you crochet, minimizing the number of ends to weave in during finishing. With its cozy design, this throw is suitable for advanced beginners and intermediate crocheters looking to enhance their skills while creating a functional piece of art. Follow along with the written directions for a seamless crafting experience.
Project Details
- Crochet terminology: US
- Skill level: Advanced beginner to intermediate
- Finished size: Approximately 56″ x 70″
- Construction method: Join-as-you-go Granny Squares
Materials and Tools
| Yarn option | Yarn and specifications | Amount |
|---|---|---|
| A | RED HEART® With Love® yarn, 1974 Rainforest Stripe | 6 skeins |
| B | RED HEART® With Love® yarn, 1814 True Blue | 1 skein |
| C | RED HEART® With Love® yarn, 1562 Jadeite | 1 skein |
| D | RED HEART® With Love® yarn, 1502 Iced Aqua | 1 skein |
- Susan Bates® Crochet Hook: 6mm
- Yarn needle
Note: To substitute yarn, ensure to match the weight and fiber content for the best results. This may affect the dimensions and drape of the completed throw.
Crochet Patterns — No Ads. No Clutter.
Browse the Crochet Library →
Abbreviations
| Abbreviation | Meaning |
|---|---|
| ch | Chain |
| dc | Double crochet |
| sl st | Slip stitch |
| space | Chain or stitch space |
Preparation and Techniques
Working in Joined Rounds
The Granny Squares are worked in joined rounds, ensuring the right side is always facing. This technique allows for an easier visual and physical transition between rounds while maintaining a clean appearance.
Changing Yarn Colors
To change yarn colors, fasten off the old color when a round indicates to do so, and join the new color directly without cutting the working yarn unless specified.
Complete Pattern Instructions
Granny Squares Assembly
The throw consists of 42 Granny Squares arranged in 6 rows of 7 squares each. Below are the instructions for Granny Square I, followed by the joining methods for the remaining squares.
Granny Square I
| Round | Instructions | Stitches |
|---|---|---|
| 1 | With B, ch 4; join with sl st in first ch to form a ring. Ch 3 (counts as dc here), 2 dc in ring, 3 times, ch 2; join with sl st in top of beginning ch-3. | 12 dc, 4 ch-2 spaces |
| 2 | Ch 3, (2 dc, ch 3, 3 dc) in last ch-2 space (first corner made), 3 times, ch 1; join with sl st in top of beginning ch-3. | 24 dc, 4 ch-1 spaces, 4 corner ch-2 spaces |
| 3 | With right side facing, draw up a loop of C in any ch-1 space, ch 3, 2 dc in same ch-1 space, ch 1, (3 dc, ch 2, 3 dc) in next corner ch-2 space, * ch 1, 3 dc in next ch-1 space, ch 1, (3 dc, ch 2, 3 dc) in next corner ch-2 space; repeat from * around; join with sl st in top of beginning ch-3. | 36 dc, 8 ch-1 spaces, 4 corner ch-2 spaces |
| 4 | With right side facing, draw up a loop of A in ch-1 space immediately following any corner ch-2 space, ch 3, 2 dc in same space, ch 1, 3 dc in next ch-1 space, ch 1, (3 dc, ch 2, 3 dc) in next corner ch-2 space, * twice, ch 1, (3 dc, ch 2, 3 dc). | 48 dc, 12 ch-1 spaces, 4 corner ch-2 spaces |
| 5 | Ch 3, 2 dc in last ch-1 space made, twice, ch 1, (3 dc, ch 2, 3 dc) in next corner ch-2 space, * 3 times, ch 1, (3 dc, ch 2, 3 dc); repeat from * around; join with sl st in top of beginning ch-3. | 60 dc, 16 ch-1 spaces, 4 corner ch-2 spaces |
| 6 | Ch 4, sl st in next ch-1 space; repeat from * until next corner ch-2 space, ch 4, (sl st, ch 6, sl st) in corner ch-2 space. Repeat all around. | 20 ch-4 spaces, 4 corner ch-6 spaces |
Fasten off after completing Round 6.
General Granny Square Join Instructions
All following Granny Squares are worked the same as Granny Square I. Follow the specific instructions for each square, ensuring you are using C for Round 3 in every other square and D for the alternate squares. Join the edges of each square as you work Round 6.
Granny Square II
| Round | Instructions | Stitches |
|---|---|---|
| 1-5 | Work same as Rounds 1–5 of Granny Square I using B for Rounds 1 and 2, D for Round 3, and A for Rounds 4 and 5. Do not fasten off. | — |
| 6 (Joining Round) | Continuing with A, ch 4, slip st in next ch-1 space, repeat, then join to side of Granny Square I. Complete Round as instructed around the square. | — |
Granny Square III
This square is worked similar to Square II. Use C for Round 3, and join to the edge of Square II opposite from the edge attached to Square I.
