
For a more defined outline, add a loose surface slip-stitch line along the two roof slopes and outer frame edges. Use about one attachment per stitch or row end, adjusting gently at corners so the outline stays flat. This optional finishing line is not a new structural row.
7. Four-Pane Window Cross
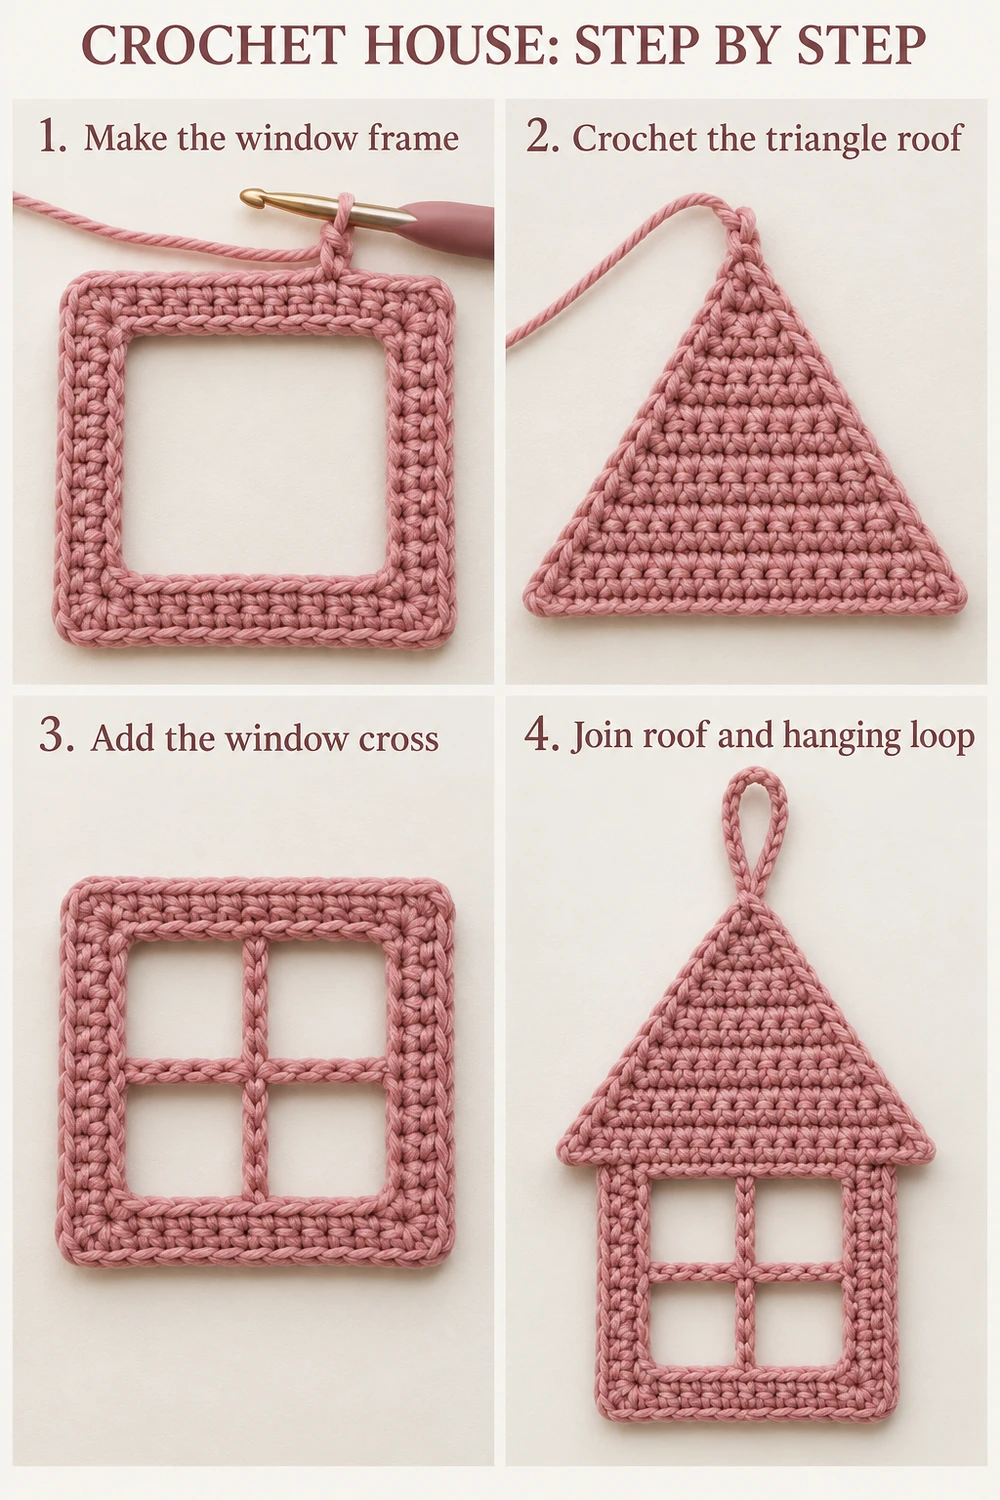
Vertical bar: ch 16 with pink and fasten off with long tails. Lay the chain along the vertical center of the window. Sew its lower end to the midpoint of the inner bottom band and its upper end to the midpoint of the inner top band, catching several dense loops at each end.
Horizontal bar: ch 10 with pink and fasten off with long tails. Sew its ends to the inner pillar edges at the midpoint of the window height. Keep both attachments at the same level.
Check the chains against your blocked opening before securing them. Add or remove a chain if needed for your actual tension; the bars should span the opening without pulling the frame inward. Sew the two chains together at their crossing with two tiny pink stitches.
The cross creates exactly four empty panes. Keep the background visible through them. Weave in all four bar tails along the backs of the frame bands and pillars, leaving the thin chains exposed in the opening.
8. Matching Hanging Loop
Ch 25 with pink and fasten off with long tails. Fold into a loop and sew both ends to the back of the roof apex, spreading the attachment across the last few dense roof rows rather than one loose loop.
Make several small sewing passes and weave the tails down the back of the triangle. Lift the ornament gently by the loop. Check that the roof stays centered and the frame hangs squarely.
Reading the Two Complete Charts
Both charts show one complete house silhouette: all nineteen frame levels, the open center, the two chain bars, the full thirteen-row roof, and the separate hanging chain. The roof and frame are crocheted separately and sewn together. Dashed marks show the joins and chain-bar attachments.
The chain counts for the two window bars are starting lengths that can be fitted to the actual blocked opening. The optional surface outline is a finishing guide, not an extra body row. A finished pink house photograph appears below each whole-house chart in two different settings.
Finishing and Care
Give the assembled house a final gentle blocking. Keep the roof point centered above the vertical window bar, the pillars straight, and the horizontal bar level. Let everything dry fully before hanging.
For a firmer ornament, test a suitable stiffener on a cotton sample and follow its label. Keep the four panes open and the crossbar chains separate. Spot-clean, reshape while damp, and dry flat. Store between tissue to protect the roof point and chain bars. This hanging decoration has a long loop; keep it away from young children and pets.
Questions and Tips
Why is the window leaning? Compare both pillar row counts and check that each has four stitches. Pin the rectangle square before fitting the crossbars.
Why is the roof too wide? The 24-stitch base is intentionally wider than the 18-stitch frame. Center the middle eighteen positions and leave three free at each side.
Can I use another color? Yes. Dusty rose throughout matches this reference. Use the same yarn weight for the roof, frame, crossbars, and loop.
Can I add a backing? Leave the window unbacked for the reference’s open appearance. Adding fabric would change the four empty panes into a different design.
More Free Christmas Crochet Patterns
- Cute Golden Christmas Bell
- Dusty Rose Poinsettia
- Red and White Snowflake
Save This Pattern
Save this little pink house for your handmade Christmas decorations. Happy crocheting from Lovely Amigurumi!
Tutorial, Two Complete Charts, and Pinterest Gallery
All six 1000 × 1500 images are grouped here at the end: one visual tutorial, two whole-house chart-above-photo guides, and three Pinterest images.
More Free Crochet Patterns
Find your next handmade project with these lovely patterns.
Christmas Lace Star Crochet Pattern – Free Five-Point Ornament Guide
View Pattern →
Granny Stitch Gingerbread Crochet Pattern – Free Ornament Guide
View Pattern →
Blue Lace Snowflake Crochet Pattern – Free Ornament Guide
View Pattern →
CONTENT END 1
