
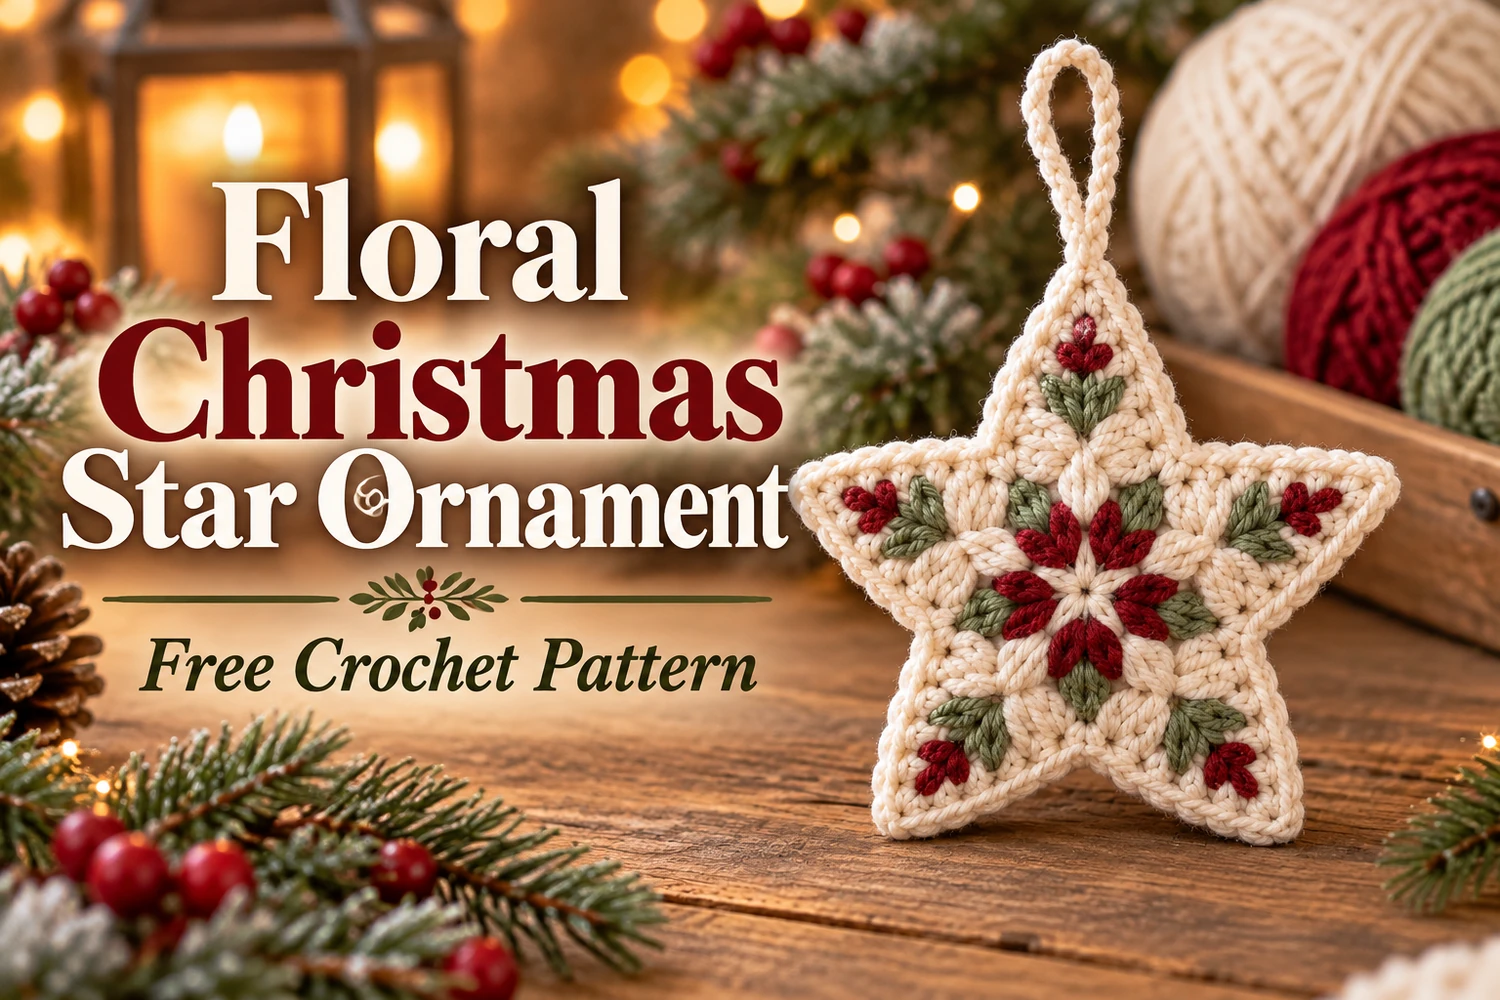
This Floral Christmas Star Ornament Crochet Pattern makes a cream five-point star decorated with burgundy petals, sage-green leaves, and tiny red buds. Raised cream stitches and a matching hanging loop complete the soft botanical look of the reference.
Make the plain cream star first, block it flat, and add the yarn embroidery afterward. The written pattern separates the crochet base from the surface details so you can position each flower and leaf on your finished star.
Pattern Information
- Skill level: intermediate beginner, with basic decreases and yarn embroidery.
- Terms: US crochet terminology.
- Construction: one flat cream center, five points worked directly onto it, a cream border, and surface embroidery.
- Estimated size: 10–12 cm across with DK cotton and a 3 mm hook. Actual size depends on yarn and tension.
- Palette: warm cream, burgundy red, and muted sage green.
This is an image-inspired adaptation, using crochet and surface embroidery to recreate the visible design. Stitch counts have been reviewed, but the pattern has not been physically crocheted or independently tested. Follow the written instructions for exact construction; the tutorial images illustrate the appearance.
Materials
- DK cotton yarn: about 12–18 g cream and small amounts of burgundy red and sage green.
- 3 mm crochet hook, or a size that makes a firm flat fabric.
- Tapestry needle with an eye large enough for the yarn, scissors, and five stitch markers.
- Blocking mat and rust-resistant pins.
- Optional removable fabric marker for positioning embroidery.
Use the same yarn weight for the base and embroidery, or a slightly finer yarn for the colored details. A blunt tapestry needle helps you pass between the crochet stitches. The star stays flat and does not need stuffing.
Responsivo Post 01 – P1
Stitches and Abbreviations
- MR: magic ring.
- ch: chain; sl st: slip stitch.
- sc: single crochet; hdc: half double crochet.
- inc: 2 sc in one stitch.
- dec: sc2tog, a single crochet decrease over 2 stitches.
- st(s): stitch(es); R: round.
- Numbers in brackets are finished stitch counts.
For a decrease, insert the hook in the next stitch and pull up a loop, insert it in the following stitch and pull up another loop, then yarn over and draw through all three loops. Beginning chains do not count as stitches. The center uses joined rounds; each point uses turned rows.
Floral Christmas Star Ornament Crochet Pattern
1. Cream Center
- R1: make MR, ch 1, work 10 hdc in the ring; pull closed and sl st in the first hdc.
- R2: ch 1, work 2 sc in each hdc; join with sl st in the first sc.
- R3: ch 1, (sc, inc) × 10; join with sl st in the first sc.
Fasten off and weave in the center tail securely. Count the thirty stitches of R3, ignoring the beginning chain and joining slip stitch. Divide them into five consecutive groups of six and mark the first stitch of each group. These five groups support the five points.
2. First Star Point
With the front of the center facing you, join cream with a sl st in the first marked stitch. The joining slip stitch is only an attachment and does not replace the first sc.
- Row 1: ch 1, sc in the same marked stitch and the next 5 center stitches.
- Row 2: ch 1, turn, dec, 2 sc, dec.
- Row 3: ch 1, turn, dec twice.
- Row 4: ch 1, turn, dec.
Fasten off at the tip and weave the tail into the back of the point without pulling the tip inward. Keep the point flat and its four rows clearly separated. Row 1 uses six center stitches, while the later rows use the preceding point row only.
3. Remaining Four Points
Return the center to the same front-facing orientation. Join cream in the next marked, unused center stitch and repeat Rows 1–4. Continue until all five six-stitch groups have their own point.
Every point has the same count sequence: 6, 4, 2, 1. Five groups of six use all thirty center stitches. Do not work an extra point into the round join. The gaps between neighboring points form the valleys of the star.
4. Cream Border
Join cream at a valley between two points. Ch 1, then work up the side of the next point, placing one sc into each of its four row ends. Work 3 sc into the single stitch at the tip. Work 4 sc down the opposite side, one in each row end, then sl st at the next valley.
Repeat around all five points. At each valley, anchor the sl st through the firm base between neighboring point groups. Join to the first border sc and fasten off. Each repeat contains four side sc, three tip sc, four side sc, and one valley sl st: eleven sc plus one slip stitch per point.
Responsivo Post 02 – P2
Use twelve stitches per repeat as a placement guide, keeping the stitches even and relaxed. The edge should frame the star without ruffling or pulling its points into a bowl. Weave in the border tails on the back.
Block the Crochet Base
Lightly dampen the star according to the yarn label. Lay it on a blocking mat and arrange the five points evenly around the center. Pin each tip and valley gently, keeping the center flat.
Let it dry completely before embroidering. Do not stretch the valleys into large holes. The reference has a soft, full yarn texture, so keep the fabric relaxed instead of pressing it thin.
Plan the Botanical Embroidery
Choose one point as the top. Mark the cream center and imagine five spokes running toward the points. Work a small pair of red petals along each spoke close to the center, then green leaves farther out and a tiny red bud near each tip.
Pin short scraps of yarn onto the surface first if helpful. Leave a strip of cream visible around the edge and between the colored groups. Keep all long embroidery stitches within the body of the star, not across a valley.
Embroider the Burgundy Center Flower
Detached Chain Stitch
Bring burgundy yarn up at the base of a petal. Insert the needle down beside the same entry point, leaving a loose loop on the front. Bring the needle up at the outer end of the petal, inside that loop, and pull gently until the loop forms an oval. Make a tiny anchoring stitch over the loop tip.
This detached chain is also called a lazy-daisy stitch. It should sit above the cream fabric without cinching it. For a fuller petal, add one straight stitch inside the loop, from its base to its tip.
Five Pairs of Petals
Make two small detached-chain petals close together along each of the five spokes, radiating away from the cream center. Ten red petals form five paired groups. Keep their bases near the center and their ends pointing toward the arms.
Leave a small cream dot visible at the very center. Space the red pairs evenly and secure the red yarn at the back between groups, weaving it through dense crochet rather than leaving exposed long floats.
