
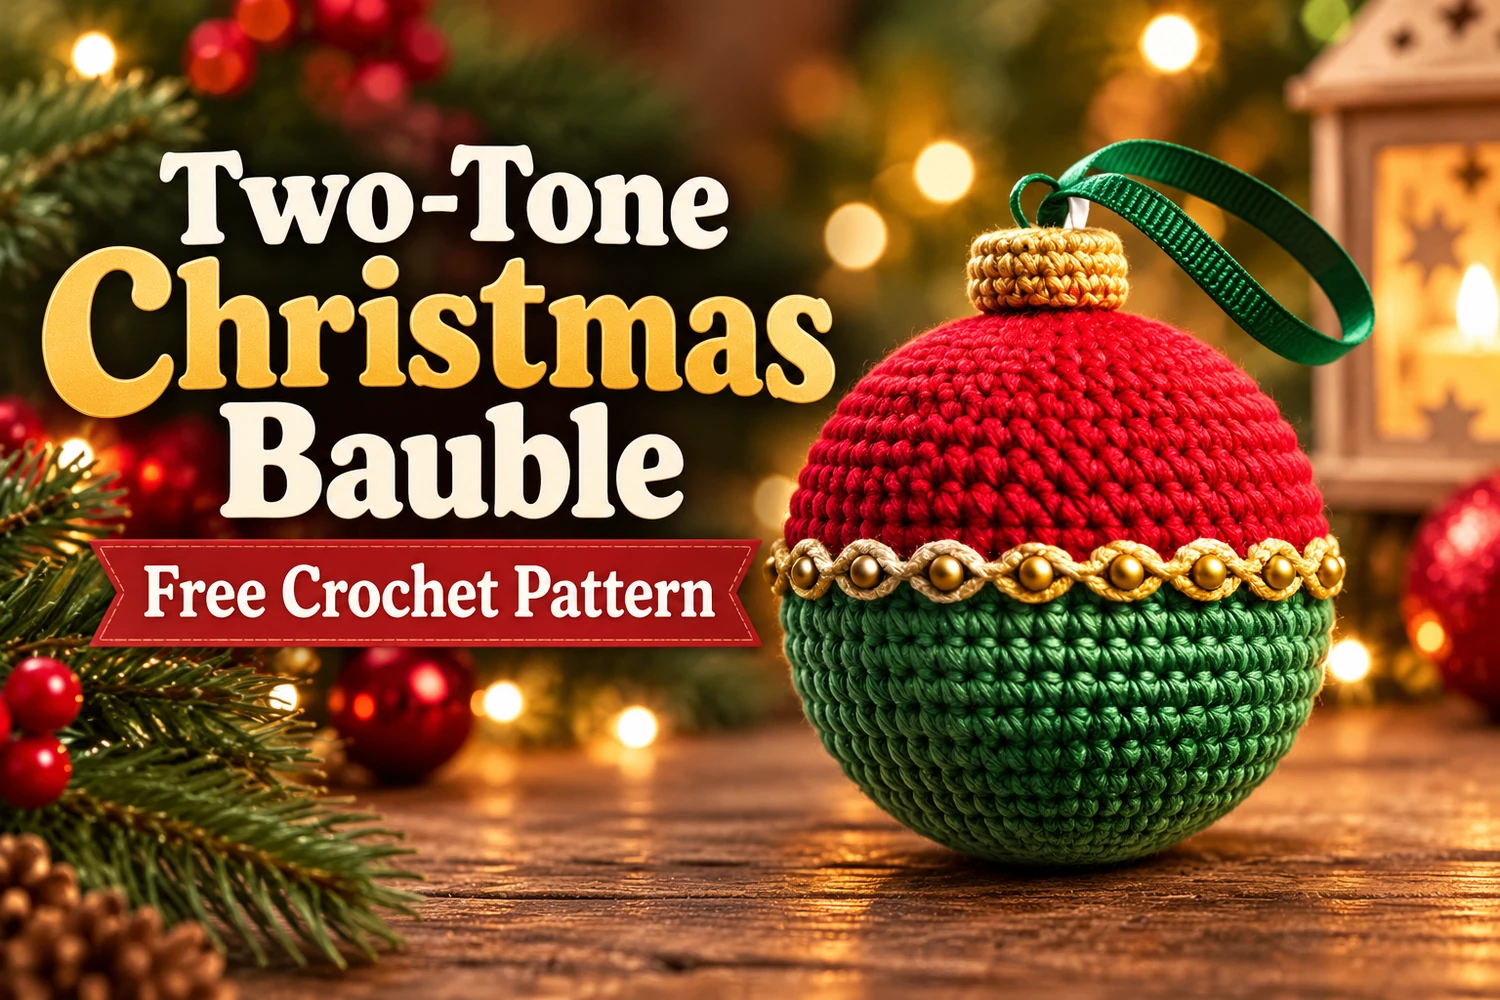
This Two-Tone Christmas Bauble Crochet Pattern makes a round red-and-green ornament with a gold beaded band, a small crochet cap, and a green ribbon loop. Its bright red upper half and forest-green lower half follow the reference closely.
Crochet the sphere in one piece from the bottom upward, changing color at the middle. Add the gold trim afterward so it sits directly over the color transition.
Pattern Information
- Skill level: confident beginner to intermediate, with basic sewing.
- Terms: US crochet terminology.
- Estimated diameter: 6–8 cm with DK cotton and a 2.5 mm hook. Actual size depends on tension.
- Construction: one stuffed joined-round sphere, separate cap, sewn trim, and reinforced ribbon loop.
This is an image-inspired adaptation in US crochet terms. The stitch counts and repeat totals have been reviewed, but the pattern has not been physically crocheted or independently tested. The photographs illustrate the design; follow the written pattern for exact construction.
Materials
- DK cotton yarn: approximately 10–15 g each of forest green and bright red.
- Small amount of fine gold yarn for the cap and optional crocheted trim.
- 2.5 mm hook, or a size that produces dense stitches.
- Polyester stuffing, tapestry needle, scissors, stitch marker, and sewing needle.
- Narrow gold wavy braid long enough to fit around the ball equator, plus a small overlap.
- Small round gold beads, enough to space around the band; 3–4 mm beads suit a small ball.
- Narrow green satin ribbon, approximately 20–25 cm, and matching strong sewing thread.
Choose soft, sewable trim and beads with holes large enough for your sewing needle. The reference uses a wavy gold edging. You can reproduce that with ready-made braid, or use the optional crochet chain-and-arch band below. The sphere uses soft stuffing rather than a rigid insert.
Responsivo Post 01 – P1
Stitches and Abbreviations
- MR: magic ring.
- ch: chain; sl st: slip stitch.
- sc: single crochet.
- inc: 2 sc in the same stitch.
- dec: sc2tog, a decrease over 2 stitches.
- BLO: back loop only; R: round; st(s): stitch(es).
- Counts in brackets are finished stitch counts. Repeats marked × are worked the stated number of times.
Use joined rounds throughout. At the end of each round, sl st into the first sc, then ch 1 before the next round. The joining slip stitch and ch 1 do not count as stitches. Work the first sc of the next round into the same first stitch. Do not turn.
For sc2tog, insert the hook into the next stitch and pull up a loop; repeat in the following stitch, then yarn over and pull through all three loops. Keep decreases firm enough to hold the stuffing inside.
Two-Tone Christmas Bauble Crochet Pattern
1. Sphere — Green Bottom and Red Top
Work R1–9 in green and R10–17 in red. The round list below gives the complete shaping. Remember to ch 1 after each joining slip stitch.
- R1: 6 sc in MR; close the ring and join.
- R2: inc × 6; join.
- R3: (sc, inc) × 6; join.
- R4: (2 sc, inc) × 6; join.
- R5: (3 sc, inc) × 6; join.
- R6: (4 sc, inc) × 6; join.
- R7–12: 36 sc each round, joining after each round.
- R13: (4 sc, dec) × 6; join.
- R14: (3 sc, dec) × 6; join.
- R15: (2 sc, dec) × 6; join.
- R16: (sc, dec) × 6; join.
- R17: dec × 6; join.
2. Clean Color Change
At the end of green R9, join with a slip stitch into its first sc, completing the final pull-through with red. Ch 1 in red and work R10 in red. Leave both tails inside the ball and weave them through the inside of matching-color stitches before stuffing.
Keep the join line at the back. The gold band will cover the boundary between R9 and R10, but it should not be used to hide an unfastened yarn tail. Maintain all thirty-six stitches around the middle.
3. Stuff and Close
Begin stuffing after R14. Add small tufts evenly around the inside, then shape the ball gently with your hands. Before R17, finish filling it firmly without stretching the stitch holes. Fasten off with a long tail, pass it through the front loops of the final six stitches, pull closed, and weave it into the ball. The starting MR is the bottom; the final closure is the top.
Gold Crochet Cap
- With gold yarn, R1: 6 sc in MR; join.
- R2: inc × 6; join.
- R3: ch 1, work 12 sc BLO; join.
- R4: ch 1, 12 sc; join.
Fasten off with a 25 cm sewing tail. Leave the twelve-stitch lower opening unclosed. The MR disc is the cap top, and the BLO round turns the wall downward. Do not stuff the cap. Test it over the ball closure before sewing.
Fit the Gold Equator Trim
Measure the stuffed ball around the boundary between green R9 and red R10. Cut the gold braid to this measurement plus approximately 1 cm for overlap. Pin it level around the full circumference, with the overlap at the back join line.
Responsivo Post 02 – P2
Using gold or matching sewing thread, tack the braid to the crochet every few stitches. Keep it close to the fabric without cinching the ball. Fold the cut ends inward at the overlap if the trim frays, then sew them securely.
Sew the Gold Beads
Place one small bead inside each wave of the braid, or space the beads evenly if your braid has a different repeat. Use a separate strong thread and a fine needle. Pass through each bead and the nearby crochet at least three times before securing the thread on the back of the trim.
Keep the beads centered across the color boundary. Carry the thread through the dense crochet beneath the braid rather than leaving exposed floats. Check that each bead is held firmly and that the gold band still lies flat.
