
If you prefer crocheted edging, make a gold chain long enough to fit loosely around the equator and adjust its count to a multiple of three. Join without twisting. Ch 1, then repeat: sl st in the next chain, ch 3, skip 2 chains. Continue around and fasten off.
This makes one small chain arch for every three foundation chains. Pin the ring over the color boundary, tack the base and each arch to the ball, then sew a gold bead beneath each arch if desired. Measure on the actual ball; a fixed chain count will not fit every yarn and tension.
Reinforce the Hanging Loop
Cut approximately 20–25 cm of narrow ribbon or hanging cord. Fold it into a loop and stitch the two ends together. Sew these ends through several dense stitches at the top of the ball, using at least four passes in different directions. Keep the seam under the future cap.
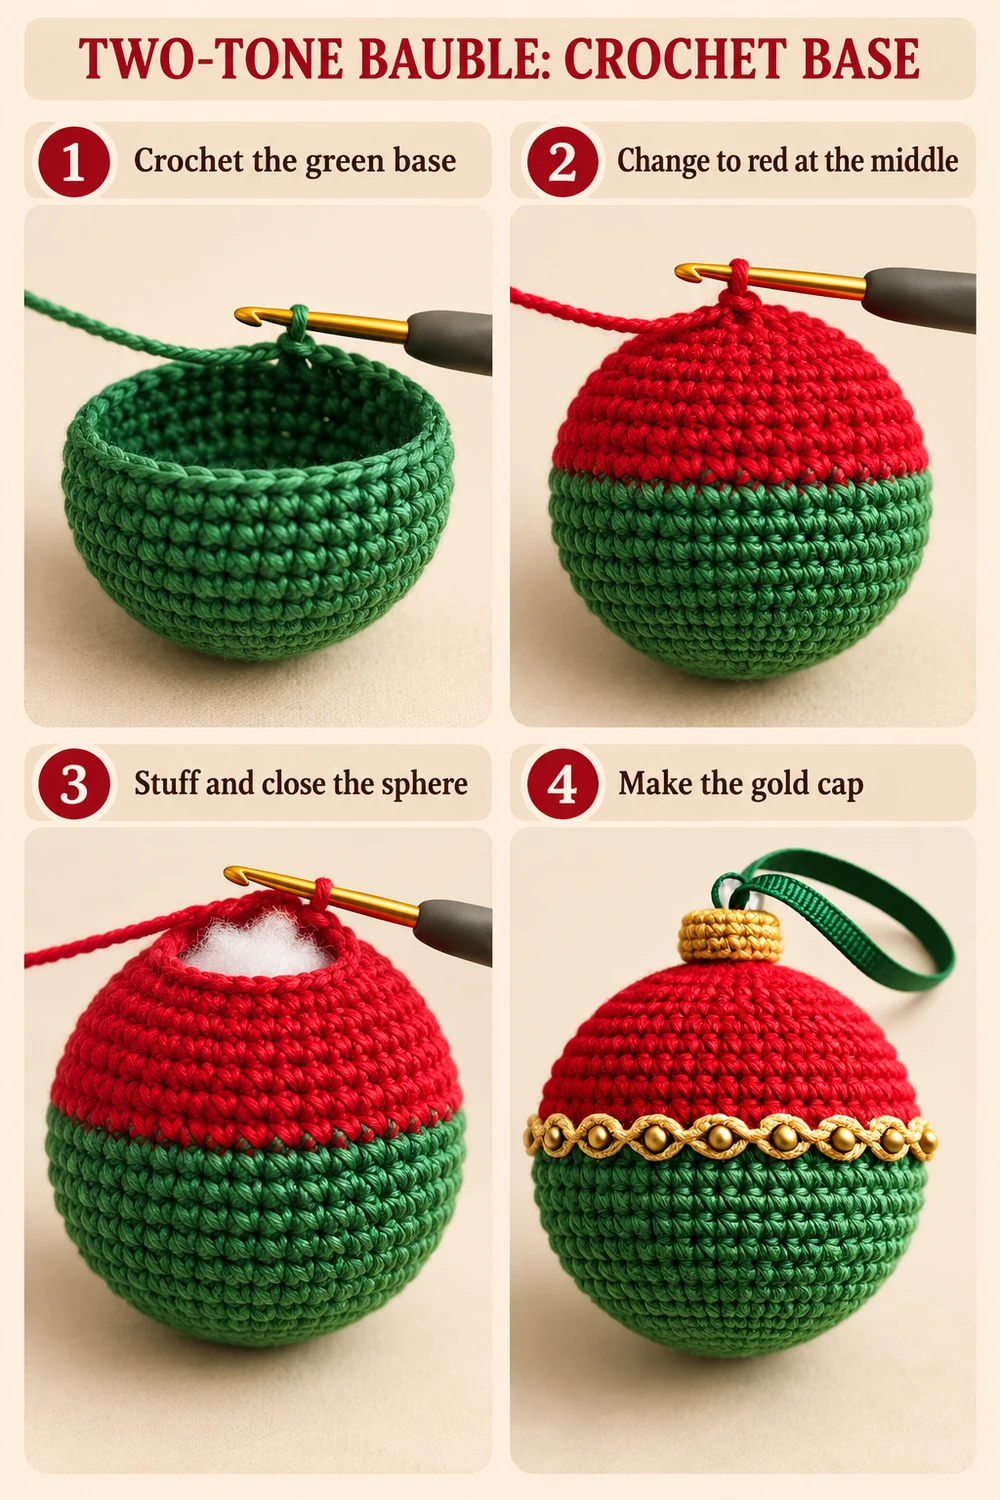
Pass the folded loop through the center of the cap disc with a tapestry needle, without cutting the yarn or forcing a thick knot through it. Lower the cap over the ball closure and sew its open edge to the sphere all the way around. The ribbon attachment inside the ball carries the weight; the gold cap covers it. Gently tug the loop to check the join.
Final Assembly Order
- Crochet the green and red sphere, weave color tails, stuff, and close.
- Crochet the gold cap and test its fit.
- Sew the gold braid or crochet band around the equator.
- Add the small gold beads.
- Anchor the green ribbon loop to the sphere.
- Lower the cap over the ribbon and sew it into place.
Full Crochet Symbol Chart
The photo-and-chart image at the end places the finished ornament above a complete unrolled chart of the sphere, R1–17, with an English symbol legend alongside. The chart includes all six repeats in every round. Read the numbered rounds from the MR upward. The connected increase and decrease symbols show their placement in the previous round; the written joining directions apply after every round. The gold cap and decorations are explained separately in the text.
Tips and Troubleshooting
- The ball looks pointed: distribute the stuffing before closing, keeping it even at both poles.
- Stuffing shows through: use a smaller hook or reduce overfilling.
- Extra stitches appear: mark the first sc and ignore the ch 1 and slip-stitch join.
- The cap leans: center it over the closure and pin it before sewing.
- Decorations slide: add small hidden sewing stitches at the poles and at intervals along the trim.
Frequently Asked Questions
Do I need a plastic bauble inside?
No. The instructions use polyester stuffing. A rigid insert would require adjusting the sizing and closure to fit that exact insert.
Can I omit the beads?
Yes. Keep only the gold braid or crocheted edging for a simpler finish. The two-tone sphere and cap stay the same.
Can I reverse the colors?
Yes. Follow the same shaping and change colors at the same round. Green below red matches the reference.
More Free Christmas Crochet Patterns
- Floral Christmas Star Ornament Crochet Pattern
- Beaded Christmas Tree Ornament Crochet Pattern
- Christmas Bell Ornament Crochet Pattern
Save This Pattern
Save this Two-Tone Christmas Bauble Crochet Pattern for a classic handmade holiday ornament. Happy crocheting from Lovely Amigurumi!
Two-Tone Bauble Tutorials, Full Chart, and Pinterest Gallery
Two photo tutorials and a finished-bauble photo above the full sphere chart come first, followed by three Pinterest images. All six images are grouped at the end.
More Free Crochet Patterns
Find your next handmade project with these lovely patterns.
Christmas Lace Star Crochet Pattern – Free Five-Point Ornament Guide
View Pattern →
Granny Stitch Gingerbread Crochet Pattern – Free Ornament Guide
View Pattern →
Blue Lace Snowflake Crochet Pattern – Free Ornament Guide
View Pattern →
CONTENT END 1
