
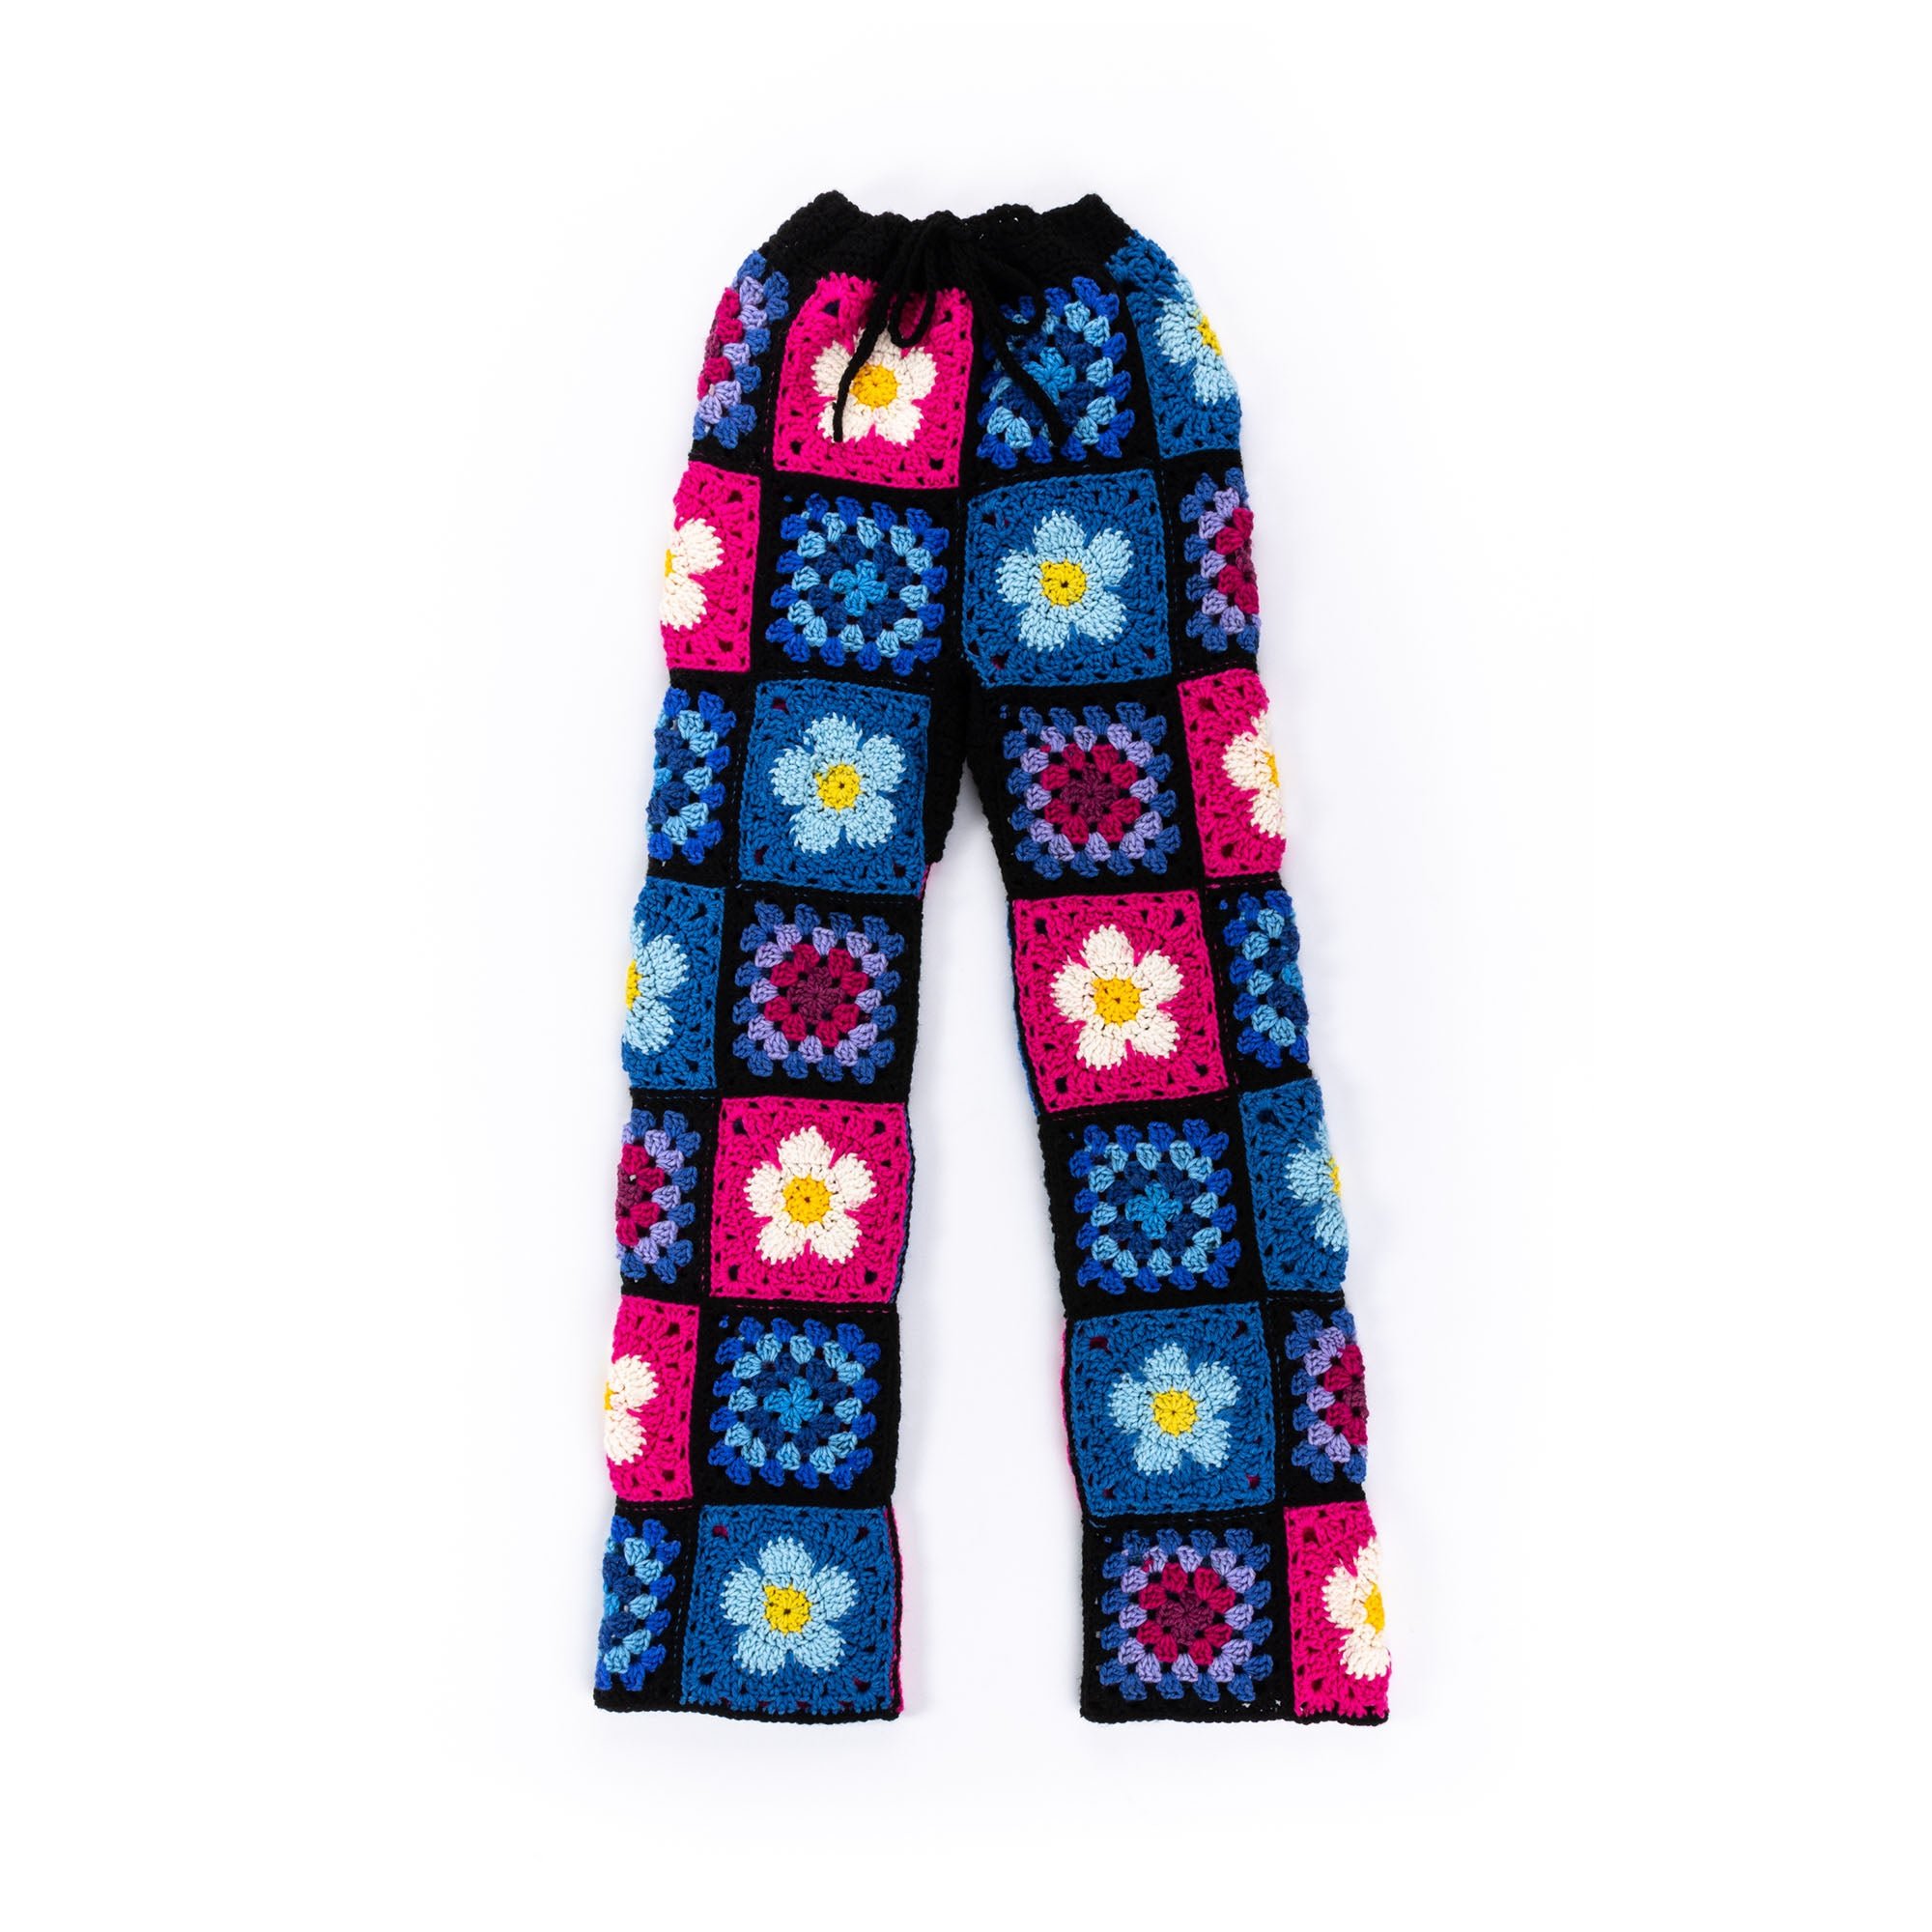
Create your own stylish Crochet Flower Power Pants with this fun and unique pattern! These pants feature vibrantly colored motifs perfect for any summer outfit. You’ll work with a mixture of granny squares and flower squares to achieve a playful look. The construction involves creating individual motifs that are then joined together, making this project not only beautiful but also enjoyable to crochet. With some experience in granny squares, you can take on this project and add a special piece to your wardrobe.
Project Details
- Crochet terminology: U.S.
- Skill level: Intermediate (requires knowledge of granny squares and basic crochet stitches)
- Finished size: XS/S/M and L/XL/2XL options available
- Construction method: Joined motifs
Materials and Tools
| Yarn option | Yarn and specifications | Amount |
|---|---|---|
| Main Color (MC) | Red Heart® Super Saver® (7 oz/198 g; 364 yds/333 m) – Black (0312) | 2 balls (XS/S/M), 2 balls (L/XL/2XL) |
| Contrast A | Red Heart® All in One™ Granny Square™ (8.8 oz/250 g; 417 yds/381 m) – Blue Beacon (2032) | 1 ball (XS/S/M), 1 ball (L/XL/2XL) |
| Contrast B | Red Heart® All in One™ Granny Square™ – Hyper Violet (2022) | 1 ball (XS/S/M), 1 ball (L/XL/2XL) |
| Contrast C | Red Heart® All in One™ Flower Square™ (8.8 oz/250 g; 417 yds/381 m) – Blue Bell (2006) | 1 ball (XS/S/M), 1 ball (L/XL/2XL) |
| Contrast D | Red Heart® All in One™ Flower Square™ – Peony Pop (2021) | 1 ball (XS/S/M), 1 ball (L/XL/2XL) |
Tools
- Crochet hook: Size U.S. I/9 (5.5 mm) Susan Bates® Silvalume® crochet hook or size needed to obtain gauge
- Susan Bates® stitch markers
- Susan Bates® yarn needle
Abbreviations
| Abbreviation | Meaning |
|---|---|
| ch | chain |
| sl st | slip stitch |
| dc | double crochet |
| hdc | half double crochet |
| tr | treble crochet |
| sc | single crochet |
Preparation and Techniques
Joining Motifs
Crochet Patterns — No Ads. No Clutter.
Browse the Crochet Library →
This project utilizes several motifs that are joined using a Flat Sl St seam. Ensure that all motifs are oriented correctly so that they align properly when attached.
Color Changes
When changing colors, make sure to leave the working yarn at the back of your work to maintain consistency throughout the piece.
Complete Pattern Instructions
Granny Squares (Make 10 (14) with A, and 11 (14) with B)
| Round | Instructions | Stitches |
|---|---|---|
| 1st rnd | (RS) Ch 6. (3 dc, ch 3) 3 times in ring. 2 dc in ring. Join. | – |
| 2nd rnd | Sl st in ch-3 sp. Ch 6. 3 dc in same ch-3 sp. *Ch 1. (3 dc, ch 3, 3 dc) in next ch-3 sp. Rep from * twice more. Ch 1. 2 dc in first ch-3 sp. Join. | – |
| 3rd rnd | Sl st in ch-3 sp. Ch 6. 3 dc in same ch-3 sp. *Ch 1. 3 dc in next ch-1 sp. Ch 1. (3 dc, ch 3, 3 dc) in next ch-3 sp. Rep from * twice more. Ch 1. 3 dc in last ch-1 sp. Ch 1. 2 dc in first ch-3 sp. Join. | – |
| 4th and 5th rnds | Sl st in ch-3 sp. Ch 6. 3 dc in same ch-3 sp. *(Ch 1. 3 dc) in each ch-1 sp to next ch-3 sp. Ch 1. (3 dc, ch 3, 3 dc) in next ch-3 sp. Rep from * twice more, then from * to once. 2 dc in first ch-3 sp. Join. | – |
Flower Power Square (Make 10 (14) with C, and 11 (14) with D)
| Round | Instructions | Stitches |
|---|---|---|
| 1st rnd | Ch 3. Work 9 dc in ring. Join. | 10 dc |
| 2nd rnd | Ch 3, dc in first dc, 2 dc in each dc around. Join. | 20 dc |
| 3rd rnd | Sl st in next dc. (Ch 3, 1 tr) in same st as last sl st. 3 tr in next dc. (1 tr, 1 dc) in next dc. Sl st in next dc. *(1 dc, 1 tr) in next dc. 3 tr in next dc. (1 tr, 1 dc) in next dc. Sl st in next dc. Rep from * around, ending by joining with sl st to top of ch-3 of previous (2nd) rnd. | – |
| 4th rnd | Sl st in first dc. Ch 3. *1 dc in next tr, 1 hdc in next tr, 1 sc in next tr, 1 hdc in next tr, 1 dc in each of next 2 sts. 1 tr in dc of 2nd rnd below sl st. 1 dc in next dc. Rep from * 3 times more. | – |
| 5th rnd | Ch 6 (counts as tr and ch-2). 1 tr in same sp as sl st. *2 dc in next st, ch 1, 1 dc in next st, 1 hdc in next st, 1 sc in next st, ch 1, skip next st, 1 sc in next st, 1 hdc in next st, 1 dc in next st, ch 1, 2 dc in next st. (1 tr, ch 2, 1 tr) all in next st. Rep from * twice more. | – |
| 6th rnd | Sl st in next ch-2 sp. Ch 2 (does not count as st). 1 hdc in same ch-2 sp. Ch 3. 3 hdc in same ch-2 sp. Ch 1. * (3 hdc, ch 1) in each ch-1 sp to next corner ch-2 sp. (3 hdc, ch 3, 3 hdc) all in next ch-2 sp. Ch 1. Rep from * twice more. 2 hdc in first ch-2 sp. Join. | – |
Crotch Gusset (Make 1)
| Row | Instructions | Stitches |
|---|---|---|
| 1st row | (RS) Ch 2. 2 sc in 2nd ch from hook. Turn. | – |
| 2nd row | Ch 1. 1 sc in each of next 2 sc. Turn. | – |
| 3rd row | Ch 1. 2 sc in each of next 2 sc. Turn. | 4 sc |
| 4th to 6th rows | Ch 1. 1 sc in each sc to end of row. Turn. | – |
| 7th row | Ch 1. 2 sc in first sc. 1 sc in each sc to last sc. 2 sc in last sc. Turn. | – |
Assembly and Finishing
Joining Motifs
Using the Assembly Diagram, join motifs as follows:
– **Top part of Pants:** Make 2 strips with 6 (8) motifs in each strip, joining motifs together using a Flat Sl St seam, and join back seam.
Seaming with Flat Sl St Join
Ensure all motifs are oriented the same direction. With right side facing, slip stitch motifs together through back loops only.
