
Small crochet keychains are a good way to practice amigurumi without committing to a big plush. This Hello Kitty keychain pattern gives you a simple, flattened round head, two small ears, a bow, and a stitched face. It works as a bag charm, zipper pull, or small gift. You’ll get a working starting pattern, finishing tips, and ideas for making it your own.
What Makes This Crochet Project Special
Hello Kitty’s design is very simple: a wide white head, small triangular ears, a bow, oval eyes, and a tiny yellow nose. That makes her well suited to crochet. There are no limbs to attach, and you only need a few colors of scrap yarn.
The head is wider than it is tall, so it looks cute even when your stitches are a bit uneven. It also uses only basic amigurumi skills: a magic ring, increases, decreases, and simple embroidery.
Note: Hello Kitty is a licensed Sanrio character. This pattern is intended for personal use and gifts. Selling finished items may require permission.
Materials You May Need
Exact yarn and hook choices change the finished size, so treat these as starting points:
- Yarn: Smooth cotton or acrylic in white, red (or your bow color), yellow, and black scraps
- Hook: One size smaller than your yarn label suggests, so the fabric is tight enough to hide the stuffing
- Fiberfill: A small amount
- Keychain hardware: A jump ring and clasp, or a split ring
- Yarn needle, scissors, and stitch marker
- Optional: 6 mm safety eyes (embroidered eyes are safer for young children)
- Optional: Pins for testing face placement
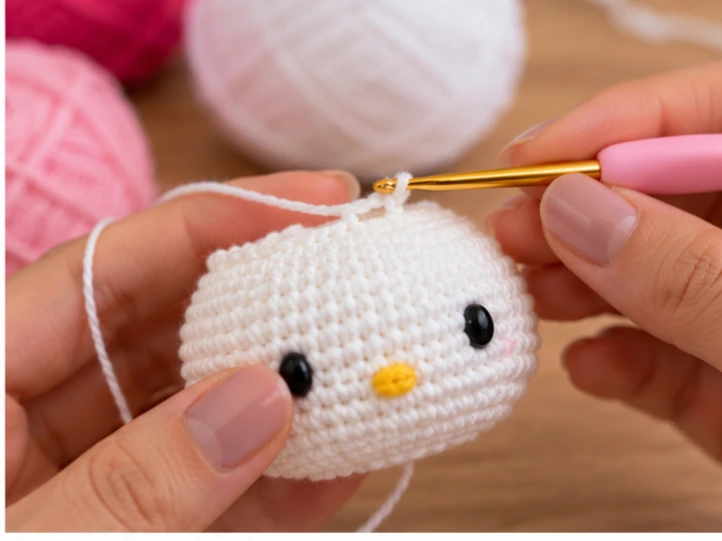
How to Make This Hello Kitty Keychain Pattern
This is a starting pattern in US terms. Work in continuous rounds and mark the first stitch of each round. Your finished size depends on yarn and hook, so gauge doesn’t need to be exact here. Just keep your tension firm.
Abbreviations: MR = magic ring, sc = single crochet, inc = two sc in one stitch, dec = single crochet decrease, sl st = slip stitch, ch = chain.
Head (white)
- R1: 6 sc in MR (6)
- R2: inc in each stitch (12)
- R3: (sc, inc) x 6 (18)
- R4: (2 sc, inc) x 6 (24)
- R5: (3 sc, inc) x 6 (30)
- R6: (4 sc, inc) x 6 (36)
- R7–R10: sc in each stitch (36)
- R11: (4 sc, dec) x 6 (30)
- R12: (3 sc, dec) x 6 (24)
- R13: (2 sc, dec) x 6 (18)
Stuff firmly but not to bulging, and add a little more as you close.
- R14: (sc, dec) x 6 (12)
- R15: dec x 6 (6)
Fasten off, weave the tail through the front loops of the last six stitches, pull tight, and hide the end.
Ears (make 2, white)
- R1: 6 sc in MR (6)
- R2: (sc, inc) x 3 (9)
- R3: sc in each stitch (9)
Fasten off, leaving a long tail. Flatten each piece and pinch it into a soft triangle. Don’t stuff the ears.
Bow (red or your choice)
Ch 11. Sc in the second chain from the hook and across (10). Work 5 more rows of 10 sc, chaining 1 and turning each time. Fasten off, leaving a tail. Wrap the tail tightly around the middle of the rectangle, pinching it into a bow shape, and secure it at the back.
Assembly
- Pin the ears to the top of the head, around rounds 3–5, leaving a small gap between them.
- Sew the ears on with whip stitch, catching only the front loops of the ear edges.
- Pin the eyes about 10–12 stitches apart, around rounds 8–9. Check the placement before committing.
- Embroider the eyes as small black ovals, or add safety eyes before stuffing.
- Stitch a small yellow oval nose between and slightly below the eyes.
- Add three short whiskers on each side with black yarn, pulled snug so they lie flat.
- Sew the bow at the base of one ear. Traditionally this is her left ear, on the viewer’s right.
- Sew a short yarn loop or a jump ring to the top center of the head, then attach the clasp.
