
6. Satin Bow
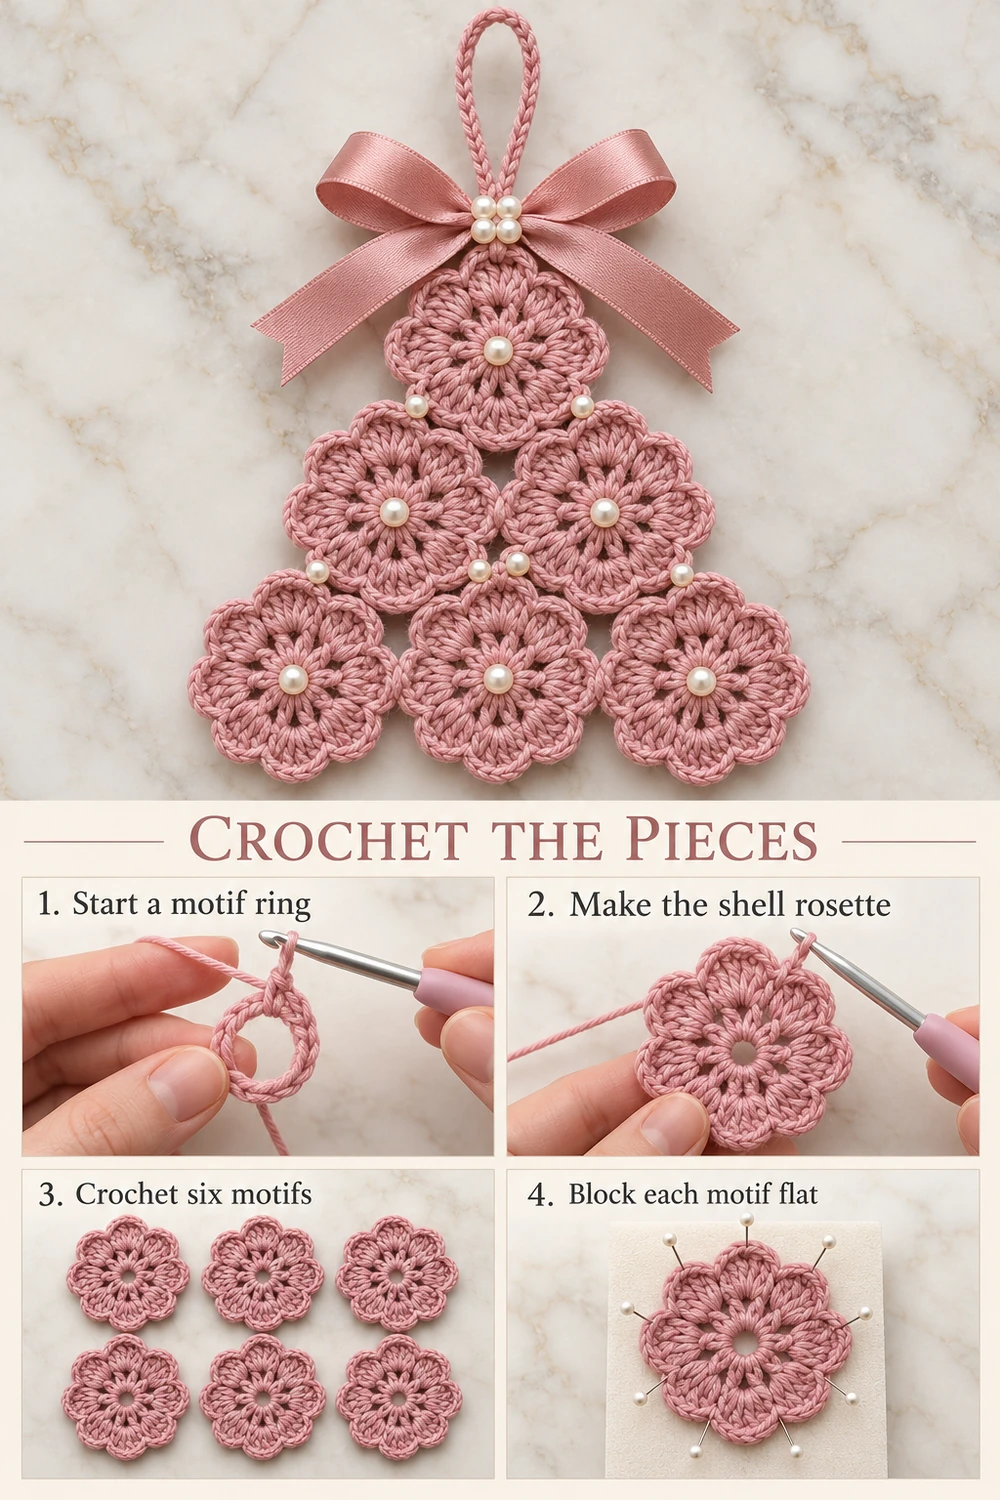
Cut a length of matching pink satin ribbon and tie a bow with two balanced loops and two tails. Place it across the top rosette, just below the hanging loop, with the tails falling diagonally over the upper sides of the tree.
Sew through the bow knot and several dense crochet stitches with matching sewing thread. Add tiny hidden stitches beneath the ribbon loops if they flop over the face of the tree. Trim the tails neatly. Check the ribbon manufacturer’s care instructions before applying any optional anti-fray product.
7. Ivory Pearl Details
Sew one ivory pearl over the center of each rosette, using several passes of strong thread through dense crochet beside the center ring. Add a few smaller pearls at motif joins if desired, keeping the placement balanced on both sides.
Sew three or four tiny pearls over the bow knot in a compact cluster. Secure each pearl separately, knot the thread on the back, and bury the end. Do not use the decorative pearls as the only connection between crochet motifs.
For a fully yarn-based version, embroider cream knots at the motif centers and leave the bow knot plain. The beaded version is a display ornament with small parts and a long hanging loop; keep it away from young children and pets.
Finishing and Care
Lay the completed tree flat, check the triangle shape, and smooth the ribbon tails. If needed, dampen only the crochet and reshape gently, keeping the satin and pearls as dry as practical. Allow it to dry completely before hanging.
Spot-clean gently and follow the ribbon care label. Store flat with tissue supporting the satin loops, so the bow keeps its shape and the shell edges do not catch on other decorations.
Questions and Tips
Can I make it in cream or red? Yes. Keep all six motifs the same size and use coordinating ribbon. The dusty-rose version follows the supplied reference.
Why is my tree twisting? Block all motifs before sewing and add a second small tack at any connection that rotates. Center the loop over the top rosette rather than attaching it to one side.
Can I add more rows of motifs? You can experiment with a larger triangle, but additional weight needs more seams and a stronger suspension. This pattern covers the six-motif version.
Complete Tree Assembly Chart
The two tree-shaped chart guides show all six complete rosettes in their 1–2–3 arrangement, with dashed sewing connections, the loop, and the bow position. Every motif contains the 12-dc foundation and six five-dc shells. In each guide, the finished tree photograph is below the chart. Pearls and ribbon outlines indicate placement rather than crochet stitches.
More Free Christmas Crochet Patterns
- Lace Bell Ornament
- Wooden Bead Christmas Elf
- Pearl and Star Christmas Tree
Save This Pattern
Save this Pink Pearl Christmas Tree Crochet Pattern for your handmade holiday decorations. Happy crocheting from Lovely Amigurumi!
Photo Tutorials, Crochet Chart, and Pinterest Gallery
One step-by-step photo tutorial and two complete tree-shaped chart-and-photo guides appear first, followed by three Pinterest images. Both chart guides have the crochet chart above the finished tree photograph. All six images are grouped here at the end.
More Free Crochet Patterns
Find your next handmade project with these lovely patterns.
Christmas Lace Star Crochet Pattern – Free Five-Point Ornament Guide
View Pattern →
Granny Stitch Gingerbread Crochet Pattern – Free Ornament Guide
View Pattern →
Blue Lace Snowflake Crochet Pattern – Free Ornament Guide
View Pattern →
CONTENT END 1
