
333
new link ads
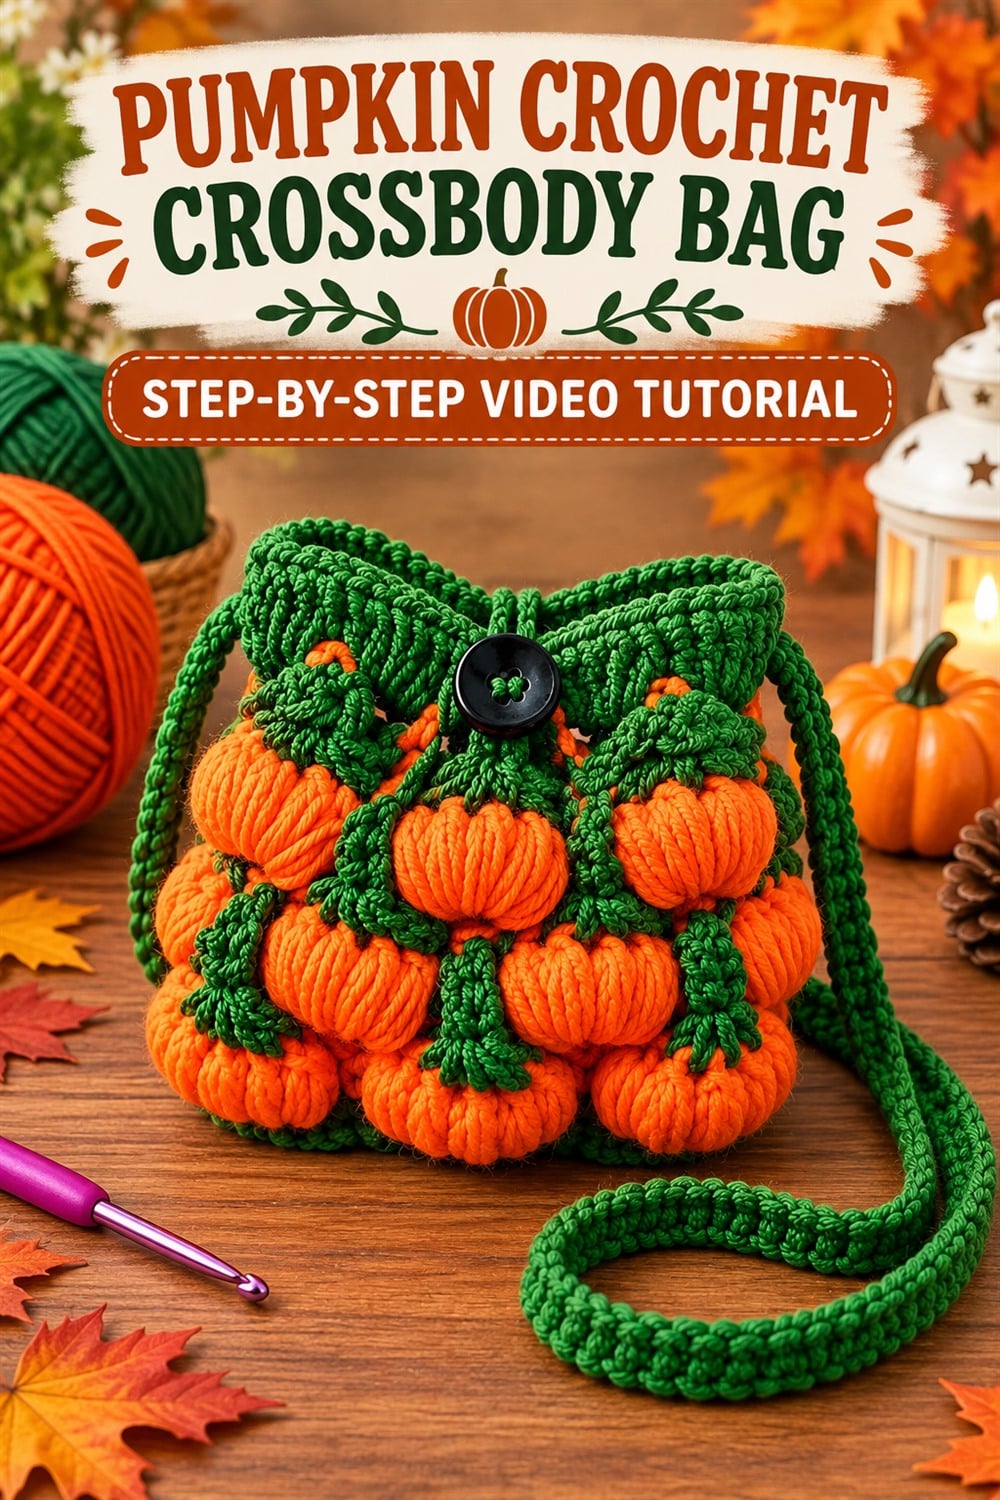
This pumpkin crochet crossbody bag turns a practical little pouch into a joyful celebration of autumn. Rows of dimensional orange pumpkins, green leaves and curling vine-like details create a richly textured surface, while a drawstring-style top and long strap make the finished piece wearable. It is a memorable accessory for fall outings, seasonal markets, Halloween events or handmade gifts.
The English guide below focuses on the techniques that support a successful bag: forming consistent pumpkin clusters, controlling the background fabric, building a stable pouch, reinforcing the strap and finishing the closure. Use the embedded video for the exact foundation, stitch counts, round sequence and placement of each decorative element.
Pumpkin Crochet Crossbody Bag Video Tutorial
What Makes This Fall Crochet Bag Special?
The raised pumpkin motifs create a striking three-dimensional fabric without relying on printed material or complicated hardware. Orange and green make the theme instantly recognizable, while the compact crossbody shape keeps the project practical. The repeated clusters also provide a satisfying rhythm once the construction becomes familiar.
This design can function as a phone pouch, small festival bag, child-sized accessory or decorative treat bag, depending on the final measurements and strap length. Always check the video dimensions and make a swatch before adapting the size.
Materials and Yarn Suggestions
- Orange yarn for the pumpkin clusters
- Dark-green yarn for leaves, vines, top and strap
- A crochet hook compatible with both yarns
- Stitch markers, scissors and tapestry needle
- Optional button or closure
- Optional fabric lining and interfacing
A smooth, plied yarn makes the pumpkin shaping easy to see. Choose colors with strong contrast so the leaves remain distinct from the orange body. For a functional bag, select a fiber that resists excessive stretching. Cotton and firm blends often provide better structure than very soft, elastic yarns.
Practice the Dimensional Pumpkin Cluster
The pumpkin texture depends on working several loops or partial stitches into a controlled area, then closing or shaping them as shown in the tutorial. Draw each loop to a similar height so the motifs have matching fullness. If the working loops become tight on the hook, relax your grip and slide them onto the wider part of the shaft.
After closing a cluster, guide it toward the front of the fabric and gently shape it with your fingers. Compare neighboring pumpkins for height and width. Consistency makes the rows look intentional and helps the bag sides remain balanced.
Add Green Leaves and Vine Details
Leaves frame the pumpkin clusters and visually connect the motifs to the green upper section. Work each leaf into the exact location shown in the video. Keep the points crisp without pulling so tightly that the surrounding fabric puckers.
Vines or small chains add movement, but they should not catch easily during wear. Secure every decorative tail on the inside. If a leaf is made separately, stitch it down at more than one point while preserving a slightly raised appearance.
Build a Stable Bag Body
Follow the foundation and shaping sequence carefully. The base should lie flat before the sides grow upward. Mark the start of every round and count the pumpkin repeats. Missing one background stitch can shift the decorative layout and change the width.
Dense clusters use more yarn and add weight, so keep the supporting fabric firm. Lay the work flat after each major section. If it begins to flare, check for extra stitches; if it narrows, look for a missed edge or space.
Create the Drawstring Top
The green upper section frames the pumpkins and provides a channel or opening for closure. Work the eyelets, folds or fastening points exactly as demonstrated. The rim should be firm enough to hold its shape but flexible enough to open comfortably.
Test the drawstring before weaving in all ends. It should move smoothly without snagging leaves or decorative loops. A button may be added as a visual accent or functional closure, depending on the tutorial construction.
