
This Red Snowflake Bauble Crochet Pattern turns a simple round ornament into a cheerful Christmas decoration. A deep red circle, a gold cap and hanging loop, white embroidered snowflakes, rosy cheeks, and a little smile recreate the cozy details of the reference.
The ornament is made from two flat crochet circles joined around the edge. Keep it unstuffed for a flat decoration, or add only a whisper of filling for a gently padded finish.
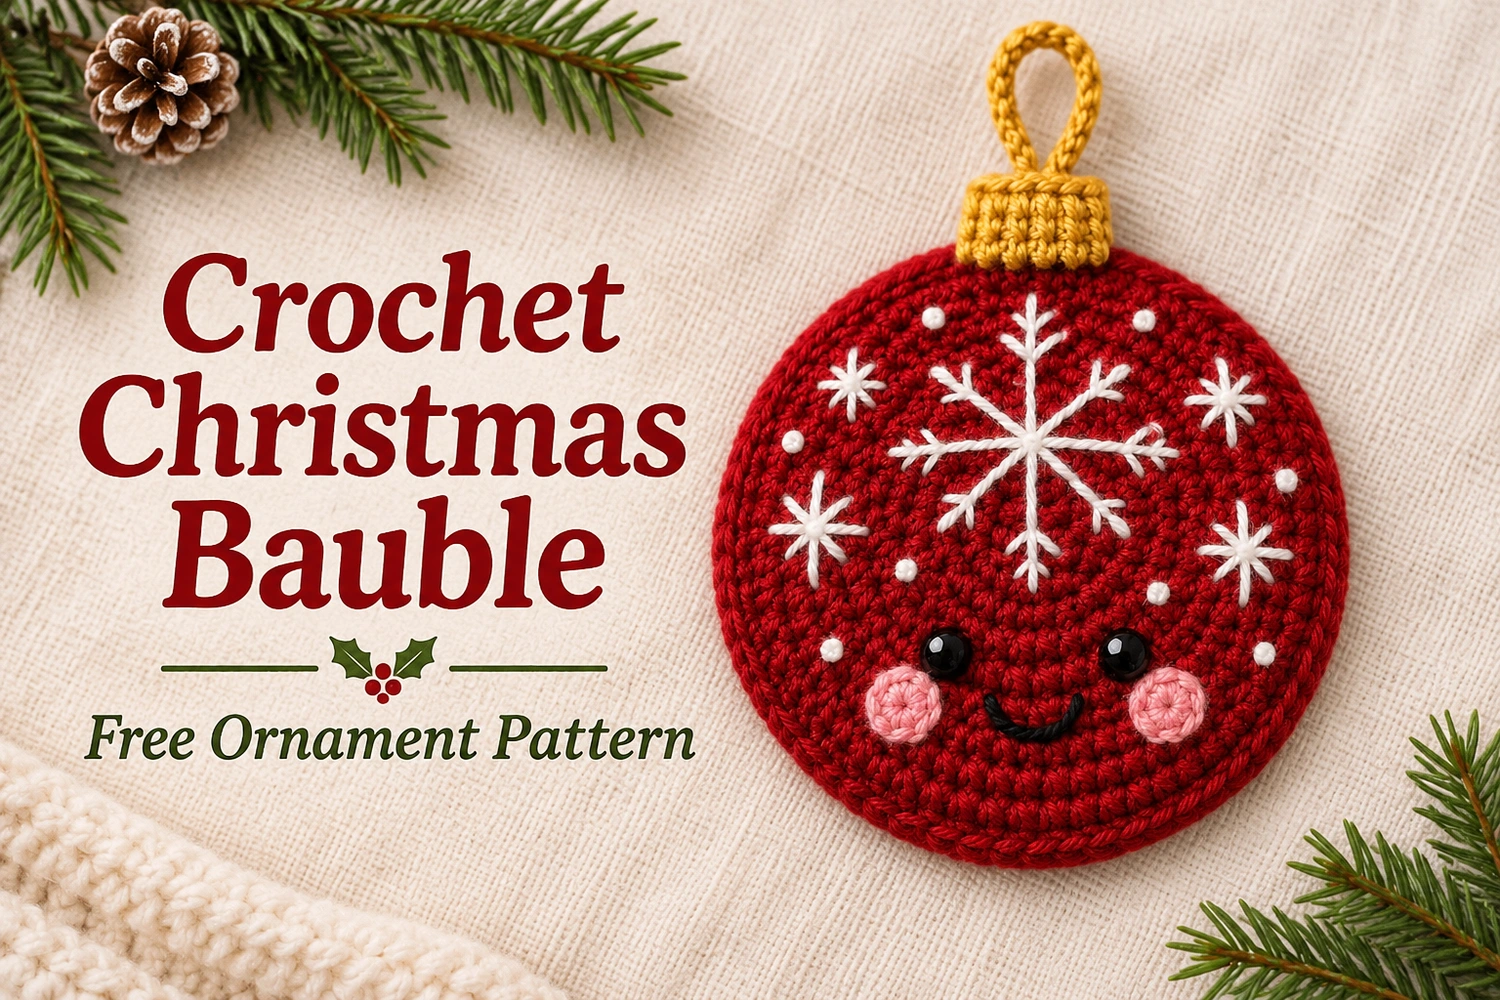
Red Snowflake Bauble Crochet Pattern: Project Details
- Skill level: confident beginner, with simple embroidery and sewing.
- Terminology: US crochet terms.
- Estimated size: 10–12 cm across, depending on yarn and tension; the cap and loop add height.
- Construction: two red circles, two pink cheek circles, one ribbed gold cap, and one gold hanging loop.
- Finish: flat or very lightly padded, with the decorations worked on the front panel only.
This is an original image-inspired adaptation. The stitch totals have been checked mathematically, but the pattern has not been physically crocheted or independently tested. Use the written instructions for exact stitch counts; the gallery illustrations show the intended appearance and placement.
Materials
- Sport or light DK cotton yarn: approximately 20 g deep red, 3 g mustard gold, and scraps of pink.
- White cotton embroidery yarn for the snowflakes and dots.
- Black embroidery thread for the smile and stitched eyes, or two approximately 6 mm safety eyes.
- A 2.5 mm crochet hook, or a hook that produces a firm, tidy fabric.
- Tapestry needle, embroidery needle, scissors, stitch marker, and a few pins.
- Optional: a very small amount of stuffing.
Choose smooth yarn so the embroidery remains easy to see. A matte mustard cotton gives the cap a soft gold appearance without requiring metallic yarn. If you use a finer embroidery thread, double it for the large central snowflake.
Responsivo Post 01 – P1
For a decoration that children may handle, embroider the eyes and avoid detachable small parts. This project is a hanging decoration; its long loop is not intended as a toy feature.
Abbreviations and Notes
- MR: magic ring.
- ch: chain.
- sc: single crochet.
- inc: work 2 sc in the same stitch.
- sl st: slip stitch.
- BLO: back loop only.
- st / sts: stitch / stitches.
- R: round; row numbers are identified separately.
- (…) × 6: repeat the instructions inside the brackets six times.
Work the red circles in a continuous spiral. Place a marker in the first stitch and move it up each round. Do not join or turn between rounds. Each increase round adds six stitches. Turning chains on the cap do not count as stitches.
The embroidery, cheeks, and gold cap are separate finishing details. They are not extra stitches added to the red circle rounds. Complete the front decoration before closing the two panels so all yarn ends and eye washers remain hidden inside.
1. Crochet Two Red Circles
With deep red yarn, make two identical panels. The first will become the decorated front; the second is the plain back.
- R1: 6 sc in MR. Pull the center closed. (6)
- R2: inc in every st. (12)
- R3: (sc, inc) × 6. (18)
- R4: (sc in next 2 sts, inc) × 6. (24)
- R5: (sc in next 3 sts, inc) × 6. (30)
- R6: (sc in next 4 sts, inc) × 6. (36)
- R7: (sc in next 5 sts, inc) × 6. (42)
- R8: (sc in next 6 sts, inc) × 6. (48)
At the end of R8, sl st into the next stitch and fasten off. The finishing slip stitch does not count as a stitch. Leave a long tail on one panel for joining. Weave in the starting ends securely.
Lay both circles on a flat surface. They should have the same diameter. If the edges ripple, first check that you have 48 stitches; an accidental increase can distort the shape. If both panels cup despite correct counts, relax your tension slightly or try a slightly larger hook. Do not add unplanned increases to just one panel.
2. Plan the Front Decoration
Choose a top position for the gold cap and mark it with a contrasting thread. Keep this orientation throughout the embroidery. The eyes and smile occupy the lower third, leaving the upper half for the large snowflake.
Place the large snowflake center a little above the circle midpoint. Its longest rays should stay inside the outer edge. Reserve a narrow clear margin around the circle for the joining seam. Add the four smaller snowflakes around the upper left, upper right, middle left, and middle right areas.
Responsivo Post 02 – P2
Pin the cheeks and mark the eye positions before stitching anything permanently. Check the face from a short distance: the eyes should look level when the cap sits directly above them. The embroidery layout is decorative and does not need to follow individual round boundaries exactly.
3. Embroider the Large White Snowflake
Use white yarn and a blunt needle. Make eight straight rays from one shared center: up, down, left, right, and the four diagonals. Work opposite rays in pairs so the center remains balanced. Let the rays rest on the fabric without pulling the red circle inward.
Add one small V-shaped pair of branches near the outer end of every ray. Each branch is a short straight stitch that angles away from the main line. For a fuller effect, add a second pair slightly closer to the center on the four longest rays.
Split a long ray into two or three shorter straight stitches if a single loose strand would snag. Bring each new stitch up close to the end of the previous one to keep the line visually continuous. Hide the starting and finishing ends on the wrong side of the front panel.
4. Add Small Snowflakes and Dots
For each small snowflake, make four crossing straight stitches to create eight rays. Vary their length slightly so they resemble hand-embroidered snow rather than identical printed marks. Keep them clear of the cheek positions.
Add approximately eight to ten tiny white dots in the remaining red spaces. A small French knot or two short stitches worked over the same spot will create each dot. Space them irregularly, as in the reference, and leave the smile area uncluttered.
Check the wrong side before continuing. Loose embroidery loops can catch while you join the panels, so secure and trim every end now. The back panel will cover this work.
5. Crochet Two Pink Cheeks
With pink yarn, work 6 sc in MR. Join to the first sc with a sl st, pull the ring closed, and fasten off with a sewing tail. Each cheek has 6 sc; the joining slip stitch is not counted.
Flatten each tiny circle and sew it below and slightly outside an eye position. Catch only the front panel with your sewing stitches. Keep the stitches around the cheek edge small so the circle remains round rather than becoming a tight lump.
