
6. Finish the Smiling Face
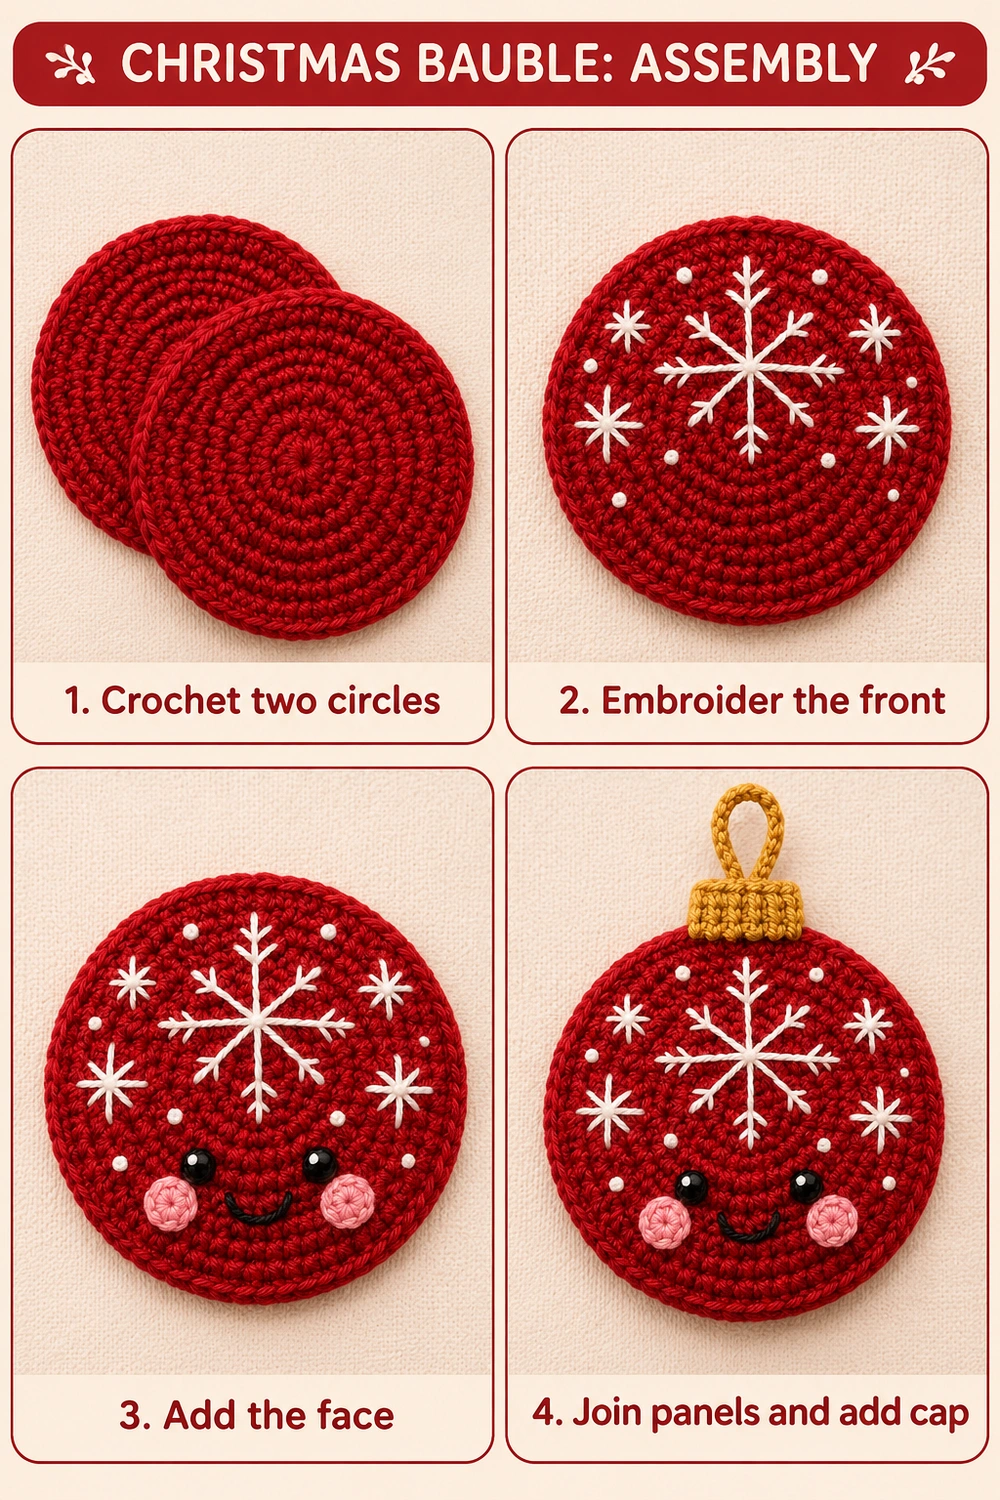
Attach the eyes in the lower third of the front panel, approximately six to eight stitches apart. The exact spacing depends on the finished diameter and the eyes you choose. Keep the cheeks slightly below eye level. If using safety eyes, install the washers before joining the panels.
For embroidered eyes, fill two small round shapes with closely spaced black stitches and add one tiny white highlight to each. This gives a similar bright expression without plastic hardware.
Embroider a small U-shaped smile centered between the cheeks. Use three or four short backstitches to follow the curve instead of pulling one long strand tightly across the fabric. Secure the ends behind the front panel. Check that the circle still lies flat.
7. Make the Ribbed Gold Cap
With mustard gold yarn, ch 4.
- Row 1: starting in the second chain from the hook, sc in each chain. (3)
- Rows 2–8: ch 1, turn, sc BLO in all 3 sts. (3 per row)
Fasten off with a long tail. The eight short rows form a small rectangle. Rotate it so the ridges run vertically and the eight-row edge runs across the top of the bauble. This creates the ribbed cap shown in the reference.
Do not close the rectangle into a tube. It is a flat cap appliqué. Its lower portion will overlap the red circle, and its upper portion will extend above it. If the cap needs gentle flattening, dampen it lightly and shape it with your fingers.
8. Crochet the Gold Hanging Loop
With gold yarn, ch 24 and fasten off, leaving a long tail at both ends. Fold the chain in half to form a narrow loop. The two chain ends will be secured behind the cap, while the curved top remains free.
Place both ends together at the marked top of the back panel. Stitch them firmly through several red stitches, taking several small passes. Position the cap over this attachment area later so it hides the ends. Do not rely on the gold cap alone to carry the ornament’s weight.
9. Join the Two Red Panels
Place the circles together with wrong sides facing inward and align the marked top positions. Match all 48 stitches around the circumference. Use the long red tail to whipstitch the corresponding edge stitches together, keeping the seam even and relaxed.
For a flat finish, close the entire edge without stuffing. For a lightly padded ornament, stop with a small opening, spread a thin layer of filling inside, then complete the seam. The center should remain low and disk-shaped; avoid packing it into a ball.
As you close the top edge, stitch through the hanging loop attachment area again to reinforce it. Secure the red tail and hide it inside the panels. Smooth the seam with your fingers.
10. Sew on the Cap and Check the Finish
Center the gold rectangle at the top with its lower edge overlapping the red circle. Sew the lower and side edges securely, catching the red panels beneath. Keep the loop visible above the cap and cover its lower attachment ends.
Inspect the ornament from front and back. The cap should sit upright, the loop should be centered, and the face should appear level. Give the loop a gentle tug over a soft surface to check the stitches before hanging the decoration.
If a small area of the red edge curls, dampen that area and let the ornament dry flat. Avoid pressing plastic eyes with an iron. For cleaning, gently spot clean and allow the piece to dry completely before storing it.
Reading the Two Tabletop Charts
The two chart photographs at the end show the same bauble construction in different tabletop settings. The red circular field represents the eight single crochet rounds, while the gold top marks the separately sewn cap and chain loop. Decorative dashed markings indicate embroidery placement rather than additional crochet stitches.
Follow the written round list for the exact six increases in each round. Crochet the cheeks and cap separately, then sew them on as described above. The charts support the overall shape and placement; they do not turn embroidery or sewing into crochet stitches.
More Christmas Crochet Projects
Pair this smiling bauble with the Santa Star Ornament Crochet Pattern, the Green and White Christmas Tree, or the White Lace Angel for a handmade tree collection.
Photo Tutorial, Tabletop Charts and Pinterest Images
Save the visual tutorial, both chart photographs, and the three project images below for your next Christmas crochet session. All six images are grouped here after the complete written pattern.
More Free Crochet Patterns
Find your next handmade project with these lovely patterns.
Christmas Lace Star Crochet Pattern – Free Five-Point Ornament Guide
View Pattern →
Granny Stitch Gingerbread Crochet Pattern – Free Ornament Guide
View Pattern →
Blue Lace Snowflake Crochet Pattern – Free Ornament Guide
View Pattern →
CONTENT END 1
