
This hanging holder keeps three spare rolls tidy and in reach. A long sage green panel with a pointed top and bottom carries three round cups. Each cup has a braided cable down the front and a cream rim of tiny ball picots, and the same cream picots run around the whole panel.
The look is soft and natural, a good fit for a bathroom with plants, wood and white tile. It uses just two colors: sage green for the body and cream for the trim.
The pattern uses US crochet terms. The finished holder measures about 7.25 in (18.4 cm) wide and 23 in (58.4 cm) long. With the hanging loop, it is about 24.5 in (62.2 cm) long.
You make four pieces. The panel is worked in rows of single crochet, starting at the bottom point. Each pocket is worked in the round, from a flat base up into walls with a cable. Then you add a cream border to the panel and sew the pockets onto it.
Finished Size and Construction
- Finished size: 7.25 in (18.4 cm) wide x 23 in (58.4 cm) long; 24.5 in (62.2 cm) with the loop
- Skill level: Intermediate (front post cables, shaping)
- Terminology: US
- Yarn weight: Worsted (#4)
- Hook: 5.0 mm (H-8)
- Number of pieces: 4 (1 panel, 3 pockets)
- Layout: 1 column of 3 pockets on the panel
- Panel size before border: 6.25 in (15.9 cm) x 22 in (55.9 cm)
- Pocket size: base 4.75 in (12.1 cm) across; walls 3.75 in (9.5 cm) tall
- Border depth: about 0.5 in (1.3 cm)
Materials
Use a smooth worsted-weight yarn in cotton or a cotton blend. It shows the cables clearly and holds its shape when loaded with rolls. The amounts below assume about 200 m per 100 g.
- Sage green (A): 200 g, about 400 m
- Cream (B): 40 g, about 80 m
Tools:
– 5.0 mm (H-8) crochet hook
– Tapestry needle
– 4 locking stitch markers
– Rust-proof pins and a blocking mat
– Measuring tape
– Scissors
The yarn amounts include a margin of about 15% for your gauge sample and small differences in tension.
Abbreviations (US Terms)
- ch: chain
- sl st: slip stitch
- sc: single crochet
- hdc: half double crochet
- dc: double crochet
- tr: treble crochet
- sc2tog / sc3tog: single crochet 2 (or 3) together
- BLO: back loop only
- FPdc / FPtr: front post double / front post treble crochet
- MR: magic ring
- st(s): stitch(es); sp: space; rnd: round
Special stitch: mini bobble picot (mbp). Ch 3. *Yarn over, insert the hook in the 3rd ch from the hook, pull up a loop, yarn over and pull through 2 loops. Repeat from * 2 more times (4 loops on the hook). Yarn over and pull through all 4 loops. This makes a small ball that sits on top of the edge.
Cables (worked over 9 sts):
– Cross A: Skip 3 sts, FPtr around each of the next 3 sts, then FPtr around each of the 3 skipped sts, working in front of the ones you just made. Finish with FPdc around each of the next 3 sts.
– Cross B: FPdc around each of the next 3 sts, skip 3 sts, FPtr around each of the next 3 sts, then FPtr around each of the 3 skipped sts, working behind the ones you just made.
Skip the stitch behind each post stitch you make.
Gauge and Checkpoints
- Single crochet rows: 16 sts and 18 rows = 4 in (10.2 cm)
- Half double crochet rounds: 16 sts and 12 rnds = 4 in (10.2 cm)
Make one pocket first and use it as your gauge test. It has every stitch in the pattern, and it tells you right away whether a roll will fit.
Checkpoints:
– Pocket after Rnd 10: the base is 4.75 in (12.1 cm) across and lies flat.
– Pocket after Rnd 20: the wall is about 3.4 in (8.6 cm) tall and fits around a roll with a little room.
– Panel after Row 11: 13 sts, 3.25 in (8.3 cm) wide.
– Panel after Row 23: 25 sts, 6.25 in (15.9 cm) wide.
– Panel after Row 99: 22 in (55.9 cm) long.
If your pieces come out too large, go down a hook size, to 4.5 mm. If they are too small, or a roll won’t fit in the pocket, go up to 5.5 mm. Fix your gauge before you start the panel. The pocket and panel stitch counts are planned to line up when you sew them together.
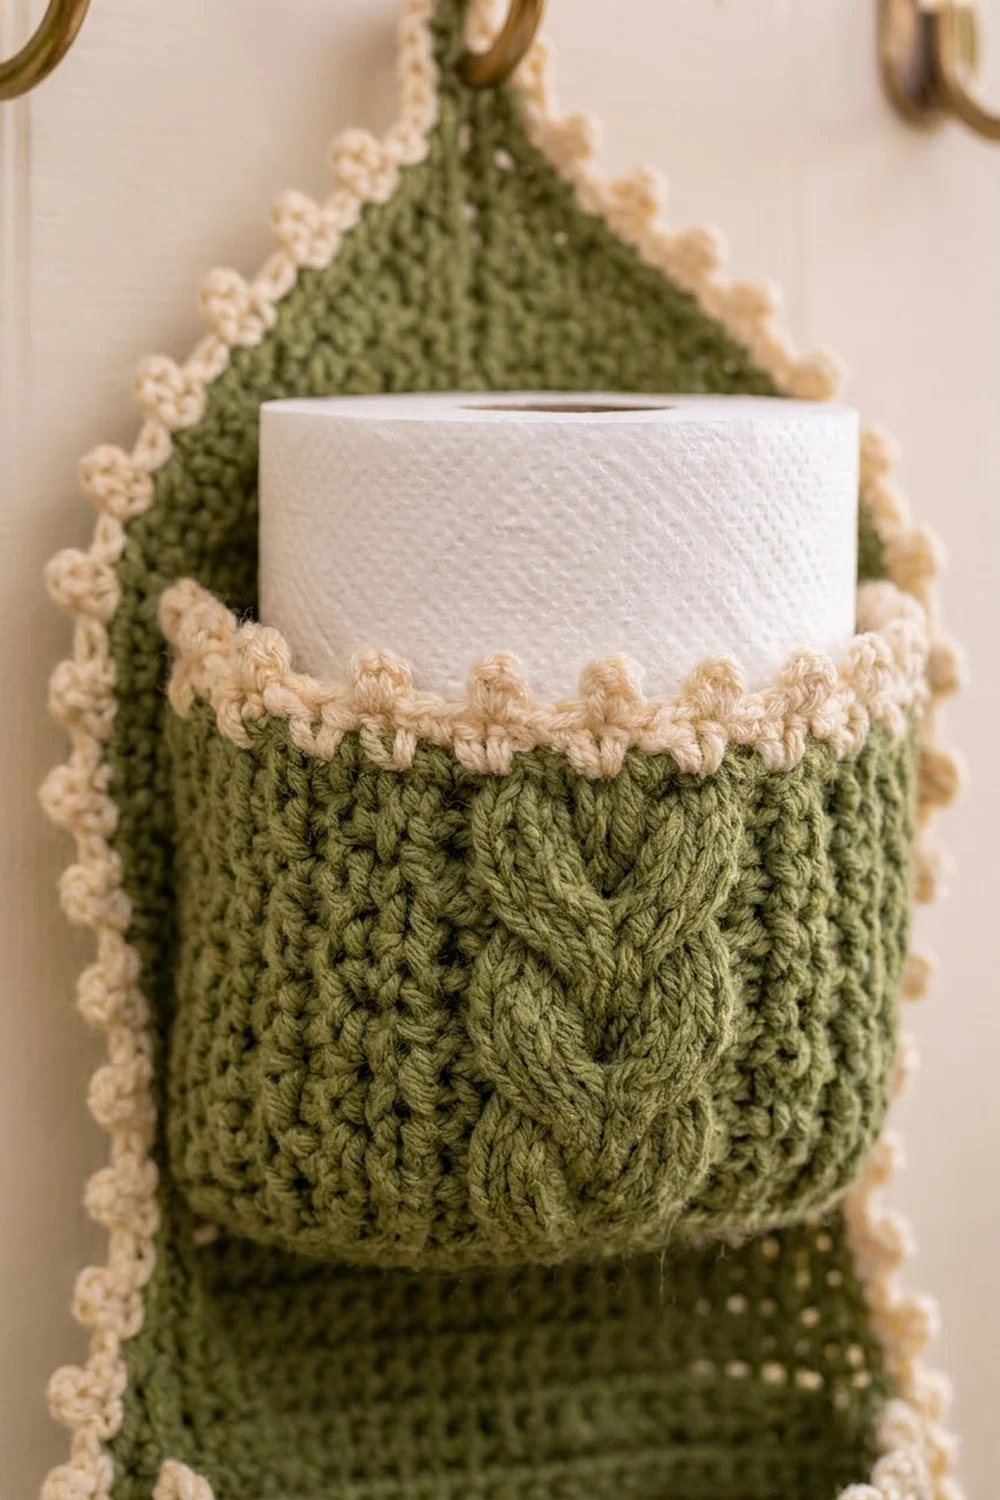
Pocket (Make 3)
Base
Use A.
Rnd 1: In a MR, ch 1, work 6 sc. Join with a sl st to the first sc. (6 sts)
Rnd 2: Ch 1, 2 sc in each st, join. (12 sts)
Rnd 3:Ch 1, 6 times, join. (18 sts)
Rnd 4:Ch 1, 6 times, join. (24 sts)
Rnds 5–10: Keep going the same way. Each round, work 1 more sc before each increase. Rnd 5 has 30 sts, Rnd 6 has 36, Rnd 7 has 42, Rnd 8 has 48 and Rnd 9 has 54. Rnd 10is 6 times, for60 sts.
The base is now 4.75 in (12.1 cm) across.
Walls and Braided Cable
Rnd 11 (turning round): Ch 1, sc BLO in each st, join. (60 sts)
The unused front loops form a ridge, and the edge starts to turn upward.
Rnd 12 (setup): Ch 2 (does not count as a st), hdc in next 25 sts, dc in next 9 sts, hdc in next 26 sts, join. (60 sts)
Rnd 13: Ch 2, hdc in next 25 sts, Cross A over the next 9 sts, hdc in next 26 sts, join. (60 sts)
Rnd 14: Ch 2, hdc in next 25 sts, FPdc around each of the next 9 sts, hdc in next 26 sts, join. (60 sts)
Rnd 15: Work as for Rnd 13, but use Cross B in place of Cross A. (60 sts)
Rnd 16: Repeat Rnd 14.
Rnds 17–20: Repeat Rnds 13–16 once more. (60 sts)
The cable crosses to the left, then to the right, and so on, which forms the braid. Fasten off A.
Rim
Rnd 21: Join B with a sl st in the joining st. Ch 1, sc in each st, join. (60 sts)
Rnd 22:Ch 1, 30 times, join. (60 sc, 30 mbp)
Fasten off and leave a 24 in (61.0 cm) tail for sewing.
The cable sits on sts 26–34 and is centered on st 30. The back of the pocket is the 21 sts across from it: sts 50–60 plus sts 1–10. Place markers on st 50 and st 10 in both Rnd 21 and Rnd 11.
Back Panel
Use A. You work the panel in rows, starting at the bottom point. Turn at the end of every row. The ch 1 at the start of a row does not count as a st.
