
This holder is made of three stocking pockets hung one above the other on soft side straps from a wooden ring. Each pocket holds one standard roll, so your spares stay out on display and are easy to reach.
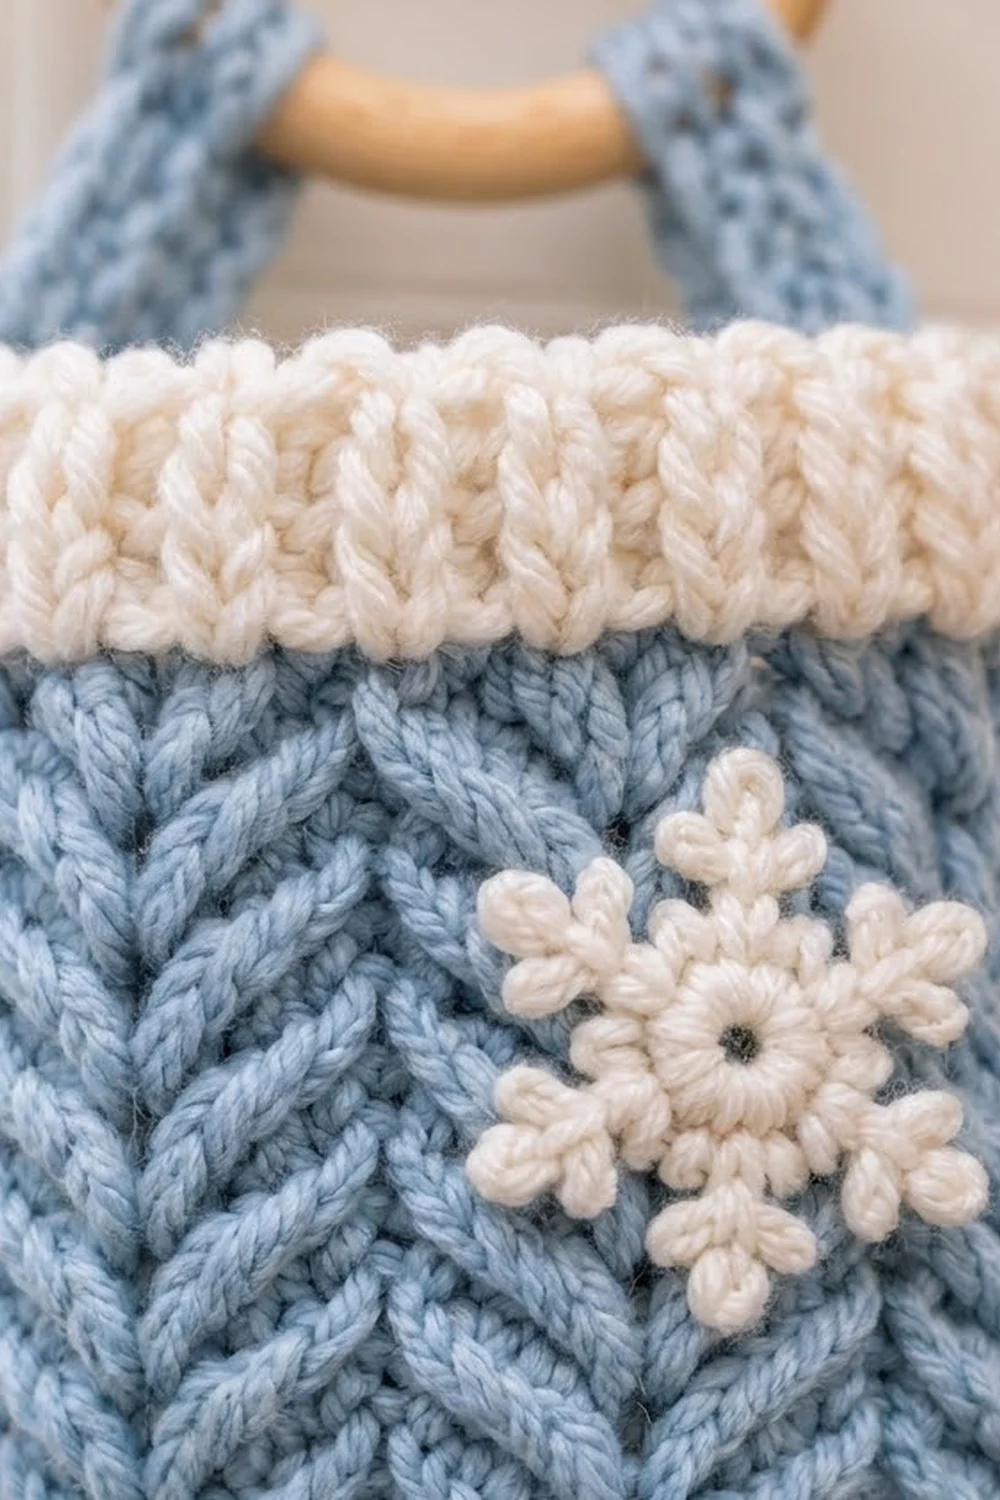
The color scheme is light blue and cream. The blue body has raised, crossed post stitches that form vertical braids, a bit like a cabled knit sweater. Each pocket has a cream ribbed cuff, a rounded toe on one side and a small cream snowflake on the front.
The pattern uses US crochet terms. The finished holder is about 6.2 in (15.7 cm) wide and 19 in (48.3 cm) long, including a 3 in (7.6 cm) ring. Each pocket is 4.9 in (12.4 cm) across and 4 in (10.2 cm) tall.
Each pocket is worked from the bottom up. You crochet a flat circle for the base, turn the edge up into a wall, work the braid rounds and then add the cuff in cream. A small toe cup and a snowflake are sewn on. Finally, two long straps are sewn to the sides of all three pockets and folded over the ring.
Finished Size and Construction
- Finished size: about 6.2 in (15.7 cm) wide x 19 in (48.3 cm) long, including the ring
- Skill level: Intermediate (front and back post stitches, working in rounds)
- Terminology: US
- Yarn weight: Worsted (#4)
- Hook: 5.0 mm (H-8)
- Number of pieces: 3 pocket bodies with cuffs, 3 toes, 3 snowflakes, 2 straps, 1 wooden ring
- Layout: 1 column x 3 pockets, stacked vertically
- Pocket size: 4.9 in (12.4 cm) diameter x 4 in (10.2 cm) tall
- Size before border (body wall only): 2.75 in (7.0 cm) tall
- Border (cuff) depth: 1.25 in (3.2 cm)
Materials
Use a smooth worsted-weight acrylic or cotton-blend yarn. A plied, slightly springy yarn shows the braids best. Avoid fuzzy or brushed yarns, because they hide the crossed stitches.
- Light blue (Color A): 150 g, about 300 m (328 yd), for bodies, toes and straps
- Cream (Color B): 50 g, about 100 m (109 yd), for cuffs and snowflakes
These amounts include a safety margin of about 15–20%. Each pocket uses roughly 35 g of blue and 10 g of cream. The two straps use about 16 g of blue together.
Tools:
- 5.0 mm (H-8) crochet hook
- One wooden ring, 3 in (7.6 cm) outer diameter
- Stitch marker
- Tapestry needle
- Scissors
- Small handful of fiberfill for the toes
- Rustproof pins and a tape measure
Abbreviations (US Terms)
- ch – chain
- sl st – slip stitch
- sc – single crochet
- dc – double crochet
- inc – 2 sc in the same stitch
- BLO – back loop only
- FPdc – front post double crochet
- BPdc – back post double crochet
- MR – magic ring
- st(s) – stitch(es)
- rnd – round
Special stitches
Braid cross (BC): Skip the next st. FPdc around the next st. Then, working in front of the FPdc you just made, FPdc around the skipped st. This uses 2 sts and makes 2 sts.
Picot: Ch 3, then sl st in the 3rd ch from the hook.
Gauge and Checkpoints
- Single crochet: 14 sc x 16 rnds = 4 in (10.2 cm)
- Double crochet: 14 dc x 8 rnds = 4 in (10.2 cm)
That works out to 3.5 sts per inch. Each sc round is about 0.25 in (0.6 cm) tall and each dc or post round is about 0.5 in (1.3 cm) tall.
Make one complete pocket first and check it against these measurements before you make the other two:
- After base Rnd 5, the circle is 2.7 in (6.9 cm) across.
- After base Rnd 9, the circle is 4.9 in (12.4 cm) across.
- After body Rnd 11, the wall is 0.75 in (1.9 cm) tall.
- After body Rnd 15, the wall is 2.75 in (7.0 cm) tall.
- After the cuff, the wall is 4 in (10.2 cm) tall.
If the base is larger than 5.1 in (13.0 cm), switch to a 4.5 mm hook. If it is smaller than 4.7 in (11.9 cm), switch to a 5.5 mm hook. Either way, the pocket has to fit a standard roll, which is about 4.3 in (10.9 cm) across.
Pocket Body (Make 3)
Work with Color A. Join each round with a sl st to the first stitch. The beginning chain does not count as a stitch.
Base
Rnd 1: 6 sc in MR, join. (6)
Rnd 2: Inc in each st around, join. (12)
Rnd 3: Sc 1, inc 6 times, join. (18)
Rnd 4: Sc 1, inc, sc 1 6 times, join. (24)
Rnd 5: Sc 3, inc 6 times, join. (30)
Checkpoint: the circle is 2.7 in (6.9 cm) across.
Rnd 6: Sc 2, inc, sc 2 6 times, join. (36)
Rnd 7: Sc 5, inc 6 times, join. (42)
Rnd 8: Sc 3, inc, sc 3 6 times, join. (48)
Rnd 9: Sc 7, inc 6 times, join. (54)
Checkpoint: the circle is 4.9 in (12.4 cm) across and 15.4 in (39.1 cm) around. It should lie flat. If it ruffles, your stitches are too loose. If it cups, they are too tight.
Wall
Rnd 10 (turning round): Ch 1, sc BLO in each st around, join. (54)
The unused front loops make a ridge that turns the base edge up into a wall. Put a marker in the first stitch of this round. That column is the left side of the pocket: stitches 1–27 are the front half and stitches 28–54 are the back half.
Rnd 11: Ch 2, dc in each st around, join. (54)
This round sets up the posts for the braid.
Checkpoint: the wall is 0.75 in (1.9 cm) tall.
Rnd 12: Ch 2, BC, BPdc around next st 18 times, join. (54: 36 FPdc in 18 crosses + 18 BPdc)
Rnds 13–15: Ch 2, BC over the 2 FPdc of the previous round, BPdc around the BPdc 18 times, join. (54 in each round)
Because each new cross sits right on top of the last one, the crosses stack into vertical braids. The BPdc between them sinks back to separate each braid. You get 9 braid columns across the front and 9 across the back.
Checkpoint: the wall is 2.75 in (7.0 cm) tall. Fasten off Color A.
Toe (Make 3)
Work with Color A in continuous rounds and move your marker up each round.
Rnd 1: 6 sc in MR. (6)
Rnd 2: Inc in each st. (12)
Rnd 3: Sc 1, inc 6 times. (18)
