
- Row 1: Ch 65. Sc in the 2nd ch from the hook and across. (64) Turn.
- Rows 2–32: Ch 1, sc in each st across. (64) Turn.
Checkpoint: the panel measures 16 in x 8 in (40.6 cm x 20.3 cm). Do not fasten off; you work the border next.
Hanging Tabs (Make 3)
Use light blue.
- Row 1: Ch 7. Sc in the 2nd ch from the hook and across. (6) Turn.
- Rows 2–17: Ch 1, sc 6. (6) Turn.
- Row 18: Ch 1, sc 2, ch 2, skip 2, sc 2. (4 sc + ch-2 space) Turn.
- Row 19: Ch 1, sc 2, 2 sc in the ch-2 space, sc 2. (6) Turn.
- Row 20: Ch 1, sc 6. (6) Fasten off.
Each tab is 1.5 in x 5 in (3.8 cm x 12.7 cm).
Make All Pieces
Light blue: 1 panel, 3 pockets and 3 tabs.
Cream: 3 pocket rims, the panel border, 3 bodies and 3 heads.
Medium blue: 3 hats and 3 scarves.
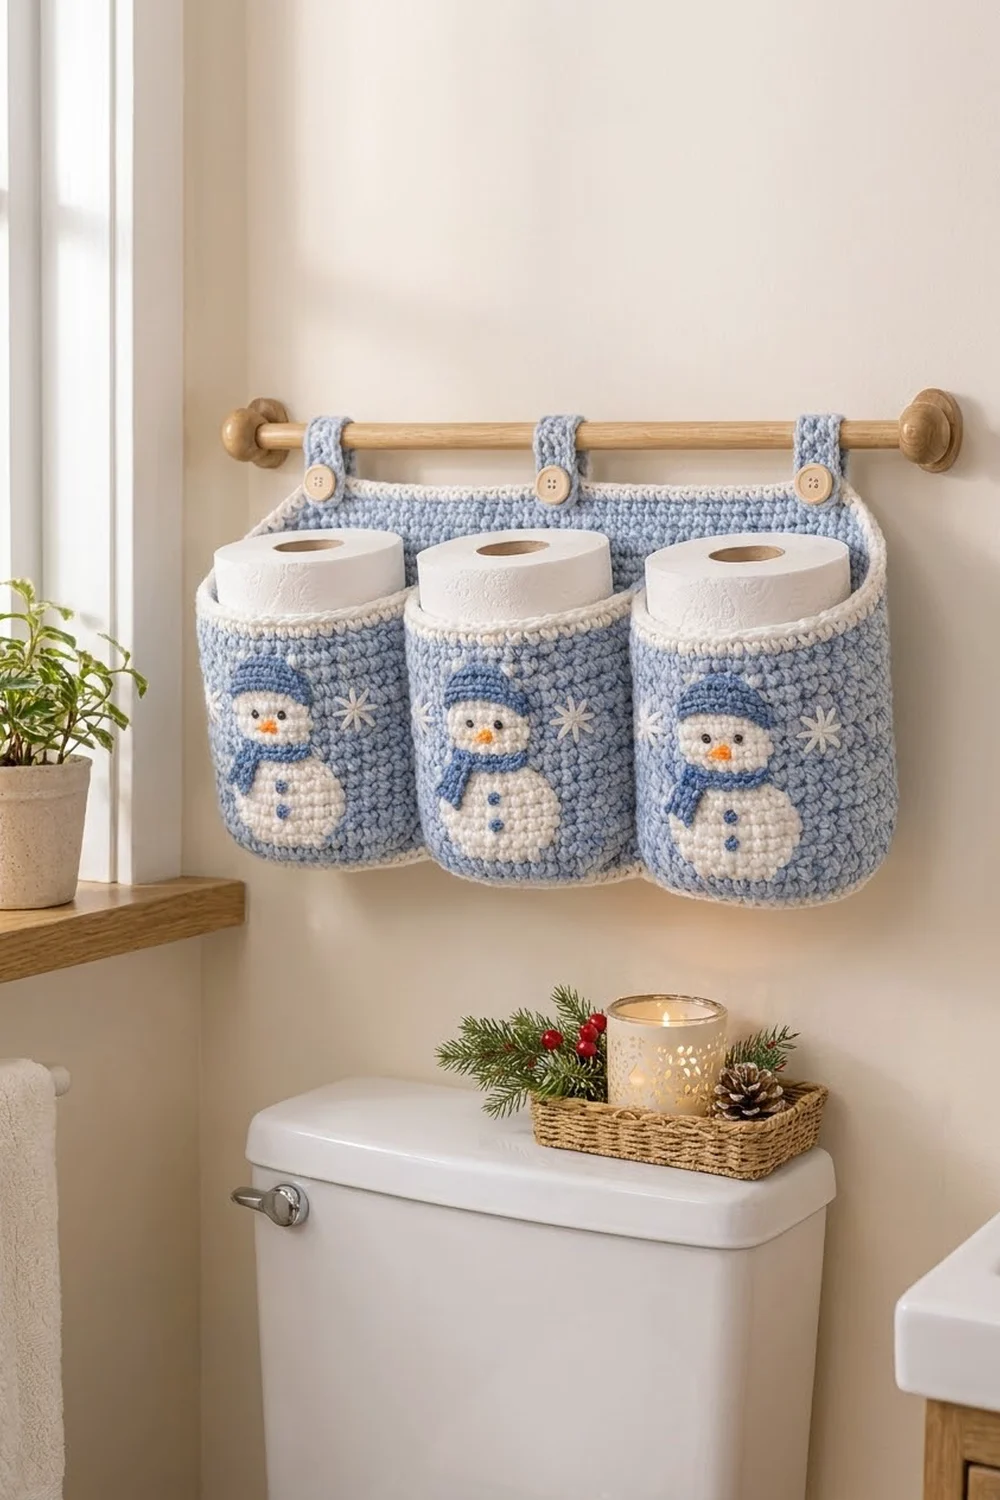
Here is how the pieces fit together, seen from the front:
Border
Border gauge: the border uses the same gauge, 16 sts = 4 in (10.2 cm). Use cream.
Rnd 1: Join cream in the last st of Row 32.
- Ch 1. Work 3 sc in the first st of the top edge, sc in each of the next 62 sts, then 3 sc in the last st.
- Down the side, sc in each row end of Rows 31 through 2. (30)
- Along the foundation chain, work 3 sc in the first ch, sc in each of the next 62 ch, then 3 sc in the last ch.
- Up the other side, sc in each of 30 row ends.
- Sl st to the first sc.
Count: 188 sts worked 1 per existing stitch or row end, + 8 added at the corners = 196. Between corner groups, that is 62 sts on the top and bottom and 30 on each side.
Rnd 2: Ch 1. Sc in each st around, working 3 sc in the center sc of each corner group. Join.
Count: 196 + 8 = 204. Between corner groups, that is 64 sts on the top and bottom and 32 on each side. Fasten off.
Why the math works: your gauge is square, so 1 sc per row end matches 1 sc per stitch, and the edge lies flat. Each border round adds 0.25 in (0.6 cm) on every side. The 2 extra sc at each corner per round keep the corners square. Two rounds turn 16 in x 8 in into 17 in x 9 in (43.2 cm x 22.9 cm).
Joining
Method: whipstitch with light blue through both loops of the panel and the pocket wall.
Pocket positions: count stitches along Row 1 of the panel.
| Back seam lines | Center | |
|---|---|---|
| Left | sts 10 and 17 | 3.25 in (8.3 cm) from the panel’s left edge |
| Middle | sts 29 and 36 | the panel center |
| Right | sts 48 and 55 | mirrors the left pocket |
The centers are 4.75 in (12.1 cm) apart, exactly one pocket width, so the pockets touch without crowding. Each outer pocket sits 0.875 in (2.2 cm) in from the panel edge, or 1.375 in (3.5 cm) in from the outer edge of the border.
Stitch-to-stitch logic:
- Set each pocket’s base on the bottom border.
- Pocket rounds 11–32 line up with panel rows 1–22, 1 round to 1 row, because the round and row gauges match.
- Sew two vertical seams per pocket, joining one wall stitch to each panel row along each seam line.
- Tack the back edge of the base to the bottom border.
- Where neighboring pockets touch, tack them together across Rnds 14–28.
Tension: sew snugly but don’t pull. The pocket should stay round, not flatten.
Size checkpoint: the three pockets span 14.25 in (36.2 cm). The panel shows 2.5 in (6.4 cm) above the rims, plus the border.
Tabs:
1. Sew Rows 1–4 of each tab to the back of the panel over Rows 27–30, centered over sts 5–10, sts 30–35 and sts 55–60.
2. Sew a button to the front of the panel at Row 30, under each tab.
3. Slide the dowel through, fold each tab over it to the front, and button it.
If you’re using plastic canvas, slip it behind the panel before you sew the tabs on.
Final Blocking
- Lightly mist the holder with water.
- Stuff each pocket with a toilet roll or a rolled towel so it dries round.
- Pin the panel flat to 17 in x 9 in (43.2 cm x 22.9 cm).
- Square the corners with a ruler.
- Let it dry completely, then remove the pins.
Final Quality-Control Checklist
- [ ] The panel measures 17 in x 9 in (43.2 cm x 22.9 cm).
- [ ] Each pocket is 4.75 in (12.1 cm) across and holds a roll upright.
- [ ] The rims are even, with 60 rev sc each.
- [ ] Border counts were 196, then 204, and the corners are square.
- [ ] The snowmen are centered, with the hat tops on Rnd 27.
- [ ] Faces and buttons are secure, and the snowflakes are symmetrical.
- [ ] The tabs are evenly spaced and the buttons fasten easily.
- [ ] All ends are woven in.
Troubleshooting
- Pocket base cups or ripples: a cupped base means your tension is too tight; ripples mean it’s too loose. Recheck gauge on Rnd 10.
- Walls flare out: check that you have 60 sts. Rnd 11 must be worked in BLO.
- Border ruffles: skip one side row end per round.
- Border pulls in: add 1 sc on each side.
- Panel sags: add the plastic canvas insert.
- Pockets tip forward: extend the back seams upward through the rim rounds.
- Snowman puckers: take smaller whipstitches and don’t pull them tight.
- Tab is too long: move the button up one row.
Care
Hand wash in cool water, press out excess water, and dry flat with the pockets stuffed into shape. Remove the dowel before washing.
Final Notes
Here is the measurement chain from start to finish:
1. Gauge is 16 sts and 16 rows = 4 in (10.2 cm).
2. Each pocket base is a 60-stitch circle, 4.75 in (12.1 cm) across.
3. Walls rise to 5.5 in (14.0 cm) with the rim.
4. The panel is 64 sts x 32 rows, or 16 in x 8 in (40.6 cm x 20.3 cm).
5. Two border rounds (196, then 204 sts) bring it to 17 in x 9 in (43.2 cm x 22.9 cm).
6. Three pockets spaced 4.75 in (12.1 cm) apart fill 14.25 in (36.2 cm) of the front.
If you check each number along the way, the holder will hang straight. Happy crocheting!
