
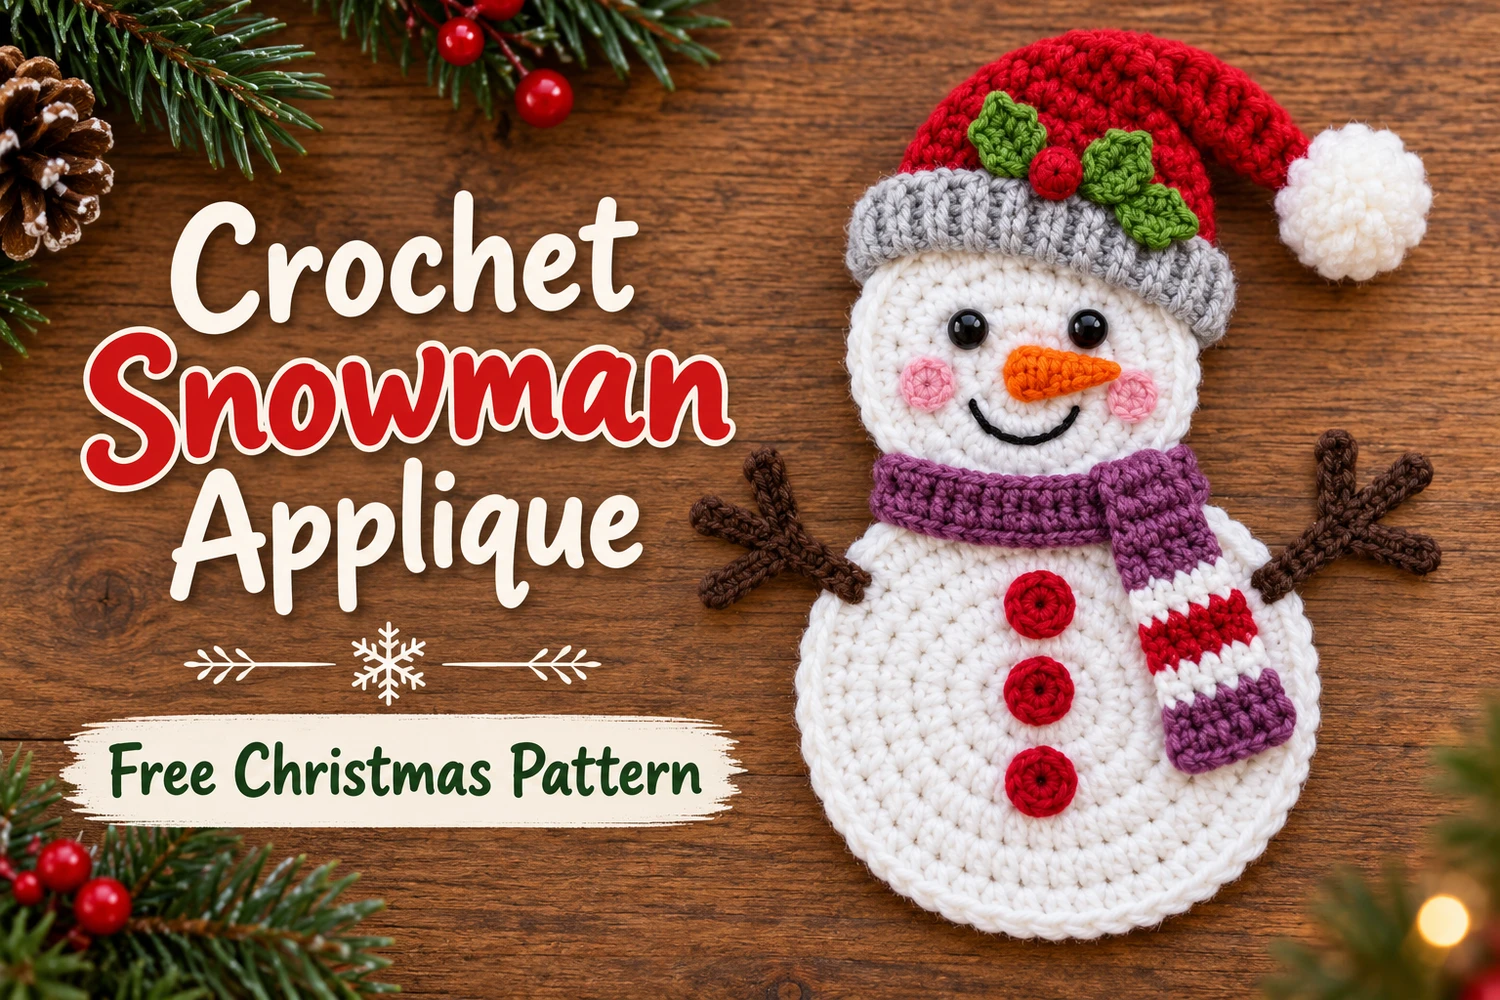
This Striped Scarf Snowman Applique Crochet Pattern creates a cheerful flat snowman with two white circles, a red Santa hat, a light gray ribbed brim, and a mauve scarf with a red-and-white striped tail. Brown twig arms, rosy cheeks, an orange carrot nose, and three red buttons complete the reference-inspired design.
Crochet the circles and small details separately, then sew them into one applique. The body stays flat and unstuffed. The red cap bends toward a white pompom on the right, with four green leaves and one red berry near the brim.
Pattern Information
- Skill level: intermediate; flat circles, turned rows, small appliques, and assembly.
- US crochet terminology.
- Estimated height: 18–23 cm with sport cotton and a 2.5 mm hook. Actual size depends on tension and placement.
- Colors: white, red, light gray, mauve, dark brown, green, orange, pink, and black.
- Construction: separate head and body circles, flat hat, ribbed brim, scarf pieces, twig arms, and sewn details.
This is an image-inspired adaptation. Stitch totals and repeats have been reviewed, but the pattern has not been physically crocheted or independently tested. Follow the written construction and use the images as appearance references.
Materials
- Sport cotton: approximately 20–25 g white, 10 g red, and small amounts of the other colors.
- 2–2.5 mm hook matched to your yarn.
- Tapestry needle, scissors, stitch markers, and pins.
- Two small black sew-on beads or black embroidery thread for eyes.
- Black embroidery thread for the smile.
- A small white yarn pompom, approximately 2 cm wide, or extra white yarn to make one.
- Blocking mat and rustproof pins.
For a decoration that may be handled by children, embroider the eyes instead of using beads. This pattern is a sewn applique rather than a stuffed toy.
Responsivo Post 01 – P1
Abbreviations and Notes
- MR: magic ring; ch: chain; sl st: slip stitch; sc: single crochet.
- hdc: half double crochet; dc: double crochet; tr: treble crochet.
- inc: 2 sc in one stitch; sc2tog: single crochet two stitches together.
- BLO: back loop only. R: round or row as identified.
- Work the circles in continuous rounds, marking the first stitch.
- Ch 1 at the start of turned rows does not count as a stitch.
- Keep long tails on small pieces for sewing. No stuffing or wire is used in the circles or arms.
Striped Scarf Snowman Applique Crochet Pattern
1. Large White Body Circle
- R1: 6 sc in MR .
- R2: inc six times .
- R3: (sc, inc) six times .
- R4: (2 sc, inc) six times .
- R5: (3 sc, inc) six times .
- R6: (4 sc, inc) six times .
- R7: (5 sc, inc) six times .
- R8: (6 sc, inc) six times .
Sl st in the next stitch to smooth the edge, then fasten off with a long tail. The finishing sl st is not included in the 48-stitch total. Weave the MR tail securely through the back. Spread the circle flat without adding stuffing.
2. Smaller White Head Circle
Work R1–R6 of the body instructions with white, ending at 36 sc. Sl st in the next stitch and fasten off with a long sewing tail. The head should be visibly smaller than the body.
Lightly dampen and block both circles flat. If an edge ruffles, check that each round has exactly six increases. If a circle cups, check for missed increases or overly tight stitches. Let the pieces dry before adding the face.
3. Red Santa Cap — Flat Rows
With red, ch 15. Row 1: starting in the second chain, sc across . Turn. Row 2: ch 1, 14 sc . Turn.
Row 3: ch 1, sc2tog, 10 sc, sc2tog . Row 4: ch 1, 12 sc . Row 5: ch 1, sc2tog, 8 sc, sc2tog . Row 6: ch 1, 10 sc . Turn at the end of each row.
Row 7: ch 1, sc2tog, 6 sc, sc2tog . Row 8: ch 1, 8 sc . Row 9: ch 1, sc2tog, 4 sc, sc2tog . Row 10: ch 1, 6 sc .
Row 11: ch 1, sc2tog, 2 sc, sc2tog . Row 12: ch 1, 4 sc . Row 13: ch 1, sc2tog twice . Row 14: ch 1, sc2tog . Fasten off with a long tail.
Keep the lower edge broad. Bend the upper third toward the right, then tack the folded section to itself with two hidden red stitches. This is a flat cap silhouette; do not sew its sides into a cone or add stuffing.
Responsivo Post 02 – P2
4. Light Gray Ribbed Brim
With light gray, ch 5. Row 1: sc in the second chain and each remaining chain . Turn. Rows 2–25: ch 1, sc in BLO across , turning after every row. Fasten off with a long tail.
The short four-stitch rows form the brim depth, while the 25 rows form its length. Curve the strip across the lower edge of the red hat. Sew its upper long edge to the hat, hiding the hat foundation beneath it. Let a little gray brim project at each side.
Fit the brim against your actual head before securing its ends; ribbed fabric can compress gently. If necessary, add or remove a few four-sc rows to match your tension, keeping the strip curved rather than stretched tight.
5. White Pompom and Green Hat Decoration
Make or use a small white yarn pompom about 2 cm wide. Tie its center firmly with a long white strand, trim the shape, and sew it to the folded right tip of the red hat with several passes. Keep the attachment short.
Green leaves — make four: ch 5. Starting in the second chain, work sc, hdc, dc, then (sc, ch 2, sc) in the last chain. Along the unused underside, work dc, hdc, sc in the next three chain positions. Join to the first sc and fasten off. Each leaf has 8 stitches plus a ch-2 tip.
Red berry: work 6 sc in MR, sl st to the first sc, and fasten off. Leave unstuffed. Sew the four leaves as a small rosette near the right side of the gray brim and sew the berry over their bases.
6. Mauve Neck Band and Striped Tail
Neck band:with mauve, ch 16. Row 1: starting in the second chain, hdc across . Row 2: ch 1, turn, hdc in BLO across . Fasten off with a long tail. Curve the band under the head, compressing its ends gently if needed to fit.
Scarf tail:with mauve, ch 6. Row 1: sc from the second chain across . Row 2: ch 1, turn, 5 sc. Change color on the final pull-through of the last stitch, then continue turning at each row.
Rows 3–4: white, 5 sc per row. Rows 5–7: red, 5 sc per row. Rows 8–9: white, 5 sc per row. Rows 10–12: mauve, 5 sc per row. Fasten off and weave the color-change tails along the back edges.
Sew the top edge of the striped tail under the left end of the neck band. Let it angle down the left side of the body, as in the reference. Tack the back of the lower tail to the body with a few hidden stitches so it stays flat.
