
Row 59: Repeat Row 56. (12 sts)
Row 60: Repeat Row 56. (10 sts)
Row 61: Repeat Row 56. (8 sts) Do not fasten off if you are going straight into the border. Otherwise, fasten off.
Checkpoint: The taper adds 2.4 in (6.1 cm), for a total of 24.4 in (62.0 cm). The top edge is about 2.3 in (5.8 cm) wide.
Strap
With Color A, ch 41.
Row 1: Sc in 2nd ch from hook and in each ch across, turn. (40 sc)
Rows 2–4: Ch 1, sc in each st across, turn. (40 sc each row)
Fasten off and leave a 12 in (30.5 cm) tail. The strap measures 10 in × 0.9 in (25.4 cm × 2.3 cm).
Make All Pieces
- Color A only: 1 backing panel, 1 strap
- Color A + Color B: 4 pockets (Rounds 1–11 in A, Rounds 12–13 in B)
Layout grid, front view, bottom row first:
Measure every height from the panel’s bottom foundation edge, before the border.
Joining
Sew the pockets on now, before the border, so your measurements match the grid.
Method: Whipstitch with Color A and a tapestry needle.
Stitch-to-stitch logic: Each pocket attaches along one back section of 12 sts, which equals one Ripple Repeat. Centre that section on the round joins so the seam line is hidden.
- Lay the panel right side up. Place a marker at each pocket height from the grid. All the marks fall on panel rows that are 5.5 in (14.0 cm) apart.
- Flatten the back of a pocket against the panel. Line the 12 back stitches of Round 6 up horizontally across the panel, centred, about 1.5 in (3.8 cm) in from each long edge at the corners of the section.
- Whipstitch those 12 sts of Round 6 to the panel. Work 1 stitch through each sc and into the panel fabric directly behind it.
- Whipstitch up both vertical edges of the back section, from Round 6 to Round 13. Use 1 stitch per round on the dc rounds and 1 stitch per sc round, for 8 stitches per side.
- Repeat for the other three pockets.
Tension advice: Pull each stitch snug but not tight. If you over-tighten, the panel puckers and the wall loses its curve.
Size checkpoint: The top of Pocket 4 sits at 20.5 in (52.1 cm). A roll standing in it reaches about 21 in (53.3 cm), which is still below the start of the taper at 22 in (55.9 cm). Between pockets, there is 1.5 in (3.8 cm) of clearance above each roll, so you can grab it easily.
Border
Border gauge: sc at 4 sts per 1 in (2.5 cm), as in the sc gauge.
With Color A and the right side facing, join at the bottom right corner.
Round 1:
– Bottom edge: 3 sc in first foundation st, sc in next 18 sts, 3 sc in last st. (24 sc)
– Left side, body (Rows 1–55):Work along the row ends as across each group of 5 rows.(88 sc)
– Left side, taper (Rows 56–61): 2 sc in each row end. (12 sc)
– Top edge (8 sts): 2 sc in first st, sc in next 6 sts, 2 sc in last st. (10 sc)
– Right side, taper: 2 sc in each row end. (12 sc)
– Right side, body: Repeat the 5-row sequence. (88 sc)
– Sl st to first sc. Total: 234 sc (24 + 88 + 12 + 10 + 12 + 88).
Why the math works: The body is 22 in (55.9 cm) tall, and 22 × 4 sc = 88, so the sides lie flat with no ruffling. Across the 8 sides of hdc rows, 8 sc for every 5 rows equals 4 sc per inch. The bottom edge has 20 sts across 5.75 in (14.6 cm), with 2 extra sc in each corner to let the corners curve. When blocked, they become the rounded corners you see in the photo.
Checkpoint: The panel now measures 6.25 in × 24.9 in (15.9 cm × 63.2 cm).
Attach the strap: Fold the strap into a loop. Sew 1 in (2.5 cm) of one end onto the back of the left side of the taper. Sew the other end onto the back of the right side, without twisting the strap. That leaves 8 in (20.3 cm) of free strap, which forms an arch about 3.5 in (8.9 cm) high. Stitch through both layers twice for strength.
Final Blocking
- Weave in all remaining ends, and secure them in seams where you can.
- Spray the whole holder with water until it is evenly damp, not dripping.
- Lay the panel flat, right side up, and pin it to 6.25 in × 24.9 in (15.9 cm × 63.2 cm).
- Shape the bottom corners into smooth curves with your fingers and pin.
- Stuff each pocket with a dry toilet roll wrapped in plastic so the walls dry rounded.
- Pinch each mint wave peak upward to sharpen the scallops.
- Leave it to dry completely, usually 24 hours, before hanging.
Final Quality-Control Checklist
- [ ] Each pocket has 60 sts in Rounds 5–13
- [ ] 5 even wave peaks on every pocket
- [ ] Panel is 20 sts wide through Row 55 and 8 sts at Row 61
- [ ] Border has 234 sc
- [ ] Pocket bases at 0.5, 6, 11.5, and 17 in (1.3, 15.2, 29.2, and 43.2 cm)
- [ ] Pockets centred, with no puckering behind them
- [ ] Strap secured with double stitching
- [ ] All ends woven in and hidden
Troubleshooting
Waves look crooked: Your increases have drifted. Start every ripple round in the first st so the repeats line up.
Base cups before Round 6: Your tension is tight. Loosen up or go up a hook size for the base only.
Base ruffles: Your tension is loose, or the increases are uneven. Check the count of 60.
Panel narrows partway up: You are missing the last st of a row. Count 20 sts every 10 rows.
Pocket sags forward: The side seams are too short. Sew all 8 rounds on both sides.
Border waves: You worked too many sc per row end. Stick to 8 sc per 5 rows.
Care
Hand-wash in cool water with mild soap, press out the water in a towel, and dry flat with the pockets reshaped. Do not tumble dry.
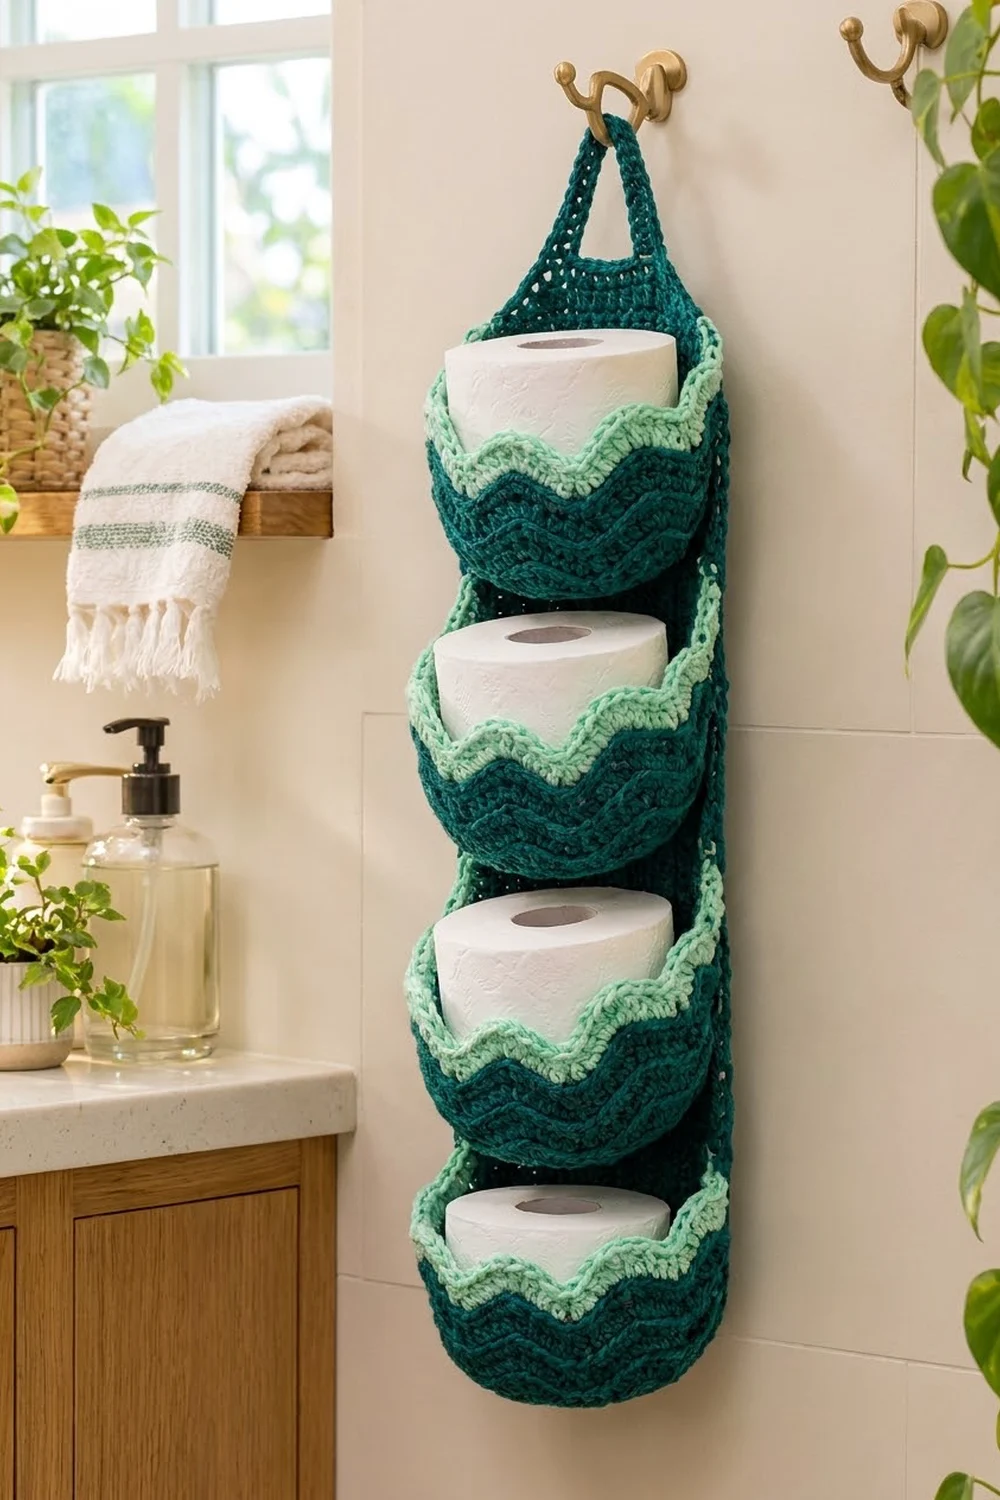
Final Notes
Here is the measurement chain:
– The pocket base reaches 5.5 in (14.0 cm) at 60 sts, and the walls rise to 3.5 in (8.9 cm).
– The panel reaches 5.75 in × 24.4 in (14.6 cm × 62.0 cm), and the 234-st border brings it to 6.25 in × 24.9 in (15.9 cm × 63.2 cm).
– Four pockets placed 5.5 in (14.0 cm) apart sit neatly below the taper.
If you check each link in that chain as you go, the finished holder will hang straight and hold every roll securely.
Happy crocheting!
