
This White Lace Angel Crochet Pattern creates a small, delicate Christmas ornament with a flat oval-shaped head, tiny fan wings, and a flared dress finished with open chain scallops. A thin white cord makes it easy to hang the angel on a branch, a gift package, or a handmade garland.
The design follows the simple all-white appearance of the reference. Fine cotton shows the radiating stitches clearly, and the light, unstuffed pieces lie flat when stored between the holidays.
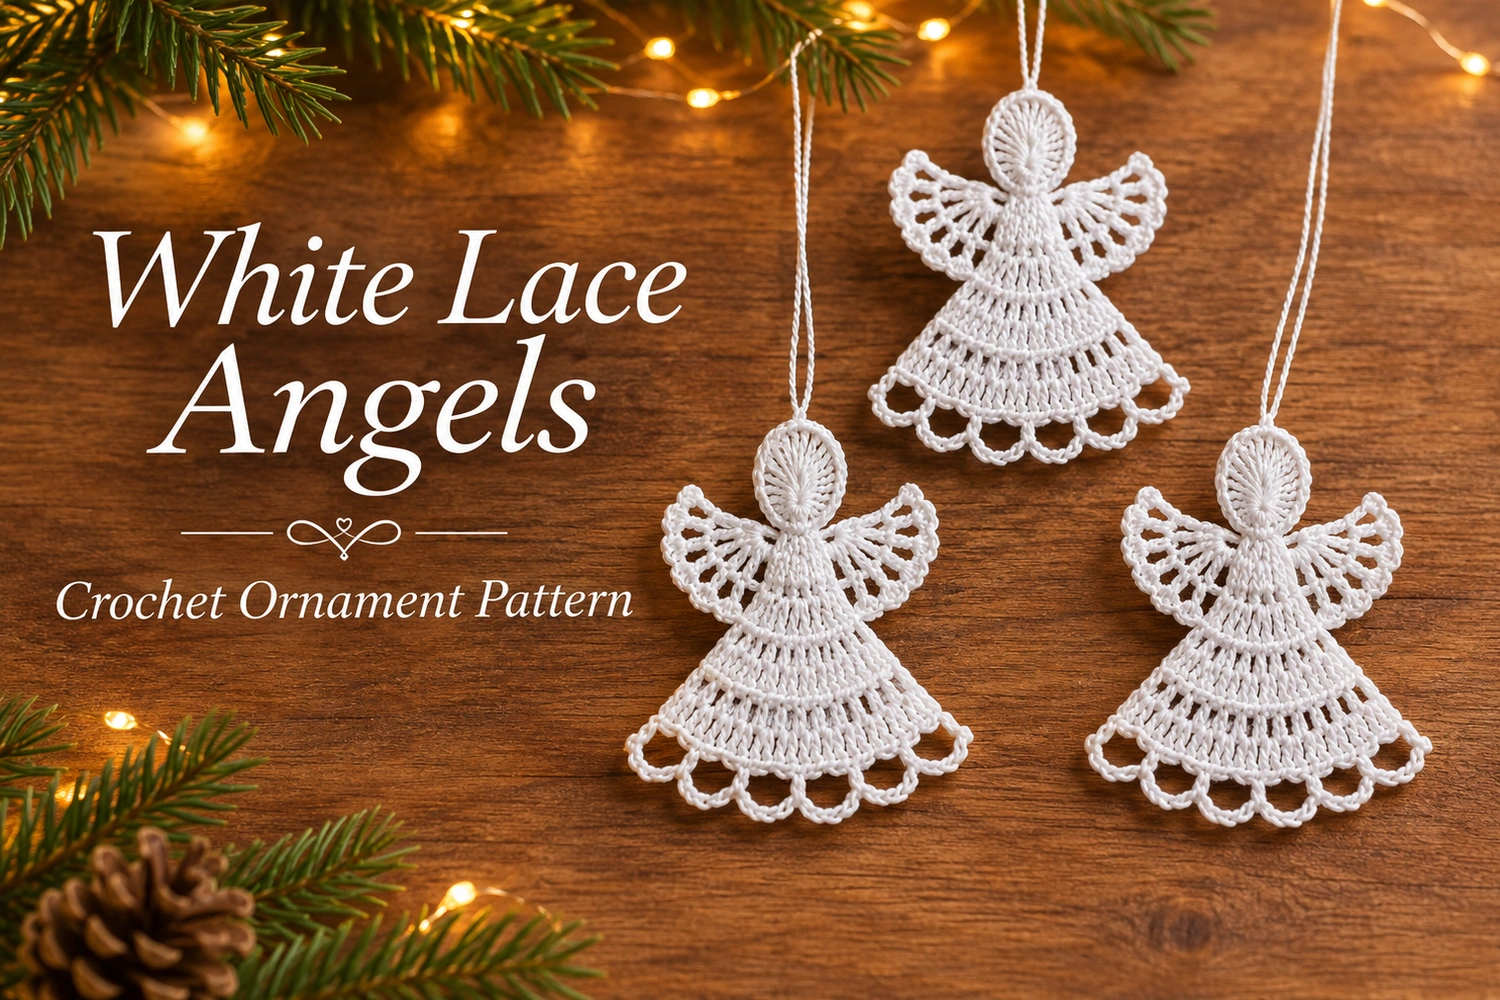
White Lace Angel Crochet Pattern: Project Details
- Skill level: confident beginner, with basic experience working into a ring and sewing small motifs together.
- Terms: US crochet terminology.
- Estimated size: about 6–8 cm tall, excluding the hanging cord; size depends on thread, hook, and blocking.
- Construction: a separate flat head, a three-row fan dress, and two small wings sewn at the neck.
- Appearance: white throughout, no face, no halo, and no stuffing.
This is an original image-inspired adaptation, not a transcription of another designer’s instructions. Stitch totals have been reviewed, but this version has not been physically crocheted or independently tested. Follow the written instructions for exact construction.
Materials
- Approximately 4–6 g of white size 3 crochet cotton, or another smooth fine cotton.
- A 2–2.25 mm hook, or a size suitable for your chosen thread.
- Tapestry needle and small scissors.
- A thin white cotton cord, about 18–20 cm long, for hanging.
- Blocking mat and rustproof pins.
- Optional suitable fabric stiffener if you prefer a firmer ornament.
Use the same cotton for the head, dress, and wings so the little pieces remain in proportion. A smooth thread keeps the open hem easy to see. If substituting a thicker yarn, expect a larger ornament and use a matching hook rather than trying to force heavy yarn through a very small hook.
Responsivo Post 01 – P1
Abbreviations and Counting Notes
- MR: magic ring.
- ch: chain.
- sl st: slip stitch.
- sc: single crochet.
- dc: double crochet.
- st / sts: stitch / stitches.
- ch-sp: chain space.
A beginning ch 3 counts as one dc wherever it starts a head round, dress row, or wing fan. The ch 1 at the start of the scalloped hem does not count as a stitch. Space chains are counted separately. The stitches in each fan are ordinary dc worked into the same ring or indicated stitches; do not join them at the top into a cluster.
1. Make the Flat Head
Make an MR. Ch 3, work 11 dc into the ring, and pull the ring closed. Join with a sl st to the top of the beginning ch 3.
Fasten off with a 15 cm sewing tail. Flatten the circle gently. During blocking, shape it into a slightly upright oval, keeping its lower edge narrow enough to meet the dress at the neck. The head remains flat and unstuffed.
Weave the MR starting tail through several stitches on the back before trimming it. Keep the longer finishing tail available for sewing. Do not add eyes or a mouth: the reference relies on the simple silhouette.
2. Crochet the Fan Dress
Make the dress separately. Ch 4 and join with a sl st to the first chain, forming a small foundation ring. This ring will sit below the head at the neck. Work back and forth in rows, not around the full ring.
- Row 1: Ch 3 and work 6 dc into the foundation ring. Turn.
- Row 2: Ch 3 and dc in the first st; work 2 dc in each of the next 5 sts; work 1 dc in the top of the beginning ch 3 from Row 1. Turn.
- Row 3 — open scalloped hem: Ch 1, sc in the first dc; (ch 5, skip 1 dc, sc in the next dc) 6 times.
Fasten off, leaving a sewing tail if desired. The dress widens through two dense rows of radiating stitches. Six open arches finish the lower edge without filling the spaces with another row of solid stitches.
Check Row 2 before working the hem: the first stitch receives the beginning ch 3 and one dc, the next five stitches receive two dc each, and the final stitch receives one dc. That makes 13 dc. The hem starts in dc 1 and anchors after each skipped stitch in dc 3, 5, 7, 9, 11, and 13.
3. Make Two Tiny Fan Wings
For each wing, ch 4 and join with a sl st to the first chain to form a small ring. Ch 3, work 4 dc into the ring, then ch 3 and sl st back into the ring.
Responsivo Post 02 – P2
Fasten off with a long sewing tail. Make a second identical wing. Each wing is a small flat fan, with its ring at the inner shoulder and its broad curved edge pointing outward. The return chain rounds the free side of the fan; it is not counted as another dc.
Lay the wings beside one another before sewing. Compare all five dc on each one and make sure their return chains have equal tension. You can flip one wing when placing them behind the neck to create a mirrored arrangement.
4. Block the Pieces
Lightly dampen the head, dress, and wings. Pin the head into a gentle upright oval, spread the dress evenly, and open all six hem arches. Shape each small wing into a balanced fan.
