
This Green and White Christmas Tree Crochet Pattern makes a delicate flat ornament with green fan stitches, snowy white scalloped edges, and a white satin bow. A matching green loop completes the top, ready to hang among your Christmas decorations.
The tree follows the reference’s three widening layers: a small fan at the top, two fans across the middle, and three fans along the bottom. White edging highlights each layer while leaving the green lace openings visible.
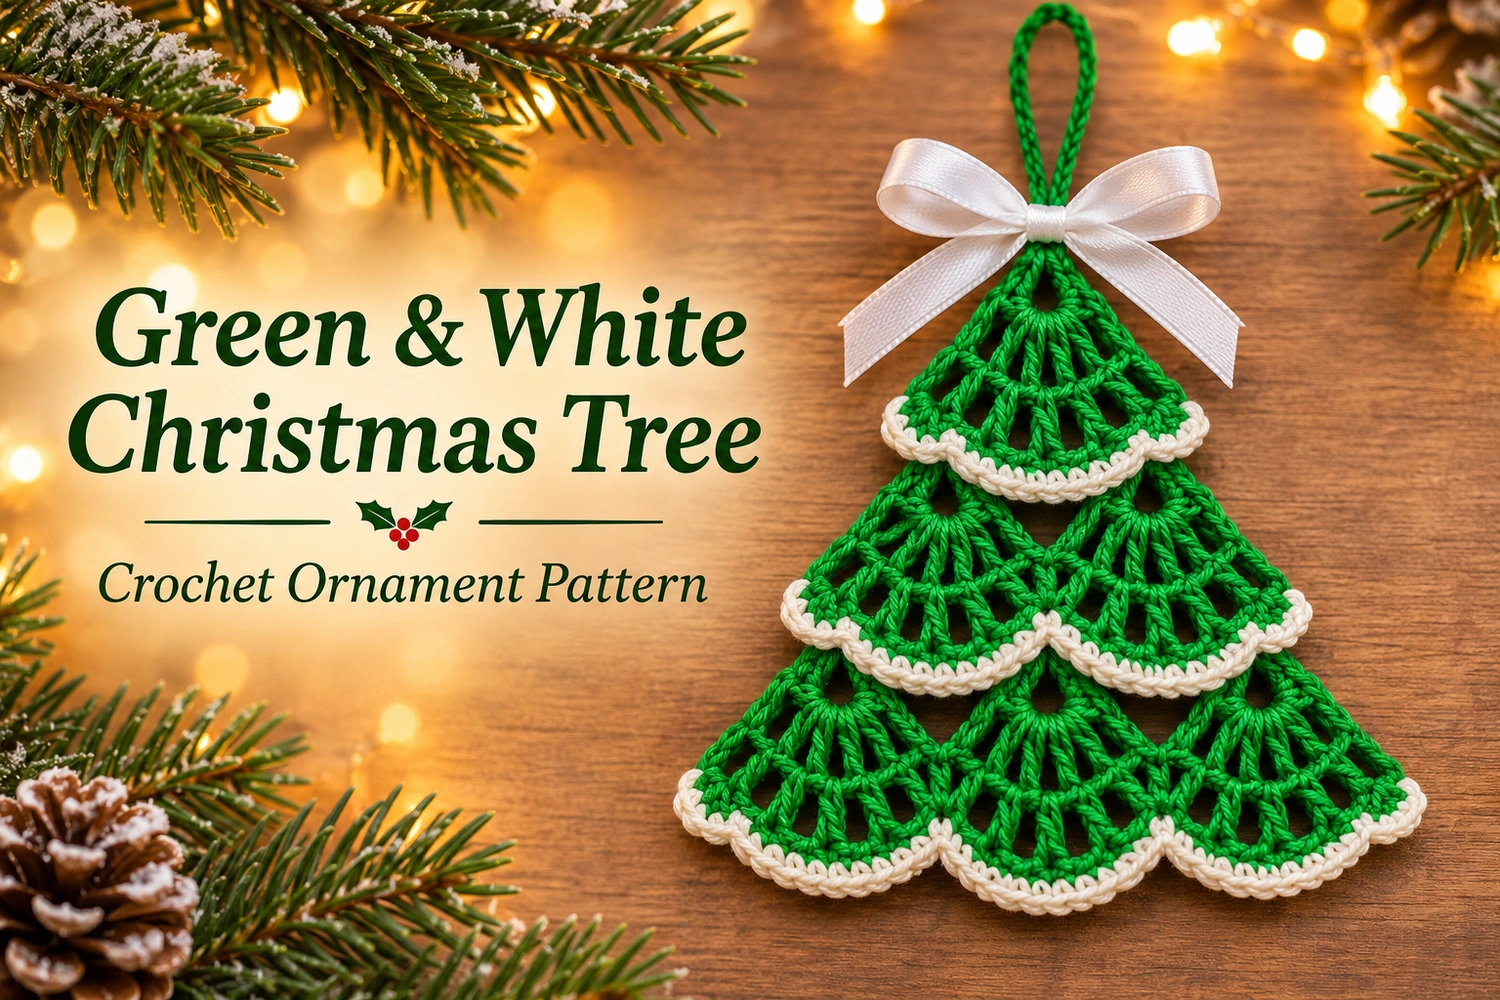
Green and White Christmas Tree Crochet Pattern: Project Details
- Skill level: confident beginner with some experience reading turning rows and adding surface edging.
- Terms: US crochet terminology.
- Estimated size: approximately 8–11 cm tall for the tree itself, excluding the hanging loop; the final size depends on yarn, hook, and blocking.
- Construction: a five-row green triangle with one, two, and three seven-dc fans, white edging added afterward, and a separately attached bow and hanger.
- Finish: flat, unstuffed, with no trunk or tassel.
This is an original image-inspired adaptation, not a transcription of another designer’s instructions. Stitch arithmetic has been reviewed, but the pattern has not been physically crocheted or independently tested. Follow the written instructions for the exact stitch counts.
Materials
- Approximately 10–12 g of smooth sport-weight cotton in bright Christmas green.
- Approximately 3–5 g of matching-weight cotton in ivory or white.
- A 2.5–3 mm crochet hook, or a size that makes defined, flexible stitches.
- About 25–30 cm of white satin ribbon, approximately 10–15 mm wide.
- Tapestry needle, sewing needle, matching sewing thread, and scissors.
- Blocking mat and rustproof pins.
Use the same yarn weight for the green motif and white edging. A much thicker white yarn can overwhelm the lace or make the edges ripple. Smooth cotton keeps the fan shapes clear and allows the finished tree to hold its outline after blocking.
Responsivo Post 01 – P1
Abbreviations and Counting Notes
- ch: chain.
- sl st: slip stitch.
- sc: single crochet.
- dc: double crochet.
- st / sts: stitch / stitches.
- ch-sp: chain space.
- Shell / fan: 7 dc worked in the indicated space.
- FLO: front loop only, the loop nearest you with the right side facing.
The beginning ch 3 in Row 1 counts as the first dc. Beginning ch 1 on the following rows does not count as a stitch. Chain spaces are counted separately from sc and dc totals. All green fans contain seven dc; they are ordinary stitches worked into the same space, not a cluster joined together at the top.
1. Crochet the Green Tree
With green, ch 4 and join with a sl st to the first chain, making a small foundation ring. Work back and forth in rows. This ring will be the narrow tip of the tree.
- Row 1 — top fan: Ch 3, then work 6 dc into the ring. Turn.
- Row 2 — two arches: Ch 1, sc in the first dc; ch 3, skip 2 dc, sc in the fourth dc of Row 1; ch 3, skip 2 dc, sc in the top of the beginning ch 3. Turn.
- Row 3 — middle fans: Ch 1, sc in the first sc; work 7 dc in the first ch-3 space, sc in the middle sc; work 7 dc in the second ch-3 space, sc in the final sc. Turn.
- Row 4 — three arches: Ch 1, sc in the first sc; ch 3, skip the first 3 dc of the first fan, sc in its fourth dc; ch 3, skip the remaining 3 dc, the middle sc, and the first 3 dc of the second fan, sc in its fourth dc; ch 3, skip the remaining 3 dc, sc in the final sc. Turn.
- Row 5 — bottom fans: Ch 1, sc in the first sc; (7 dc in the next ch-3 space, sc in the next sc) 3 times.
Fasten off green and weave in the ends at the back. Lay the triangle with the foundation ring at the top and the three fans at the bottom. Mark the right side so the white edging can be worked consistently from the front.
Before edging, check the fan arrangement: one top fan, two middle fans, and three bottom fans. The six fans contain 42 dc altogether. Rows 2 and 4 connect them with open arches; do not fill those arches with extra stitches.
Check the Middle Arch Placement
In Row 4, the fourth dc of each middle fan is an anchor. The center ch-3 arch spans the valley between those two fans. It skips three dc on the first fan, the green sc in the valley, and three dc on the next fan. No additional sc is worked into that valley.
This placement creates exactly three spaces for the bottom row. If you count four spaces, undo Row 4 and check the anchors before continuing. Each bottom fan needs its own ch-3 space.
2. Add White Edging to Each Fan Layer
Add three separate white edging passes with the right side facing you. These passes follow the curved dc tops on green Rows 1, 3, and 5. Rows 1 and 3 are already joined to later rows, so gently lift the green joining stitches and insert the hook through the accessible front loop of the original dc top. Do not catch the later chain arch or pull the join out of shape.
Work one sc for each dc, keeping the white stitches relaxed. The white edging sits on the front of the green row as a raised snowy line; it does not replace any green stitches. For Row 1’s beginning ch 3, work the first white sc into the top chain loop to match the six neighboring dc.
Responsivo Post 02 – P2
- Top layer, over Row 1: Join white at the first dc of the fan. Ch 1, sc in FLO of each of the seven dc, including the beginning ch 3. Fasten off.
- Middle layer, over Row 3: Join white with a sl st in the first green sc. Work sc in FLO of each of the next 7 dc, sl st in the middle green sc; sc in FLO of each of the next 7 dc, sl st in the final green sc. Fasten off.
- Bottom layer, over Row 5: Join white with a sl st in the first green sc. Work (sc in FLO of each of the next 7 dc, sl st in the next green sc) 3 times. Fasten off.
Weave each white tail into the back of its own edging, then into neighboring green stitches on the back if needed. Keep the white ends out of the open chain spaces. Do not join the three edging passes along the sides: the separate passes preserve the layered appearance.
