
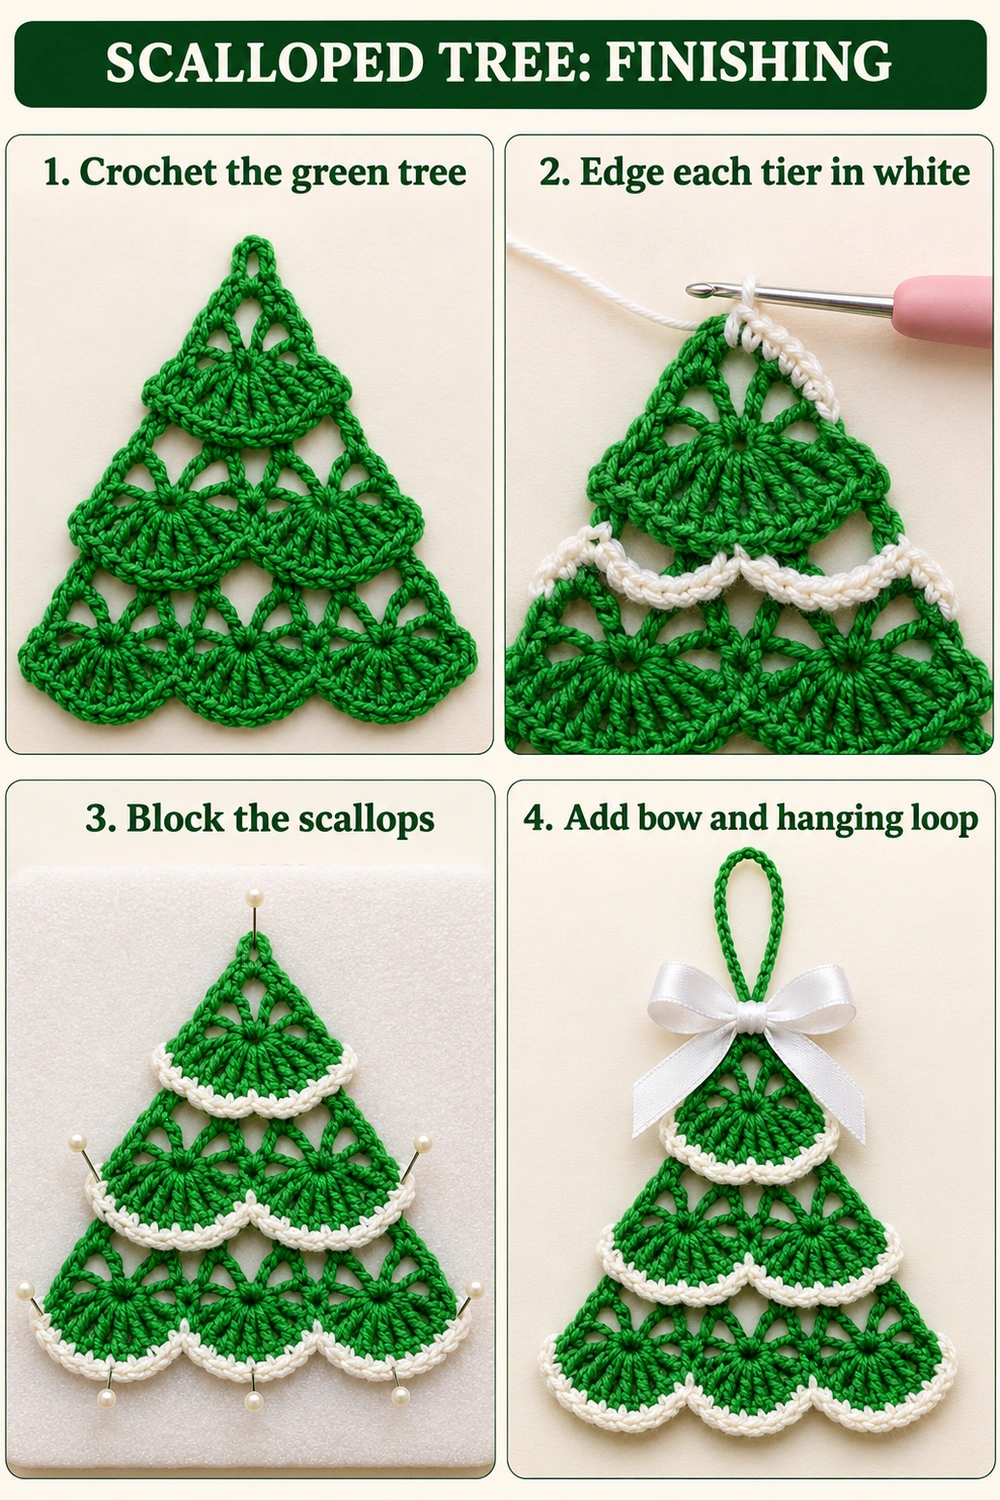
Lightly dampen the crochet before adding the ribbon. Place the foundation ring at the top and arrange the three lower fans into a balanced hem. Spread the two middle fans evenly and keep their white edges visible.
Pin the outer curves gently. Open the lace spaces without stretching them into long gaps. Let the ornament dry completely before removing the pins. If the white edges pucker, ease the white sc along the green row; tight edging can make the fans fold inward.
4. Make and Attach the Hanging Loop
With a separate length of green yarn, ch 24. Fasten off with a sewing tail at each end. Bring the ends together to form the loop and sew both ends securely through the small foundation ring at the tree’s tip.
Take several sewing passes through the ring and nearby green stitches, then weave in the tails on the back. The loop should stand above the tree in a narrow oval. You may adjust its length to suit your branch or display hook.
5. Finish with the White Satin Bow
Tie the satin ribbon into a small bow, adjusting the loops until they are even. Position the bow at the base of the hanging loop, just over the green foundation ring. Trim the ribbon tails diagonally.
With matching sewing thread, take a few small stitches through the back of the bow’s knot and the green stitches at the tip. The bow is a decorative attachment; the crochet hanging loop supports the ornament. Keep the bow small enough to leave the first green fan visible.
Reading the Two Tabletop Crochet Charts
Both chart images show one complete tree diagram on a sheet above the finished ornament lying on a craft table. Read the green motif from its foundation ring at the narrow tip down through five rows. The fan rows have one, two, and three seven-dc shells, separated by the chain-arch rows.
Ovals represent chains, a filled dot represents a slip stitch, a plus sign represents sc, and a slashed T represents dc. The lighter edging marks refer to the white stitches added over the three fan rows afterward. The ribbon bow is attached after blocking; it is not made from crochet stitch symbols. Follow the written instructions for each edging pass and its anchors.
Helpful Finishing Tips
- Wrong bottom fan count: check that Row 4 contains three ch-3 spaces and four sc anchors.
- White edge ripples: use one white sc per green dc, without adding increases.
- Tree folds inward: relax the white edging and avoid tightening the slip stitches in the valleys.
- Layers look crowded: open the chain arches gently during blocking, keeping the fans symmetrical.
- Bow hides the tip: reduce its loops and shorten its tails before sewing it on.
More Free Christmas Crochet Patterns
- Green Fan Stitch Tree with Tassel
- Lavender Angel Ornament
- Lace Bell Ornament
Save Your Green and White Christmas Tree Crochet Pattern
Make a little snowy-edged tree for your Christmas display or a handmade gift. Save this guide for your next holiday crochet afternoon. Happy crocheting from Lovely Amigurumi!
Photo Tutorial, Two Tabletop Charts, and Pinterest Images
The six images below include a finishing tutorial, two matching chart-and-piece tabletop views, and three Pinterest images to save for later.
More Free Crochet Patterns
Find your next handmade project with these lovely patterns.
Christmas Lace Star Crochet Pattern – Free Five-Point Ornament Guide
View Pattern →
Granny Stitch Gingerbread Crochet Pattern – Free Ornament Guide
View Pattern →
Blue Lace Snowflake Crochet Pattern – Free Ornament Guide
View Pattern →
CONTENT END 1
