
This Santa Claus Keychain Crochet Pattern creates a palm-sized Father Christmas with a tall red hat, white beard, black boots, and a black belt with a gold buckle. Two white hat stripes and a tiny green holly detail give the little Santa the cheerful finish shown in the reference.
The legs join into one stuffed body, the head continues above it, and the arms and facial details are sewn on separately. Finish with a silver clasp attached through a reinforced yarn loop at the top.
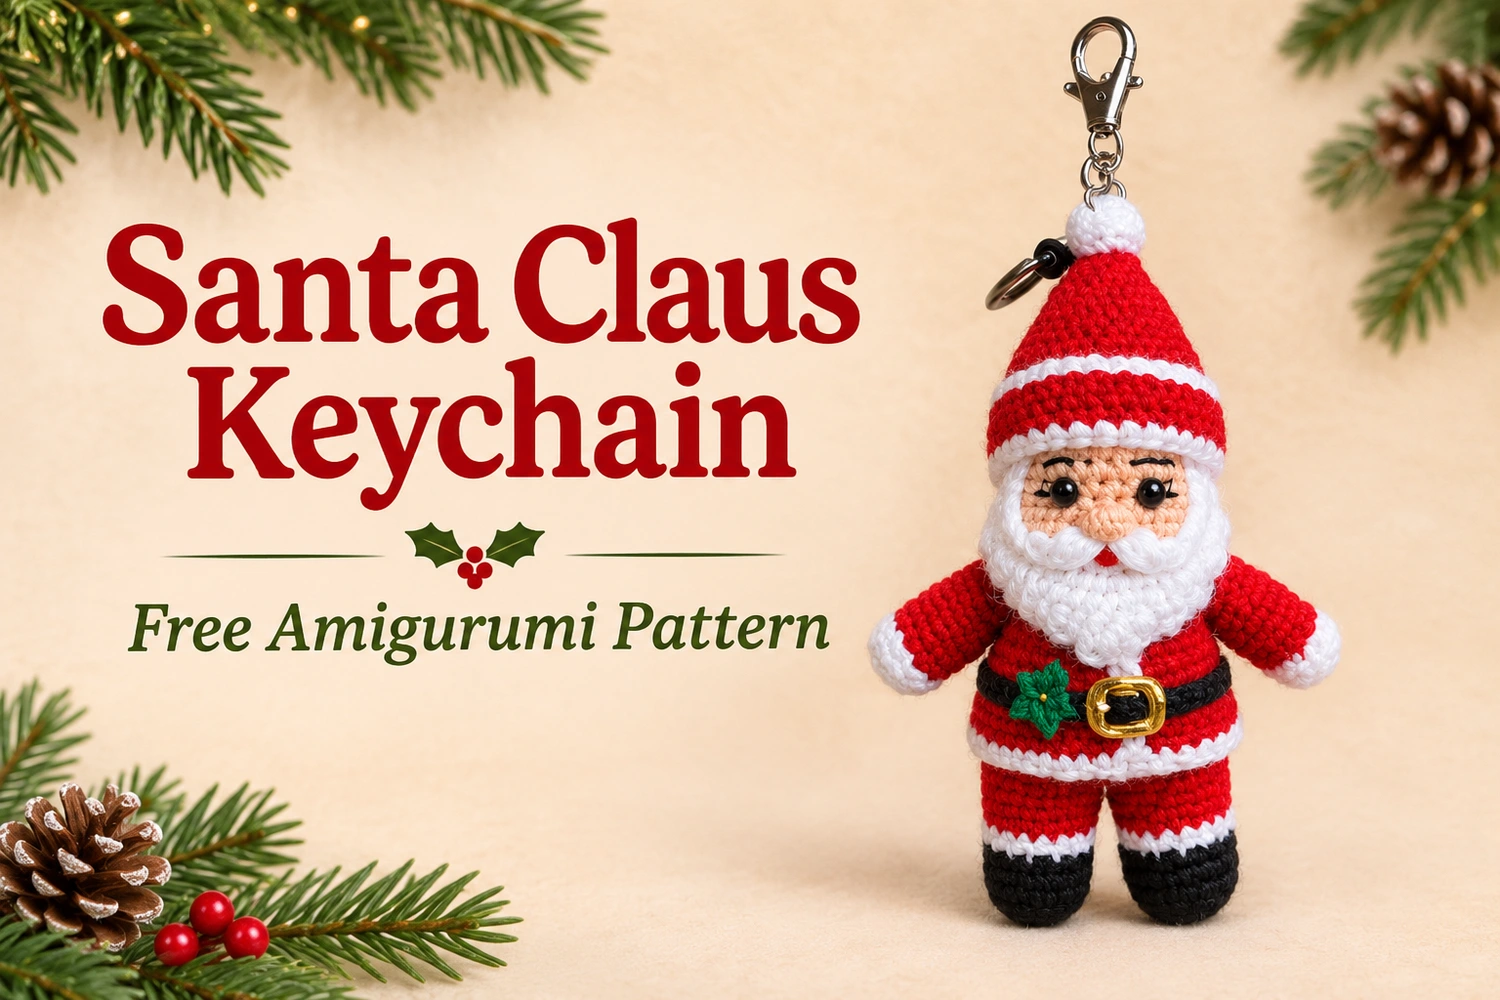
Santa Claus Keychain Crochet Pattern: Project Details
- Level: intermediate, including small parts, color changes, and assembly.
- Terminology: US crochet terms.
- Estimated height: approximately 12–15 cm, excluding hardware; yarn and tension affect the size.
- Colors: red, white, peach, black, dark green, and gold embroidery yarn.
- Construction: joined legs and body, integrated head, separate arms, hat, nose, beard, and moustache.
This is an original image-inspired adaptation. Stitch totals have been reviewed, but the pattern has not been physically crocheted or independently tested. Use the written instructions for exact counts. The gallery charts illustrate component construction and sewing placement.
Materials
- Sport-weight cotton: about 18 g red, 7 g white, 5 g peach, 4 g black, and green scraps.
- A 2–2.5 mm hook that makes a firm fabric.
- Gold embroidery yarn for the buckle and black thread for eyebrows.
- Two approximately 5 mm safety eyes, or black embroidery thread.
- Polyester stuffing, tapestry needle, scissors, pins, and stitch markers.
- A silver lobster clasp with a small connecting ring.
Embroider the eyes if the decoration may be handled by young children. This keychain includes small parts and hardware and is not intended as a toy. Keep the stuffing light enough that the seams can close neatly without stretching the stitches.
Responsivo Post 01 – P1
Abbreviations and Notes
- MR: magic ring.
- ch: chain.
- sc: single crochet.
- hdc: half double crochet.
- dc: double crochet.
- inc: 2 sc in the same stitch.
- dec: single crochet 2 stitches together.
- sl st: slip stitch.
- BLO: back loop only.
- st / sts: stitch / stitches.
- R: round. Totals appear in parentheses.
Work the stuffed pieces in continuous rounds unless told otherwise. Mark the first stitch of each round. Change color during the final pull-through of the previous stitch. Turning chains on flat pieces do not count. Decorative surface stitches are not added to the body-round totals.
1. Make Two Boots and Legs
Start each boot with black yarn.
- R1: 6 sc in MR. (6)
- R2: inc in each st. (12)
- R3: sc BLO in each st. (12)
- R4: sc in each st. (12)
- R5, white: sc in each st. (12)
- R6–R8, red: sc in each st. (12 each round)
Stuff the boots and lower legs lightly. Fasten off the first leg. Keep the yarn attached to the second leg. Place both legs side by side, with the color-change lines facing backward. The tops of both legs must have 12 stitches.
2. Join the Legs and Crochet the Body
Continue in red from the second leg. Ch 2, sc in all 12 stitches around the first leg, sc in each of the 2 chains, sc in all 12 stitches around the second leg, then sc along the 2 unused underside loops of the chain bridge. Mark the first stitch of this new body round. This joining round has 28 sc.
- Body R1: joining round described above. (28)
- R2: (sc in next 6 sts, inc) × 4. (32)
- R3, white: sc in each st. (32)
- R4–R5, red: sc in each st. (32 each round)
- R6–R7, black: sc in each st. (32 each round)
- R8–R9, red: sc in each st. (32 each round)
- R10: (sc in next 6 sts, dec) × 4. (28)
- R11: (sc in next 5 sts, dec) × 4. (24)
- R12: (sc in next 2 sts, dec) × 6. (18)
The white body round forms the coat hem, and the two black rounds form the belt. Add stuffing evenly through the open neck. Close any small gap between the legs with the starting tail from the first leg. Do not pull the legs together so tightly that they lose their separate shape.
3. Continue with the Head
Change to peach yarn at the neck. Keep the body marker in place and count these as head rounds.
- Head R1: (sc in next 2 sts, inc) × 6. (24)
- R2: (sc in next 3 sts, inc) × 6. (30)
- R3–R6: sc in each st. (30 each round)
- R7: (sc in next 3 sts, dec) × 6. (24)
- R8: (sc in next 2 sts, dec) × 6. (18)
- R9: (sc, dec) × 6. (12)
- R10: dec × 6. (6)
Before the opening becomes too small, place the eyes between Head R4 and R5, approximately five stitches apart. Keep them centered above the front of the belt. Add stuffing and secure eye washers before completing the final rounds.
Fasten off after R10, thread through the front loops of the last six stitches, and draw closed. Hide the tail. The neck and head should feel supported without being packed hard.
Responsivo Post 02 – P2
4. Crochet Two Arms
Start each arm in white.
- R1: 6 sc in MR. (6)
- R2: sc in each st. (6)
- R3–R6, red: sc in each st. (6 each round)
Add only a tiny amount of stuffing near the white end. Flatten the open red edge and work 3 sc through both layers to close it. Leave a sewing tail. Sew the arms to opposite sides near the top red body rounds, pointing slightly outward.
Check the placement from the front before finishing the seams. Both white cuffs should be visible, and the arms should sit at the same height.
5. Make the Peach Nose
Work 6 sc in MR with peach yarn, then one round of 6 sc. Add a tiny wisp of stuffing, work 3 dec, and fasten off. Draw the final opening closed and leave a sewing tail.
Sew the nose midway between and just below the eyes. Leave room underneath for the inner ends of the white moustache. Embroider two short black eyebrows above the eyes with a gentle upward curve.
6. Crochet the White Beard
With white yarn, ch 10.
