
This Santa Gift Basket Crochet Pattern makes a little Christmas container with a red rim, a white beard-like lower section, a peach face, and charming round glasses. A raised nose and two curled moustache pieces give the basket the friendly Santa expression shown in the reference.
The basket stays open at the top. Slip a small wrapped treat or lightweight gift inside and tie the packaging above the rim for a festive handmade presentation.
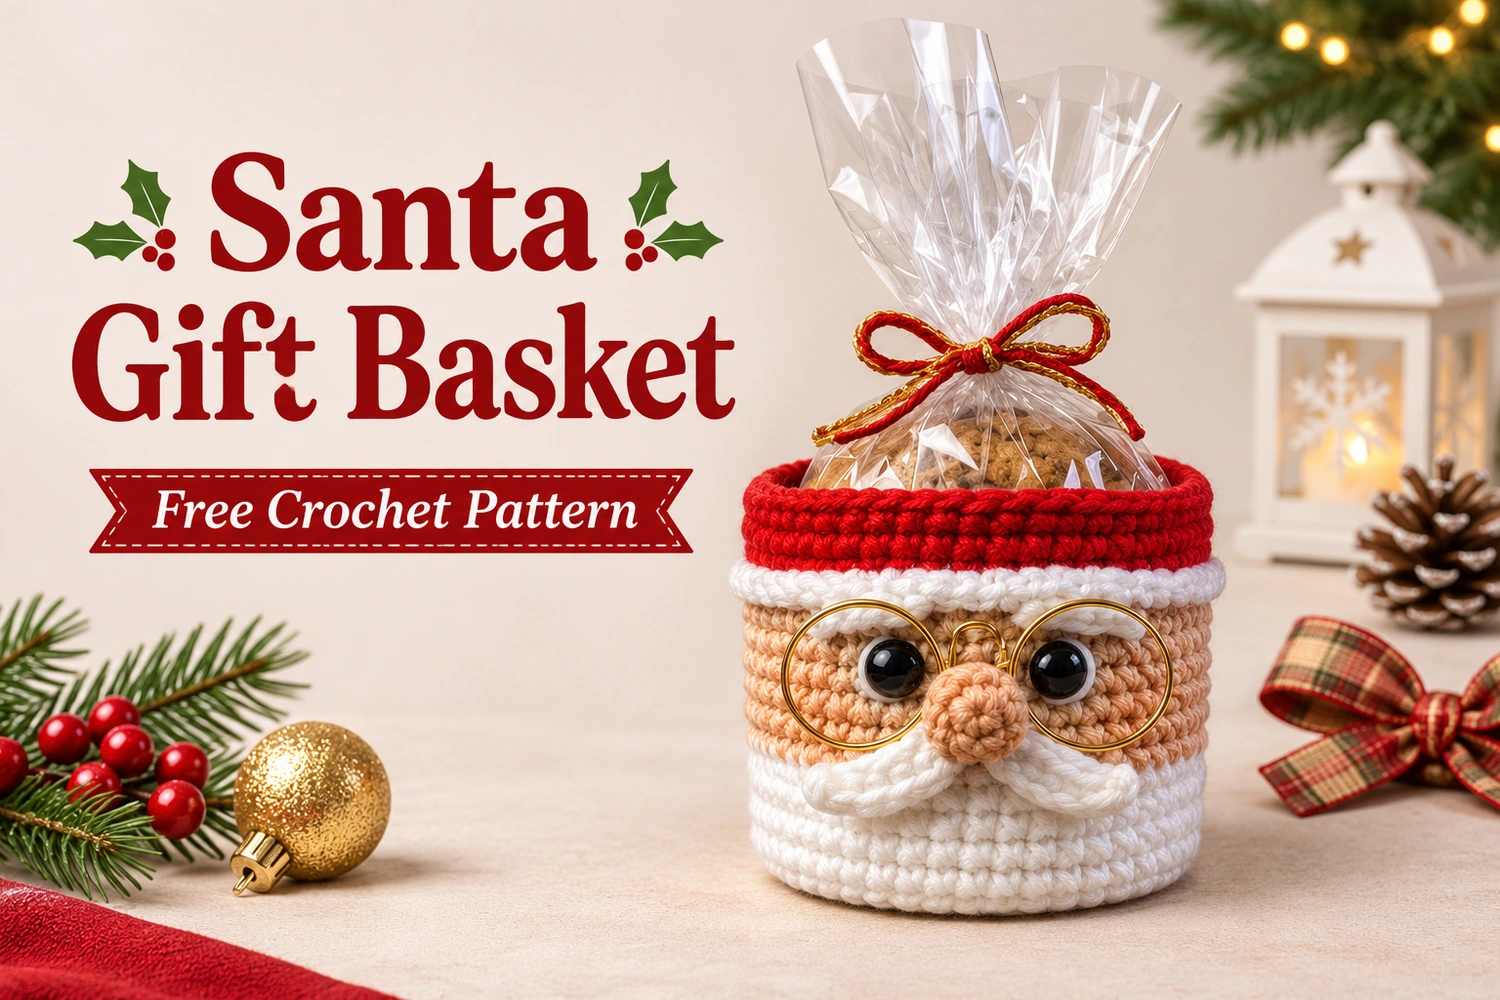
Santa Gift Basket Crochet Pattern: Project Details
- Level: confident beginner to intermediate, including shaping and small-piece assembly.
- Terminology: US crochet terms.
- Estimated size: approximately 8–10 cm across and 7–9 cm tall; the result depends on yarn and tension.
- Construction: a white circular base and cylindrical wall, red upper rim, separate peach face patch, nose, and white moustache.
- Colors: white, red, peach, black, and gold for the glasses.
This is an original image-inspired adaptation. Stitch counts have been reviewed, but the pattern has not been physically crocheted or independently tested. Use the written rounds for exact totals. The gallery charts support construction and placement rather than replacing the individual component instructions.
Materials
- Firm DK cotton yarn: approximately 30 g white, 10 g red, and 5 g peach.
- A 2.75–3 mm hook, or a size that produces a dense fabric that holds its shape.
- Two approximately 7–8 mm safety eyes, or black embroidery yarn.
- Small premade round doll glasses, approximately 4–5 cm wide overall, sized to fit your completed face.
- A tiny amount of stuffing for the nose.
- Tapestry needle, scissors, stitch marker, and pins.
- Optional: a small food-safe bag for wrapped treats and a ribbon for the packaging.
Choose the glasses after measuring the finished face patch if possible. The lenses should sit around the eyes without covering the nose. For a soft alternative, embroider two gold circles and a short bridge directly on the face.
Responsivo Post 01 – P1
Use the basket for lightweight contents. Keep food individually wrapped or inside a suitable food-safe bag. If children may handle the basket, use embroidered eyes and embroidered glasses instead of detachable hardware.
Abbreviations and Notes
- MR: magic ring.
- ch: chain.
- sc: single crochet.
- hdc: half double crochet.
- dc: double crochet.
- inc: 2 sc in the same stitch.
- dec: single crochet 2 stitches together.
- sl st: slip stitch.
- BLO: back loop only.
- st / sts: stitch / stitches.
- R: round. Totals appear in parentheses.
Work in continuous rounds unless the instructions say to join. Place a marker in the first stitch and move it up each round. Change color during the last pull-through of the stitch before the new color. The slip stitch used to finish a piece is not included in its stitch count.
The facial pieces are sewn to the outside of the basket. They are not colorwork stitches added to the wall rounds. Keep their yarn tails on the inside until all positions have been checked, then secure them neatly.
1. Crochet the White Base
With white yarn, start at the center of the base.
- R1: 6 sc in MR. (6)
- R2: inc in every st. (12)
- R3: (sc, inc) × 6. (18)
- R4: (sc in next 2 sts, inc) × 6. (24)
- R5: (sc in next 3 sts, inc) × 6. (30)
- R6: (sc in next 4 sts, inc) × 6. (36)
- R7: (sc in next 5 sts, inc) × 6. (42)
- R8: (sc in next 6 sts, inc) × 6. (48)
The base should lie reasonably flat before you turn upward. Count the last round carefully. If it ripples or cups strongly, check the stitch total first, then adjust your hook or tension for the yarn you selected.
2. Work the White Basket Walls
- R9: sc BLO in each st. (48)
- R10–R21: sc through both loops in every st. (48 each round)
The back-loop round creates a corner between the base and the wall. After that round, return to working through both loops. There are no increases in the wall section, so the basket grows upward as a cylinder.
Keep the white wall straight and firm. Do not stuff the basket. The lower white section will remain visible below the peach patch and moustache, giving the impression of Santa’s beard.
3. Add the Red Upper Rim
Change to red after finishing the white wall.
Responsivo Post 02 – P2
- R22–R25: sc in every st. (48 each round)
Sl st into the next stitch, fasten off, and weave in the end on the inside. Leave the red rim unfolded so it forms a clear horizontal band above the face. The uppermost white wall round remains visible as the narrow trim beneath it.
If you prefer the color-change join at the back, choose the opposite side as the front before placing the face. Do not decrease around the opening: the reference has a wide, usable top rather than a gathered closure.
4. Crochet the Peach Face Patch
With peach yarn, ch 9. Work an oval around both sides of the chain.
- R1: starting in the second chain from the hook, sc in the next 7 chains, 3 sc in the last chain. Continue along the underside: sc in the next 6 chains, 2 sc in the first chain used. (18)
- R2: inc, sc in next 6 sts, inc in next 3 sts, sc in next 6 sts, inc in next 2 sts. (24)
- R3: sc in each st. (24)
Join with a sl st and leave a long sewing tail. The oval may develop a shallow curve after R3; this helps it follow the basket wall. Do not stuff it.
Hold the patch horizontally on the front of the white wall, with its upper edge just below the narrow white trim. Pin it in place and check its width against your glasses. The lower edge will be partly covered by the moustache, so the peach area should frame the eyes rather than extend down to the base.
5. Position the Eyes
Place the two eyes toward the left and right ends of the peach patch, approximately five to seven stitches apart depending on their size. Check that each eye sits near the center of a glasses lens before securing it.
If using safety eyes, insert the posts through both the peach patch and the basket wall, with washers inside the basket. Complete the placement before sewing the patch edges down. For an embroidered version, fill two small black circles and add a tiny white highlight to each.
