
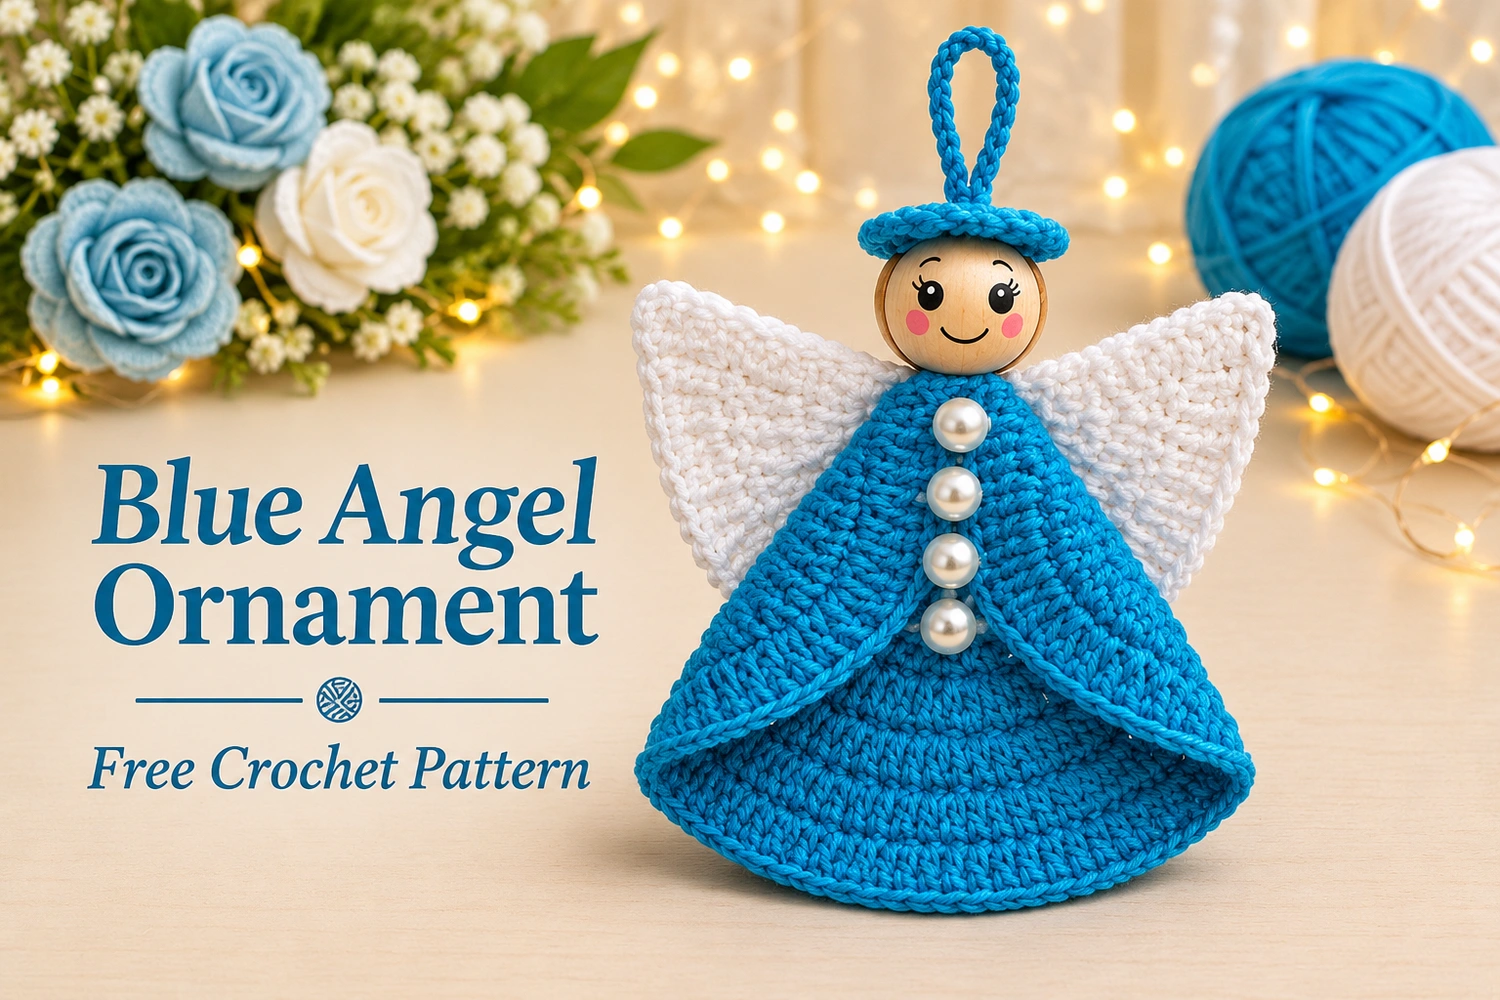
This Blue Angel Ornament Crochet Pattern transforms a flat turquoise circle into a little flared dress. White triangular wings, a smiling wooden bead head, four pearl buttons, and a blue hanging loop recreate the delicate look of the reference.
The dress is folded rather than stuffed. Its two curved side flaps meet at the front, leaving the lower center open enough to reveal the circular crochet texture beneath.
Blue Angel Ornament Crochet Pattern: Project Details
- Level: confident beginner, with folding and sewing.
- Terms: US crochet terminology.
- Estimated height: 11–14 cm without the hanging loop; yarn and bead size affect the result.
- Construction: one blue circle, two white triangles, one small blue halo disk, a wooden bead head, and four pearl buttons.
- Finish: an unstuffed folded dress with separately attached wings and head.
This is an original image-inspired adaptation. Stitch totals have been checked, but the pattern has not been physically crocheted or independently tested. Use the written rounds for exact stitch counts; the gallery guides show construction, folding, and assembly.
Materials
- Sport or light DK cotton: about 15 g turquoise blue and 6 g white.
- A 2.5–3 mm hook, or a hook that makes a neat fabric with enough structure to hold a fold.
- One wooden bead approximately 20–25 mm across, with a vertical hole large enough for your sewing thread.
- Four small sew-on pearl beads, approximately 5–6 mm.
- Strong matching sewing thread, tapestry needle, scissors, pins, and a ruler.
- A fine permanent craft pen or suitable craft paint for the face, unless the bead already has a face.
Choose the head and pearl sizes in proportion to your completed dress. A small round bead gives a delicate expression; a much larger bead may make the ornament lean forward. This is a decorative ornament with small parts and a hanging loop, not a toy.
Responsivo Post 01 – P1
Abbreviations and Notes
- MR: magic ring.
- ch: chain.
- sc: single crochet.
- dc: double crochet.
- inc: 2 dc in the same stitch when used in the circle or wings.
- sl st: slip stitch.
- st / sts: stitch / stitches.
- R: round. Totals appear in parentheses.
Join the circle rounds with a slip stitch and do not turn. The starting ch 2 does not count as a stitch. Work the first dc of each round into the same stitch as the join. Count only the actual dc stitches, not the turning chain or joining slip stitch.
The white wings are worked in turned rows. On those rows, the turning ch 2 also does not count. The head and pearls are beads; they are not crocheted components.
1. Crochet the Blue Circle
With turquoise yarn, start with a magic ring.
- R1: ch 2, work 12 dc in MR. Join to the first dc. (12)
- R2: ch 2, inc in every st. Join. (24)
- R3: ch 2, (dc, inc) × 12. Join. (36)
- R4: ch 2, (dc in next 2 sts, inc) × 12. Join. (48)
- R5: ch 2, (dc in next 3 sts, inc) × 12. Join. (60)
- R6: ch 2, (dc in next 4 sts, inc) × 12. Join. (72)
- R7: ch 1, sc in each st around. Join. (72)
Fasten off and weave in the ends. Pull the magic ring closed securely. Lay the circle flat and check its shape before folding.
The circle should measure approximately 12–15 cm across with the suggested materials, although individual tension varies. If it ripples strongly, check for extra stitches. If it cups, check the count and consider a slightly larger hook. Keep all increase rounds complete rather than adding random stitches to one area.
2. Shape the Folded Dress
Lay the circle with the right side facing down and choose one point on the outer edge as the top neck. Mark that point. Imagine a vertical line running from it through the center to the opposite lower edge.
Bring the left and right upper side sections inward toward that line. The right side of the crochet will show on the folded flaps. Let the flaps overlap slightly near the neck and upper front, then spread apart toward the lower half to create the curved opening shown in the reference.
Pin the folds and stand the shape gently on its lower curved edge to assess the bell-like dress. The top should be narrow enough for the bead head, while the bottom remains wide and flared. This is a folded circle, so there is no separate stuffed cone inside.
Responsivo Post 02 – P2
Sew the two flaps together at the neck and for approximately the upper third of the front opening. Keep the lower curved flap edges free. Adjust the overlap before finishing the seam so the dress sits symmetrically and the circular texture remains visible inside.
3. Crochet Two White Triangular Wings
Use white yarn. Make two identical triangles, then place them in mirror positions during assembly.
- Row 1: ch 3, work 1 dc in the third chain from the hook. (1 dc; the unused chain height does not count)
- Row 2: ch 2, turn, 2 dc in the only st. (2)
- Row 3: ch 2, turn, inc in both sts. (4)
- Row 4: ch 2, turn, inc, dc in next 2 sts, inc. (6)
- Row 5: ch 2, turn, inc, dc in next 4 sts, inc. (8)
- Row 6: ch 2, turn, inc, dc in next 6 sts, inc. (10)
Ch 1 and work a border: sc across all 10 top stitches, placing an extra sc at each top corner to turn neatly. Work 2 sc into each dc row-end space down one side and up the other. At the narrow starting tip, work (sc, ch 1, sc) to turn the point. Join and leave a long sewing tail.
The border is an edge finish and does not change the six-row triangle counts. Keep the stitches relaxed enough that the wing lies flat. Make the second wing in the same way.
4. Position and Sew the Wings
Place the dress front down. Position the narrow tip of each triangle near the back neck, with the wider outer section spreading to the left or right. Rotate the triangles until the outer corners sit above the middle of the dress, like the reference.
Overlap the inner wing tips slightly behind the neck and pin them in place. Turn the angel over to check that both wings show evenly from the front. Sew each wing securely along its inner edge and at the neck attachment point.
Leave the outer wing edges free. Stitching the entire wing flat to the dress would hide its triangular outline and reduce the open, spread-wing effect.
