
This Flat Snowman Applique Crochet Pattern combines two white circles with a jaunty red top hat, a carrot nose, and three red buttons. The simple black eyes and embroidered smile give the snowman the cheerful expression shown in the reference.
The pieces stay flat and unstuffed. Sew the finished snowman to a gift bag, a seasonal banner, or another fabric decoration, or keep it as a small decorative motif.
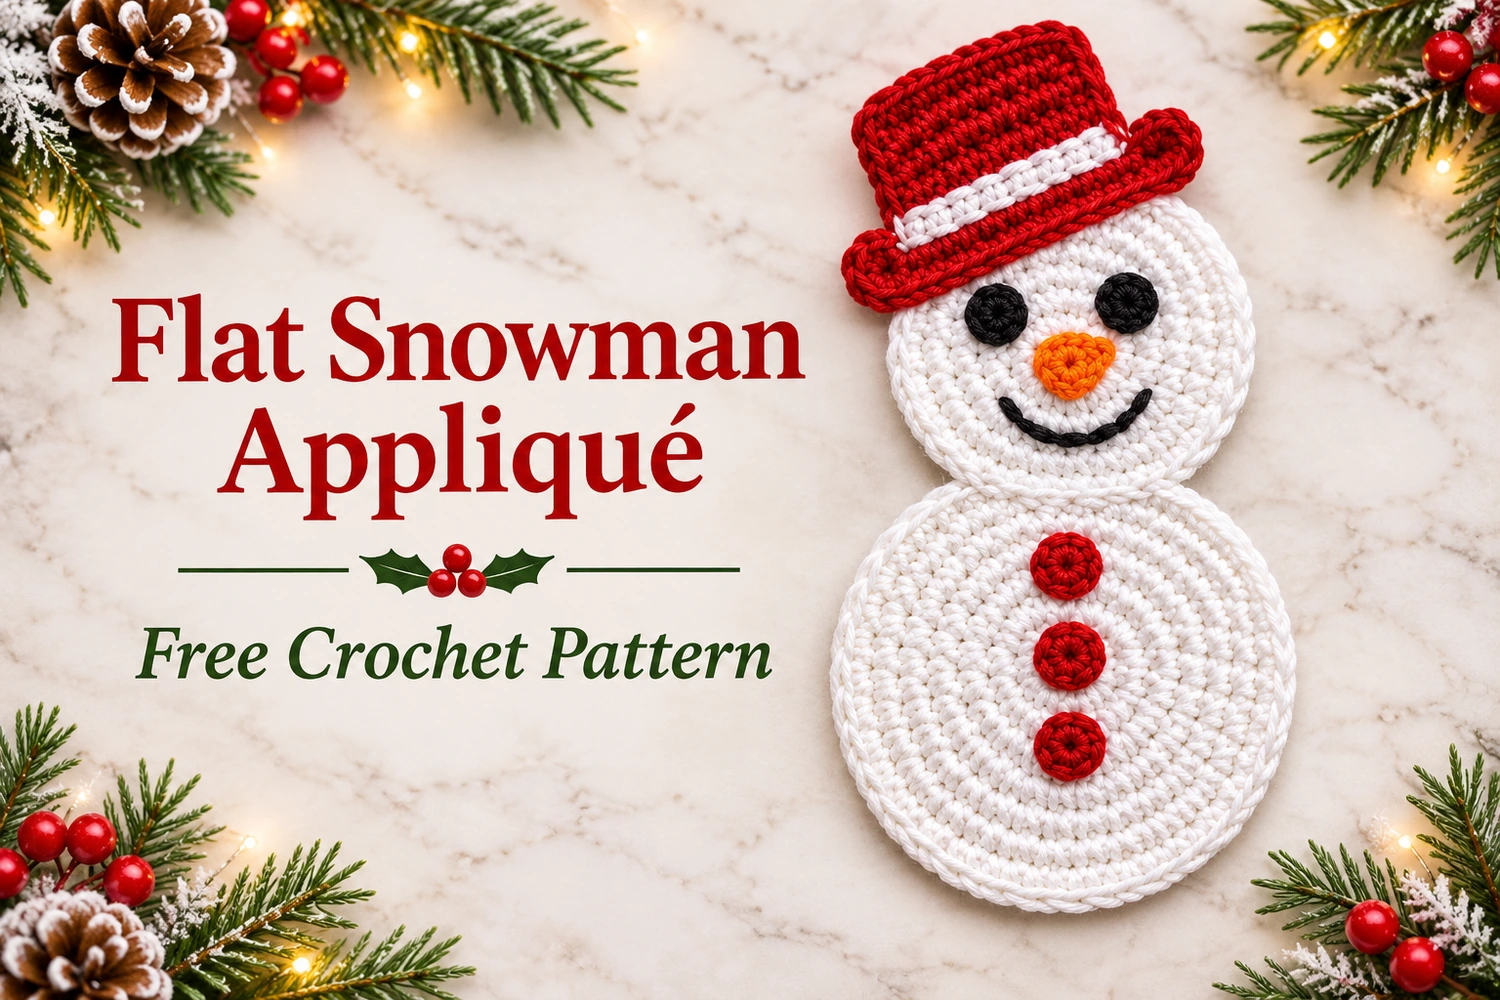
Flat Snowman Applique Crochet Pattern: Project Details
- Level: confident beginner, including increases and simple sewing.
- Terms: US crochet terminology.
- Estimated height: 16–20 cm including the hat; yarn and tension affect the size.
- Construction: two white circles, a flat red hat crown and brim, two black eyes, an orange nose, and three red buttons.
- Finish: flat, with no stuffing.
This is an original image-inspired adaptation. Stitch totals have been reviewed, but the pattern has not been physically crocheted or independently tested. Follow the written rounds for exact counts. The gallery illustrations show the intended shape and component placement.
Materials
- Sport or light DK cotton: approximately 20 g white, 6 g red, and scraps of black and orange.
- A 2.5–3 mm hook, or a size that makes tidy, even stitches.
- Tapestry needle, scissors, pins, and a stitch marker.
- Black embroidery yarn for the smile.
Use the same yarn weight for the circles and hat so the pieces stay in proportion. All the round eyes and buttons in this version are crocheted and sewn on. For a motif that children may handle, embroider those small details instead of attaching separate pieces.
Responsivo Post 01 – P1
Abbreviations and Counting Notes
- MR: magic ring.
- ch: chain.
- sc: single crochet.
- inc: 2 sc in the same stitch.
- dec: single crochet 2 stitches together.
- sl st: slip stitch.
- st / sts: stitch / stitches.
- R: round. Numbers in parentheses give the total.
Work the white circles in continuous rounds without turning. Mark the first stitch of each round and move the marker up. Each increase round adds six stitches. The final slip stitch used to finish a piece does not count as an extra stitch.
The hat and nose are worked in turned rows. Their ch 1 turning chains do not count as stitches. The colored facial details are sewn on after the white circles are finished; they are not additional stitches in the circle rounds.
1. Crochet the Larger Body Circle
Use white yarn and start at the center.
- R1: 6 sc in MR. (6)
- R2: inc in every st. (12)
- R3: (sc, inc) × 6. (18)
- R4: (sc in next 2 sts, inc) × 6. (24)
- R5: (sc in next 3 sts, inc) × 6. (30)
- R6: (sc in next 4 sts, inc) × 6. (36)
- R7: (sc in next 5 sts, inc) × 6. (42)
- R8: (sc in next 6 sts, inc) × 6. (48)
Sl st into the next stitch, fasten off, and weave in the ends. Pull the center closed firmly. Lay the circle on a flat surface and smooth it gently with your fingers.
If the circle ripples, count the stitches and check for accidental extra increases. If it cups despite correct counts, try a slightly larger hook or a more relaxed tension. Do not stuff or close the piece; it is a single flat disk.
2. Crochet the Smaller Head Circle
With white yarn, repeat Body R1–R6 only. The head finishes with 36 sc. Join with a sl st and leave a long sewing tail.
The head should be noticeably smaller than the body. Place both circles side by side and check their proportions before sewing. With the same yarn and hook, six head rounds and eight body rounds give a consistent size difference.
3. Join the Head and Body
Place the body flat with the right side facing up. Position the head above it, overlapping the lower head edge over the upper body edge by approximately one white round.
Responsivo Post 02 – P2
Pin the overlap and look at the silhouette. The circles should create a narrow neck without hiding too much of either circle. Sew across the overlap with white yarn, catching both layers with small stitches.
Work a second short line of stitches through the back of the join if needed to prevent the head from flopping. Keep the seam relaxed enough that the motif remains flat. Hide the tail on the wrong side.
4. Make Two Black Crochet Eyes
For each eye, work 6 sc in MR with black yarn. Join to the first sc with a sl st, pull the ring closed, and fasten off with a sewing tail. Each eye has 6 sc.
Pin the eyes on the upper half of the head, approximately four to six white stitches apart. Check the spacing with the orange nose temporarily between them. Sew each eye around its edge with small stitches, catching only the head fabric.
Keep the eyes circular and low against the surface. Avoid pulling the sewing tail so tightly that the eye becomes a raised knot. You may embroider filled black circles in the same positions instead.
5. Crochet the Orange Carrot Nose
With orange yarn, ch 4.
- Row 1: sc in the second chain and each remaining chain. (3)
- Row 2: ch 1, turn, dec, sc in next st. (2)
- Row 3: ch 1, turn, dec. (1)
Fasten off with a sewing tail. Position the small triangle between and below the eyes, with its pointed end angled slightly downward. Sew the edges to the head, keeping the shape flat.
The nose does not need stuffing. If the point curls, dampen it lightly and flatten it before attaching.
6. Embroider the Smile
Use black yarn and a blunt needle to mark a gentle U-shaped smile below the nose. Begin at one corner, work several short backstitches around the curve, and finish at the opposite corner.
