
This Wrapped Swirl Candy Crochet Pattern makes a little round sweet with a raised white spiral and two gathered wrapper ends. Make the center red, forest green, or turquoise blue, keeping the spiral and frilled tips white for the look shown in the reference.
The candy has a lightly padded disk-shaped center rather than a long cylinder. A separate white chain is sewn into a spiral on the front, and two small crochet fans form the wrapper ends.
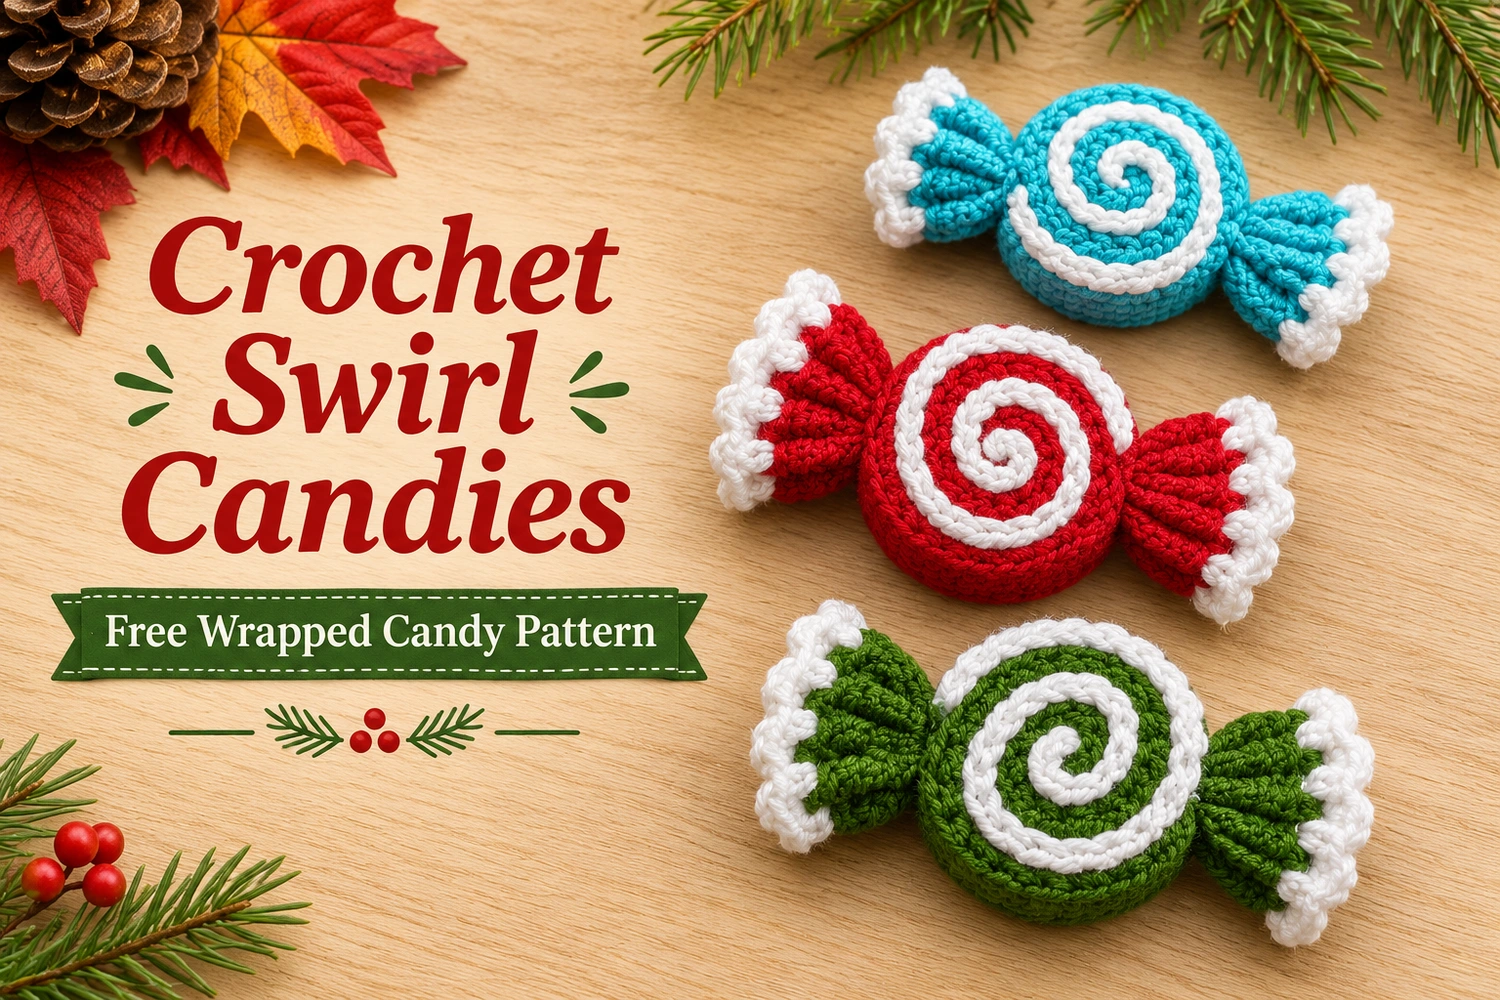
Wrapped Swirl Candy Crochet Pattern: Project Details
- Level: confident beginner to intermediate, including simple sewing.
- Terms: US crochet terminology.
- Estimated size: 8–10 cm from tip to tip, with a center approximately 4–5 cm across; yarn and tension affect the result.
- Construction: two colored disks, a sewn white chain spiral, and two separately attached fan-shaped wrapper ends.
- Colors: one main color plus white. Repeat the same instructions for each colorway.
This is an original image-inspired adaptation. Stitch totals have been reviewed, but the pattern has not been physically crocheted or independently tested. Follow the written instructions for exact counts. The gallery charts show construction and assembly rather than replacing the separate component instructions.
Materials
- Sport-weight cotton: approximately 8 g of your main color and 3 g white for one candy.
- A 2.25–2.5 mm hook, or a size that makes a neat, firm fabric.
- A small pinch of polyester stuffing.
- Tapestry needle, scissors, pins, and a stitch marker.
- Optional: fine matching white sewing thread for attaching the spiral.
Use the same yarn weight for the white and colored sections so the spiral does not overwhelm the center. Smooth cotton makes the raised chain easy to see. Keep the filling light; the finished candy should resemble a thick little disk, not a ball.
Responsivo Post 01 – P1
This project is a decorative crochet sweet, not food. For decorations that children may handle, secure all pieces carefully and avoid using the candy as a substitute for an age-appropriate toy.
Abbreviations and Notes
- MR: magic ring.
- ch: chain.
- sc: single crochet.
- dc: double crochet.
- inc: 2 sc in the same stitch for the disks.
- sl st: slip stitch.
- st / sts: stitch / stitches.
- R: round. Numbers in parentheses give the total.
Work the disks in continuous rounds without turning. Mark the first stitch of each round. The fan-shaped wrappers are worked back and forth in rows, with increases written out as 2 dc in a stitch. Starting ch 2 on the fans does not count as a stitch.
The white spiral is a separate chain sewn to the front. It is not a spiral color-change round, and it does not add stitches to the disk count. Sewing lines in the construction guides indicate assembly.
1. Crochet the Front Disk
Use your main color: red, green, or turquoise.
- R1: 6 sc in MR. (6)
- R2: inc in every st. (12)
- R3: (sc, inc) × 6. (18)
- R4: (sc in next 2 sts, inc) × 6. (24)
- R5: (sc in next 3 sts, inc) × 6. (30)
Sl st into the next stitch, fasten off, and weave in the ends. The finishing slip stitch does not count as an extra stitch. Pull the center ring closed firmly.
Lay the disk flat before adding the spiral. If it ripples or cups strongly, check the stitch count first and adjust your tension or hook if necessary. Avoid adding unplanned increases, because the front and back edges need the same 30-stitch circumference.
2. Make the White Spiral Chain
With white yarn, ch 70 as a starting length. Fasten off with a long sewing tail. Chain length is adjustable because the spiral is a surface decoration rather than part of the disk structure.
Place the colored disk right side up. Begin with one end of the chain at the center and coil it outward in a continuous spiral. Leave a narrow strip of colored crochet visible between each turn. Aim for approximately two turns, adjusting the spacing to your disk size.
Responsivo Post 02 – P2
Stop the spiral near the outer edge while leaving the last round’s edge loops free for joining. Pin the chain in place before sewing. If the chain is too short, remake it longer; if it is too long, unpick the finishing knot, unravel the excess chains, and secure the new end.
Sew the chain down with tiny white stitches, catching the underside of the chain and the front disk. Keep the visible chain loops facing upward. Work around the curve gradually rather than pulling the entire spiral tight at once.
Secure the two chain ends on the wrong side of the front disk. Check that the disk still lies flat and that the design reads as one continuous swirl rather than separate white rings.
3. Crochet the Back and Side Wall
With the main color, repeat Front Disk R1–R5 to reach 30 sc.
- Back R6: sc in every st. (30)
- Back R7: sc in every st. (30)
These two plain rounds turn the outer edge upward to create a shallow side wall. Join with a sl st and fasten off. Weave in the starting end inside the shallow cup.
Do not decrease or close the back piece. The decorated front disk will close the opening during assembly. Its 30 stitches match the 30 stitches of the back rim.
4. Join and Lightly Fill the Center
Place the decorated front over the back opening with wrong sides facing inward. Match the stitches around the edge. With white yarn, whipstitch through the corresponding edge stitches to join the two pieces.
The white seam creates a narrow light outline around the front, complementing the spiral. Keep the stitches even and relaxed. Leave a small opening before completing the seam.
Add only a thin layer of stuffing and spread it across the center. The front should rise gently while the overall shape remains a low-profile disk. Close the remaining opening, secure the tail, and hide it inside.
