
Press the center gently between your fingers to check the shape. If it has become round like a ball, remove some filling before finishing the seam.
5. Crochet Two Fan-Shaped Wrapper Ends
Start each wrapper in the main color. These pieces are small open fans worked in turned rows, not complete circles.
- Row 1: make an MR, ch 2, work 6 dc into the ring. Do not join. (6)
- Row 2: ch 2, turn, work 2 dc in each st. (12)
- Row 3: ch 2, turn, dc in every st. (12)
Pull the starting ring closed to gather the narrow base of the fan. Keep the wide outer edge open. Change to white for the decorative edge.
6. Add the White Frilled Tips
White Row 4: ch 1, turn. Repeat (sc in next 2 sts, ch 3, sl st into the top of the second sc just made) six times. You will have 12 sc and six small chain-loop picots along the outer edge.
The picot slip stitches do not count as extra sc. Fasten off and weave in the white ends on the back. Keep a long main-color tail at the fan base for attaching it to the candy.
Make a second identical wrapper. Gently spread the white tips with your fingers. Do not stitch the fan’s side edges together; its flared shape should remain visible.
7. Gather and Attach the Wrappers
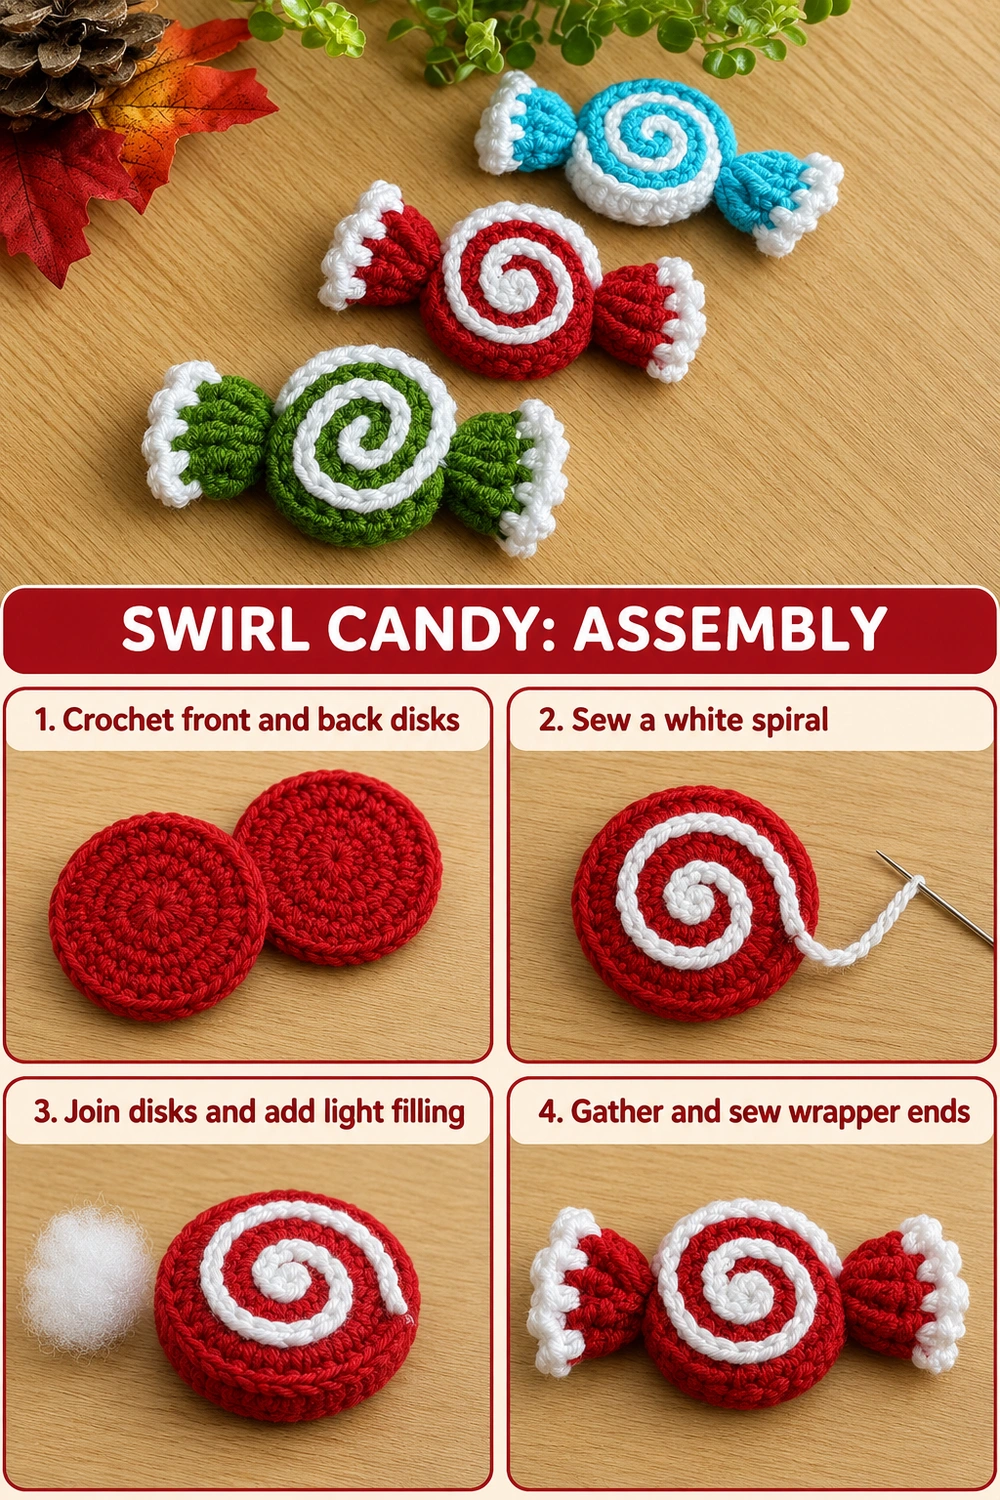
Place the completed candy center face up. Mark two opposite points at the left and right sides, keeping the spiral upright and centered.
Pin the narrow gathered base of each fan to one marked side. The colored section should extend outward and the white frill should sit at the far end. Sew the fan base securely through several stitches in the colored side wall.
Wrap the main-color sewing tail around the narrow join once or twice to suggest a twisted candy wrapper, then secure it through the side wall again. Do not wrap so tightly that the fan collapses into a thin cord.
Repeat on the opposite side, checking that both ends have similar width and length. Hide the tails inside the candy center and trim only after all seams are secure.
Color Variations
Use the same instructions for the three versions in the reference. Make the disks and fan sections red with a white spiral, green with a white spiral, or turquoise with a white spiral. Keep the frilled outer tips white in each version.
For a coordinated set, use the same yarn brand, hook, number of rounds, and filling amount for every candy. Pin each white chain spiral before sewing so the turns have a similar spacing across the set.
Finishing and Care
Check the spiral for loose sections that could lift away from the front. Add small securing stitches where needed. Check both wrapper joins with a gentle tug and make sure the white tips remain spread.
Spot clean gently and dry completely. Store without crushing the wrapper ends. If using the candy on a fabric project, attach it through the colored back rather than through the raised front spiral.
Reading the Tabletop Construction Guides
The two chart photographs below show one complete wrapped-candy silhouette above the matching finished piece resting on a table. One uses the red version and the other uses green; both follow the same written construction.
The center uses single crochet, the wrapper fans use double crochet, and the white spiral is a separately sewn chain. Dashed lines mark sewing and gathering points. The guides explain placement; use the written instructions for the exact round and row totals.
More Christmas Crochet Ideas
Pair these sweets with the Santa Gift Basket, the Flat Snowman Applique, or the Blue Angel Ornament for a handmade holiday collection.
Photo Tutorial, Tabletop Guides and Pinterest Images
All six images are collected below the complete pattern: one assembly tutorial, two tabletop construction guides, and three candy project images to save for later.
More Free Crochet Patterns
Find your next handmade project with these lovely patterns.
Christmas Lace Star Crochet Pattern – Free Five-Point Ornament Guide
View Pattern →
Granny Stitch Gingerbread Crochet Pattern – Free Ornament Guide
View Pattern →
Blue Lace Snowflake Crochet Pattern – Free Ornament Guide
View Pattern →
CONTENT END 1
