
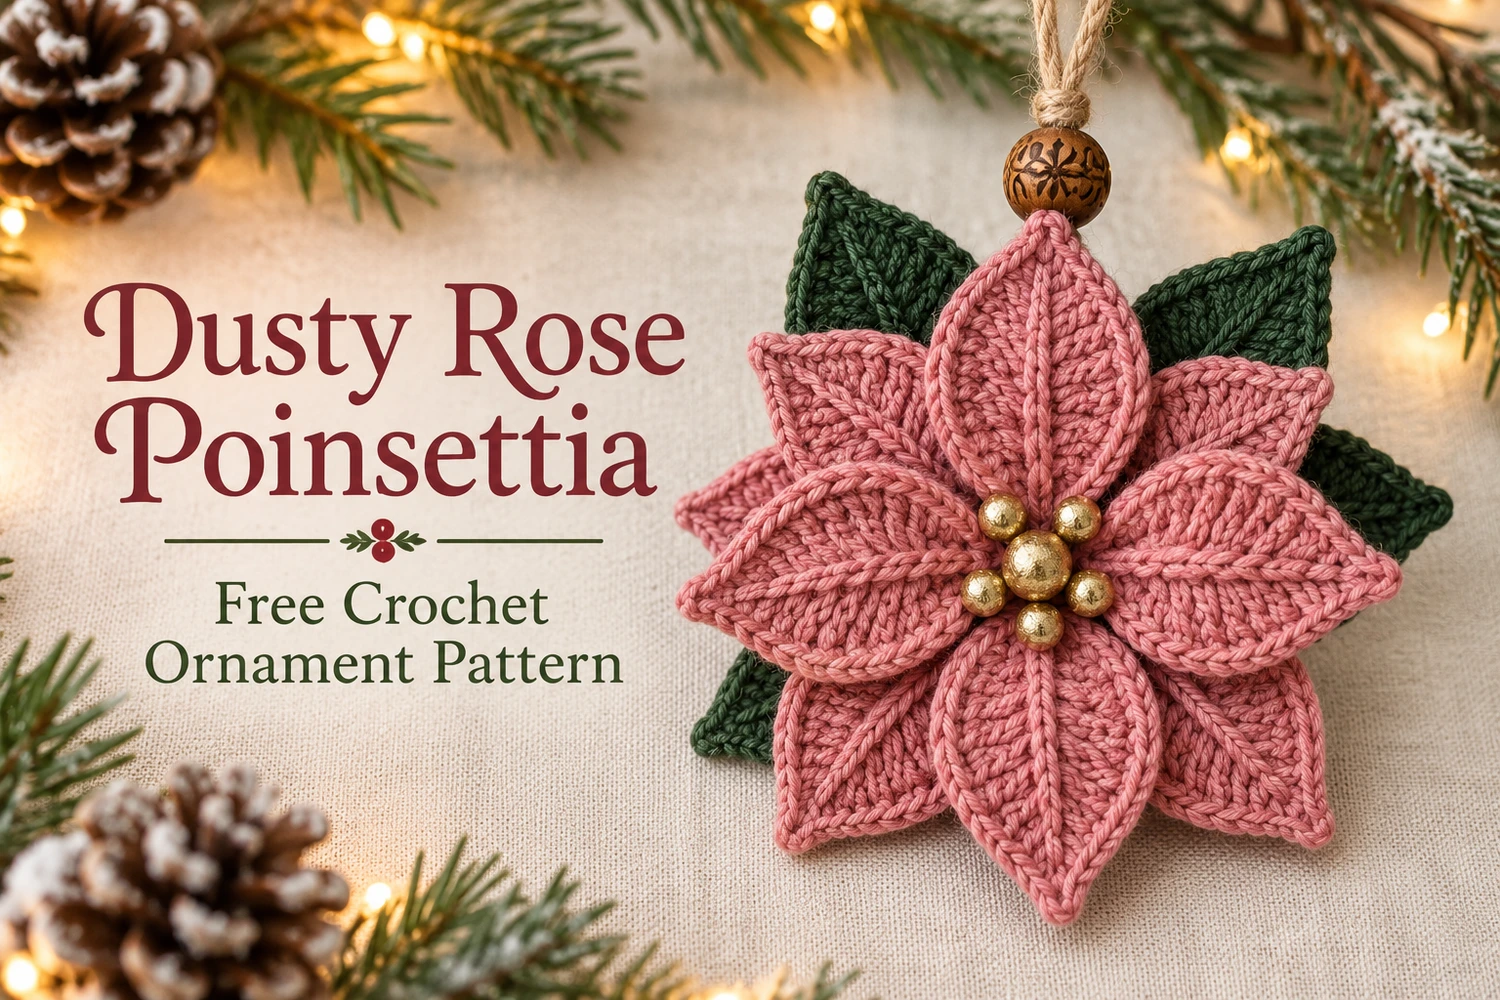
This Dusty Rose Poinsettia Crochet Pattern creates a layered Christmas flower in soft antique pink, with dark green leaves, a cluster of gold beads, and a rustic hanging loop topped with a wooden bead. The pointed oval petals and softly raised center follow the supplied reference.
Make ten pink petals, arrange them in two staggered groups of five, and sew them onto a small backing disc. Three green leaves sit behind the flower. The petals remain separate around their outer edges so the layers keep their natural dimension.
Pattern Information
- Skill level: intermediate; working around both sides of a foundation chain and assembling several small pieces.
- US crochet terminology.
- Estimated flower width: 12–16 cm with sport cotton and a 2.5 mm hook; actual size depends on tension.
- Ten dusty rose petals in two layers of five, three forest-green leaves, and one green backing disc.
- Five gold beads form the center. A natural cord loop passes through a brown wooden bead above the flower.
This is an image-inspired adaptation. Counts and repeat structure have been reviewed, but the pattern has not been physically crocheted or independently tested. Use the written instructions for construction; photographs illustrate the intended appearance.
Materials
- Sport cotton: approximately 25–30 g dusty rose and 5–10 g dark forest green.
- 2–2.5 mm crochet hook matched to your yarn.
- Tapestry needle, scissors, sewing needle, and strong matching sewing thread.
- Five gold beads: one approximately 10 mm and four approximately 6–8 mm, with holes suitable for your thread.
- One brown wooden bead approximately 12–15 mm with a hole large enough for two strands of cord.
- Natural cotton or jute cord, approximately 30 cm.
- Pins and blocking mat.
Abbreviations and Notes
- ch: chain; sl st: slip stitch; sc: single crochet.
- hdc: half double crochet; dc: double crochet; tr: treble crochet.
- MR: magic ring; inc: two sc in one stitch.
- The beginning ch 1 does not count as a stitch.
- Work each petal around both sides of its foundation chain without turning.
- Mark the middle of the three tip sc in Round 1: this is the tenth stitch of the round.
- No stuffing or wire is needed. Keep sewing tails long enough to attach each piece securely.
Dusty Rose Poinsettia Crochet Pattern
1. Dusty Rose Petals — Make Ten
With dusty rose, ch 10. Keep the foundation chain firm but flexible. Start in the second chain from the hook and work into one side of the chain.
Responsivo Post 01 – P1
Round 1, first side: sc in the second chain from the hook; hdc in the next chain; dc in the next; tr in each of the next two; dc in the next; hdc in the next; sc in the next. Work 3 sc in the last chain. These three sc turn around the pointed end.
Place a marker in the middle of those three tip sc. Turn the piece in your hands so the unused underside of the foundation faces you; do not turn the work over.
Round 1, second side: in the eight remaining underside chain positions, work sc, hdc, dc, tr, tr, dc, hdc, sc, one stitch per position, traveling back toward the starting end. Work 2 additional sc into the same foundation-chain position as the beginning sc. Join with a sl st to the first sc.
Round 1 total: 21 stitches: eight along the first side, three at the far tip, eight along the second side, and two extra at the base. The base chain position contains four sc altogether across the two sides and the final two extras. Joining sl st does not count.
Round 2: ch 1; sc in each of the first nine stitches. In the marked tenth stitch work (sc, ch 2, sc). Sc in each of the remaining eleven stitches. Join with a sl st to the first sc. Fasten off with a 20 cm sewing tail at the base.
Round 2 total: 22 sc and one ch-2 tip space. The extra sc at the marked tip creates the increase. Do not crochet into the joining sl st or beginning ch 1.
Make ten matching petals. The taller stitches swell the middle while the shorter stitches narrow both ends. The original chain gives a visible center line. Weave in the beginning tail on the back, leaving the long final tail for assembly.
2. Forest-Green Leaves — Make Three
Work the same two-round petal instructions in forest green, including the ch-10 foundation, 21 stitches in Round 1, and 22 sc plus a ch-2 tip in Round 2. Leave long tails for sewing.
Responsivo Post 02 – P2
Keep these leaves flat. Their shape matches the pink petals, but most of each leaf will be hidden behind the flower. Only their pointed outer sections should project beyond the dusty rose layers. Do not add loose wire to hold them in place.
3. Green Backing Disc
With green, make a MR. Round 1: ch 1, 6 sc in the ring; join to the first sc . Round 2: ch 1, inc in each stitch; join . Round 3: ch 1, (sc, inc) six times; join . Fasten off with a long tail and close the MR securely.
The disc is a sewing foundation behind the flower. It should be smaller than the finished petal spread and should not show around the front edges. Weave in its starting tail before attaching leaves.
4. Shape the Petals
Dampen the cotton pieces lightly. Pin each petal with its base rounded, sides gently curved, and ch-2 tip pointing outward. Open the tip just enough to define the point; avoid stretching it into a long hole.
Let all pieces dry completely. Keep the pink petals the same length so the flower stays balanced. They may curve slightly toward the right side; retain a gentle curve for dimension rather than forcing every piece completely flat.
5. Sew the Back Layer
Lay the backing disc on a flat surface. Position five pink petals with their bases overlapping over the disc center and their tips evenly spaced around a circle. Space them approximately one fifth of a turn apart.
Pin the bases, then use the pink tails to sew each petal to several stitches of the disc. Catch both sides of the rounded base. Add a second short seam through the neighboring petal base where they overlap. Leave the pointed ends and outer halves free.
Check from the front before tightening the seams. This first layer should make a five-point flower outline without pulling the disc into a cup.
6. Add the Front Layer and Leaves
Place the remaining five pink petals above the back layer. Rotate them so each front tip sits between two back tips, creating ten staggered points around the flower. Overlap the bases at the center.
