
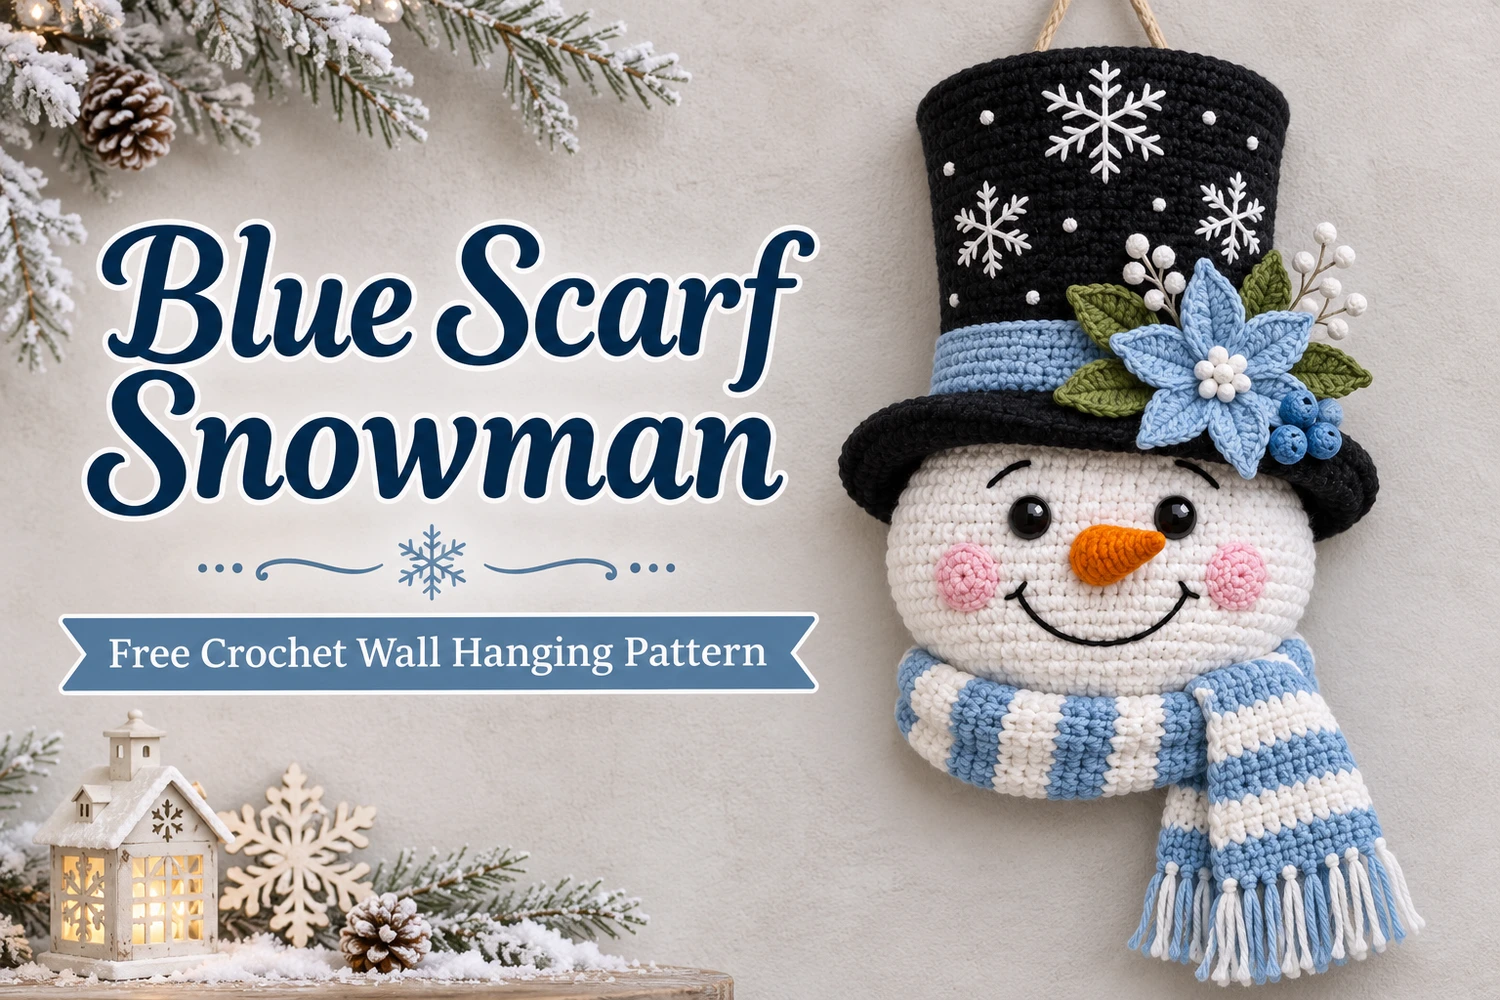
This Blue Scarf Snowman Wall Hanging Crochet Pattern creates a smiling white snowman head under a tall black top hat, decorated with white snowflakes, a light blue band, and a blue poinsettia with green leaves. A blue-and-white striped scarf finishes the lower edge.
This is a head-only wall decoration with a slightly flattened back, a hollow crocheted top hat, and a natural cord hanger. Keep the scarf tail and flower on the right when looking at the face.
Pattern Information
- Skill level: intermediate amigurumi, flat appliques, and assembly. US crochet terms.
- Estimated height: 25–32 cm including the long scarf tail, excluding the hanger. Yarn and tension change proportions.
- Colors: white, black, light blue, olive green, orange, and pink.
- Construction: stuffed head, hollow tall hat and brim, striped scarf, six-petal flower, three leaves, and small yarn berries.
- No torso, arms, or legs are used.
This is an image-inspired adaptation. Counts and repeats have been reviewed, but the design has not been physically crocheted or independently tested. Use the written instructions for construction; photos illustrate appearance.
Materials
- Sport cotton in the listed colors: approximately 40 g white and 30–40 g in the main hat/scarf colors, plus small amounts for details.
- 2–2.5 mm hook, polyester stuffing, tapestry needle, scissors, and markers.
- Black embroidery thread, pink yarn, and two sew-on eye beads or black yarn for embroidered eyes.
- Strong sewing thread and pins.
- For the dangling snowman: soft twisted ivory cotton cord, two 12 cm arms and two 18 cm legs plus attachment allowances. For the wall hanging: natural cotton hanging cord, approximately 30 cm.
Abbreviations and Notes
- MR: magic ring; ch: chain; sl st: slip stitch; sc: single crochet; hdc: half double crochet; dc: double crochet.
- inc: 2 sc in one stitch; dec: sc2tog over two stitches.
- BLO: back loop only. Ch 1 at the start of a turned row does not count.
- Numbers in brackets are finished stitch totals. Mark the first stitch in continuous rounds.
- Use long tails for assembly. Keep every hanging attachment short and sewn through several dense stitches.
White Stuffed Head
- R1: 6 sc in MR .
- R2: inc six times .
- R3: (sc, inc) six times .
- R4: (2 sc, inc) six times .
- R5: (3 sc, inc) six times .
- R6: (4 sc, inc) six times .
- R7: (5 sc, inc) six times .
- R8–R13: 42 sc per round .
- R14: (5 sc, dec) six times .
- R15: (4 sc, dec) six times .
- R16: (3 sc, dec) six times .
- R17: (2 sc, dec) six times .
- R18: (sc, dec) six times .
- R19: dec six times .
Work continuous rounds, marking the first stitch. Begin adding polyester stuffing after R13 and add small tufts as the opening narrows. Keep the front smooth and gently flatten the back for hanging. After R19, draw the yarn through the six remaining front loops, close, and bury the tail. Do not add a torso.
Responsivo Post 01 – P1
Carrot Nose and Smiling Face
With orange, R1: 4 sc in MR . R2: (sc, inc) twice . R3: (2 sc, inc) twice . R4: 8 sc. Fasten off with a long tail. Add a tiny pinch of stuffing, flatten the open base, and sew it centrally on the face around head R10–R11, with the MR end pointing outward.
Sew two black eye beads approximately 8–10 mm wide above the nose, or embroider black eyes. Space them evenly on the actual stuffed head. Add a black U-shaped smile below the nose and two short curved eyebrows. Embroider pink cheek patches outside and below the eyes. Secure all thread ends inside the stitches and bury knots at the back. Embroidered eyes are a bead-free option.
Tall Black Top Hat
- With black, R1: 6 sc in MR .
- R2–R8: increase six stitches each round, working (n sc, inc) six times as n rises from 0 to 6 .
- R9: 48 sc in BLO to turn down the crown edge.
- R10–R27: 48 sc per round for the tall side wall.
- R28: (7 sc, inc) six times .
- R29: (8 sc, inc) six times .
- R30: (9 sc, inc) six times .
- R31: sl st loosely in each of the 66 stitches.
Fasten off and leave the lower opening hollow. The final increase rounds make the projecting brim. Shape the top disc flat, keep the walls tall, and fit the opening over the upper head. Sew the inner brim/head contact in several places; do not fill the whole hat with stuffing. Keep its height visible above the face.
Light Blue Hat Band
With light blue, ch 49. Row 1: sc in each chain from the second chain . Rows 2–4: ch 1, turn, 48 sc. Join the short ends and fit the band around the lower hat wall, just above the brim. Add or remove foundation positions if your actual hat circumference differs. Sew both long edges with small blue stitches.
Embroider white snowflakes and small white dots over the black hat. Use three crossing straight stitches for each snowflake and add tiny branches. Keep the inside floats short and anchor them behind the blue band or inside the hat wall.
Blue-and-White Striped Scarf
With light blue, ch 11. Row 1: sc across from the second chain . Rows 2–60: ch 1, turn, 10 sc in BLO. Change color after every four rows, alternating four blue and four white rows. There are fifteen four-row stripes, starting and ending in blue. Weave color-change tails along the back edge.
Wrap the scarf under the head, cover the lower seam area, and overlap at the front right. Leave a long tail on the right, as in the reference, and a shorter end behind it. Fit the length before sewing the overlap and adding hidden tacks around the lower head.
Add short blue-and-white fringe to both ends. Secure each folded strand through an edge stitch, stitch its knot down, and trim evenly. Keep the long tail broad and flat so the alternating stripes remain visible.
Responsivo Post 02 – P2
Six Blue Flower Petals and Three Green Leaves
For each petal, ch 7 with blue. Starting in the second chain, work sc, hdc, dc, dc, hdc in the first five positions. In the last chain work (sc, ch 2, sc). Along the underside work hdc, dc, dc, hdc, sc. Join to the first sc and fasten off . Make six blue petals.
