
Fasten off and weave in the color-change tails. Leave a beige starting tail for attachment. The decreased final red row rounds the lower hoof. Sew the beige tops behind the lower body edge, leaving a visible gap between the legs. Attach each leg across its full width with several stitches so it hangs straight. Keep both red ends facing forward.
9. Red Scarf
Neck Band
With red, ch 31. Row 1: sc in the second chain and each remaining chain . Row 2: ch 1, turn; 30 sc. Fasten off with a long tail. Check the length around the flat neck before sewing: the band should cover the head-to-body seam, with its ends overlapping at the back. If your tension differs, adjust the foundation chain to fit without drawing the fabric together.
Two Hanging Ends
For each end, ch 5. Row 1: sc in the second chain and each remaining chain . Continue in rows of 4 sc, turning with ch 1. Make one strip 10 rows long and the second 13 rows long. Fasten off with sewing tails. Place the shorter strip over the longer one and sew their upper ends to the right front of the neck band. Let them fall diagonally down the chest. Tack them near their tops so the lower ends remain free.
10. Join the Head and Body
Place the head over the narrowed top of the body with approximately 1–1.5 cm overlap. The lower face should sit in front of the folded corners. Pin, then sew through the lower head edge and dense groups of the body beneath it. Use several separated attachment points rather than tightening one seam across the whole neck.
Wrap the red neck band over this join and sew its overlapping ends at the back. Add small tacking stitches at the sides to keep the band level. The scarf covers the join; the structural head-to-body stitches carry the body weight. Check that both scarf ends lie on the right and the body holes remain visible below them.
11. Secure the Hanging Loop
With beige, ch 30, or make a chain that gives your preferred loop length. Fasten off leaving two long tails. Fold the chain and sew both ends to several dense stitches on the back of the upper head, between the antlers. Make at least four passes in different directions, anchoring through more than one crochet stitch.
The loop must be attached to the head itself, not only to an antler or the scarf. Weave the tails into the back of the head and test the loop gently over a soft surface. Adjust the ears, antlers, and scarf before trimming the final tails.
Photo and Full Crochet Symbol Chart
The third instructional image below places the finished reindeer photo above a complete connected chart of the granny body, rounds 1–4 and the single-crochet border. It shows every dc, chain space, and border sc, with the English legend alongside. The upper-corner folds are made after crocheting and are explained in the assembly steps. The head, nose, ears, antlers, legs, and scarf follow their separate written instructions.
Read from the center outward. A group of three dc shares one space at its base but has three separate tops. Each corner receives two groups separated by ch 2; side spaces receive one group. The starting ch 3 replaces the first dc of each granny round, and each round closes with a slip stitch.
Finishing Tips
- Block the granny square before folding so the two upper corners match.
- If the head cups, recount the six increases per round and loosen an overly tight tension.
- If the eyes pucker, loosen the black thread and use shorter anchoring stitches.
- If the antlers flop, tack their lower stems to the head over a slightly longer area.
- Keep the scarf ends short enough to reveal the openwork body.
- Spot-clean gently, reshape while damp, and dry flat. Check the yarn label before using heat.
Frequently Asked Questions
Is the body a special reindeer-shaped stitch pattern?
The base is a four-round granny square with a single-crochet border. Folding its upper corners behind the neck creates the flared reindeer shape. No stitch-count changes are needed for those folds.
Does the nose need stuffing?
No. The small unstuffed cup gives a raised button shape when its open edge is sewn to the face.
Can I make a smaller ornament?
Use finer yarn with a matching smaller hook to scale all pieces together. Keep the same stitch counts and adjust the hanging loop and scarf band to fit the finished neck.
Can this be a toy?
The pattern is designed as a hanging decoration, with a long loop and sewn-on details. Display it out of reach of young children and pets.
More Free Christmas Crochet Patterns
- Snowman Christmas Door Hanging Crochet Pattern
- Christmas Bell Ornament Crochet Pattern
- Rustic Christmas Star Ornament Crochet Pattern
Save This Pattern
Save this Granny Reindeer Ornament Crochet Pattern for a cozy handmade Christmas. Happy crocheting from Lovely Amigurumi!
Photo Tutorials, Full Granny Chart, and Pinterest Gallery
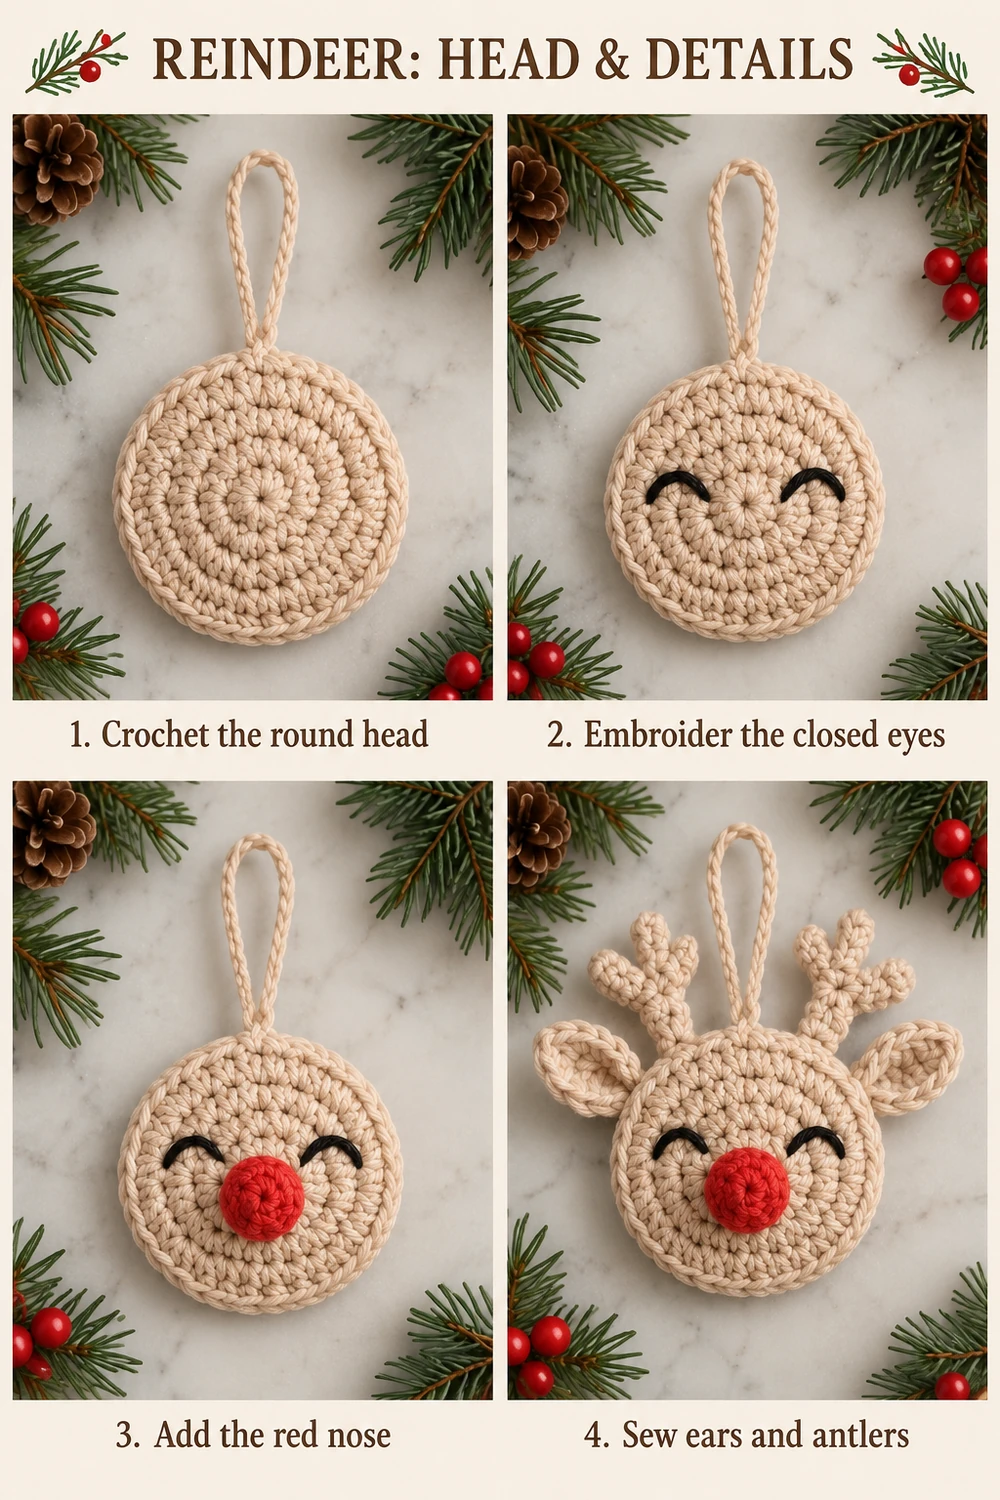
The two photo tutorials and the finished-reindeer photo with its complete body chart come first, followed by three Pinterest images. All six images are grouped here at the end.
More Free Crochet Patterns
Find your next handmade project with these lovely patterns.
Christmas Lace Star Crochet Pattern – Free Five-Point Ornament Guide
View Pattern →
Granny Stitch Gingerbread Crochet Pattern – Free Ornament Guide
View Pattern →
Blue Lace Snowflake Crochet Pattern – Free Ornament Guide
View Pattern →
CONTENT END 1
