
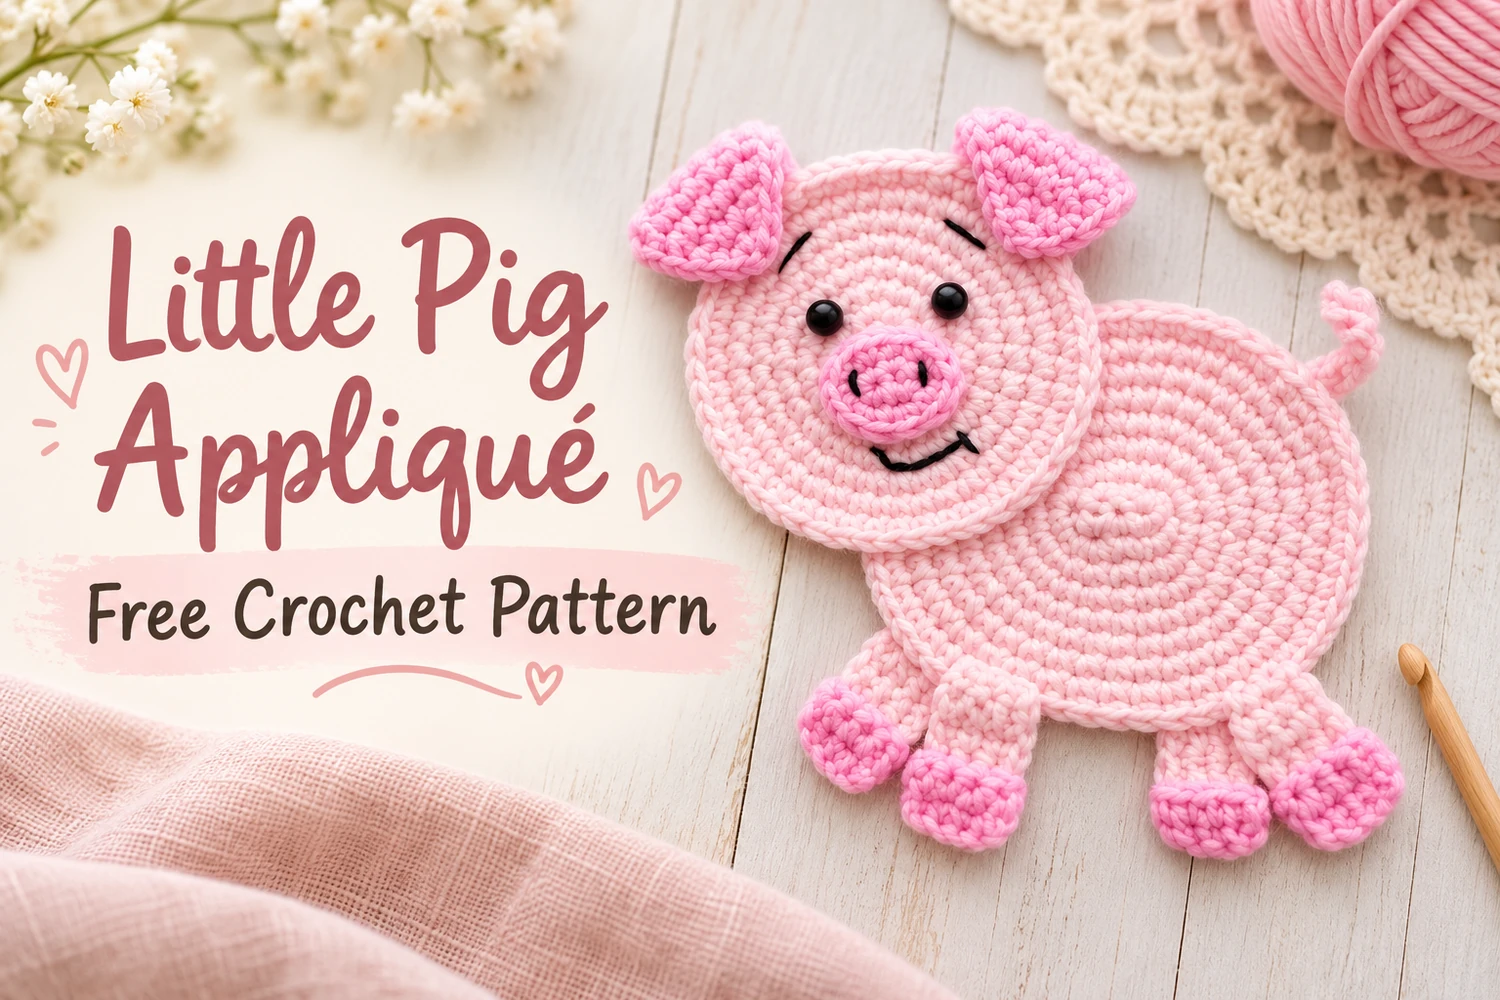
This Little Pig Appliqué Crochet Pattern makes a sweet flat pig with two overlapping pink circles, folded ears, a little oval snout, four short legs, and a curly tail. The pale pink body and deeper pink details follow the reference, while the smiling embroidered face gives it a friendly expression.
Crochet the body and head separately, add the small details, and sew the head over the upper-left edge of the body. Use the finished pig as a decorative appliqué, a small mat, or a playful addition to a handmade gift.
Pattern at a Glance
- Skill level: confident beginner; simple increases and sewing.
- Terminology: US crochet terms.
- Construction: flat unstuffed pieces joined by sewing.
- Estimated finished size: 15–18 cm tall including ears and feet, with DK cotton and a 2.5–3 mm hook. Your tension may change the size.
- Colors: pale pink for both circles and legs; deeper pink for ears, snout, and hooves; black for the facial embroidery.
This pattern is an image-inspired adaptation. Stitch counts have been reviewed, but the design has not been physically crocheted or independently tested. Follow the written instructions for the exact stitch placement; the photographs illustrate the intended result.
Materials
- DK cotton yarn: approximately 25–35 g pale pink and 10–15 g deeper pink.
- 2.5–3 mm hook, chosen to make a firm but flexible flat fabric.
- Small amount of black embroidery thread or fine black yarn.
- Tapestry needle, embroidery needle, scissors, stitch marker, and pins.
- Optional blocking mat and rustproof pins.
The pig does not need stuffing. Embroidered eyes give the black bead-like look of the reference while keeping the piece softer and flatter. If you plan to put a cup on the body, use heat-tolerant cotton, keep the cup on the unobstructed body circle, and avoid raised embellishments in that area.
Responsivo Post 01 – P1
Stitches and Abbreviations
- MR: magic ring.
- ch: chain; sl st: slip stitch.
- sc: single crochet.
- inc: work 2 sc in the same stitch.
- dec: sc2tog over the next 2 stitches.
- sc3tog: single crochet the next 3 stitches together.
- R: round for the circles and snout; row for ears and legs.
- Stitch counts appear in brackets. Joining slip stitches and turning chains do not count.
Work the circles in continuous spiral rounds without joining or turning. Mark the first stitch and move the marker every round. At the end of each circle, make one finishing slip stitch in the next stitch, fasten off, and leave a sewing tail. That slip stitch does not add a round or change the stitch count.
For sc2tog, pull up a loop in each of the next two stitches, yarn over, and pull through all three loops. For sc3tog, pull up a loop in each of the next three stitches, yarn over, and pull through all four loops. For rows, ch 1 and turn after each row; this turning chain does not count.
Little Pig Appliqué Crochet Pattern
1. Pale Pink Body Circle
Begin at the center and work outward in pale pink. There are six evenly distributed increases in each round after R1.
- R1: 6 sc in MR.
- R2: inc × 6.
- R3: (sc, inc) × 6.
- R4: (2 sc, inc) × 6.
- R5: (3 sc, inc) × 6.
- R6: (4 sc, inc) × 6.
- R7: (5 sc, inc) × 6.
- R8: (6 sc, inc) × 6.
- R9: (7 sc, inc) × 6.
- R10: (8 sc, inc) × 6.
Make the finishing slip stitch and leave a 30 cm tail. Close the starting ring and weave the center tail through the backs of several stitches. Lay the circle flat and smooth it gently; do not stuff or fold it.
2. Smaller Head Circle
With pale pink, repeat body R1–8 and stop at 48 stitches. Finish with one slip stitch and leave a long tail for joining. The head is approximately four-fifths of the body diameter when both are made with the same yarn and hook. Keep its right side facing you.
Before adding the face, decide where the ears will sit. Mark the top center of the head and place pins at roughly ten o’clock and two o’clock. The snout will sit just below the center, leaving space above it for the eyes.
3. Deeper Pink Oval Snout
Ch 5 in deeper pink. Work around both sides of the foundation chain rather than turning.
- R1: starting in the second chain from the hook, work 3 sc along the chain, 3 sc into the last chain; continue along the opposite side with 2 sc, then 2 sc into the first chain used.
- R2: inc in the first stitch, 2 sc, inc in each of the next 3 stitches, 2 sc, inc in each of the final 2 stitches.
Sl st into the next stitch, fasten off, and leave a sewing tail. Embroider two short vertical black nostrils near the middle of the oval, with a small space between them. Sew the snout to the head just below its center. Catch its edge stitches without adding stuffing, keeping the oval nearly flat.
Responsivo Post 02 – P2
4. Embroidered Eyes, Eyebrows, and Smile
Place the two eyes approximately 5–7 stitches apart above the snout, adjusting their position before sewing. Make each eye with several small satin stitches to create a neat rounded black shape. Catch only a small area of crochet so the fabric does not pucker.
Add a short slanted eyebrow above each eye. For the smile, use a shallow U-shaped line below the snout, secured with two or three tiny couching stitches along the curve. Bring the thread tails to the back of the head and secure them through nearby stitches. Do not pull the face threads tightly enough to distort the circle.
5. Folded Pink Ears — Make Two
Use deeper pink and work from the wide base toward the point. Ch 8.
- Row 1: sc in the second chain and each remaining chain.
- Row 2: ch 1, turn; dec, 3 sc, dec.
- Row 3: ch 1, turn; dec, sc, dec.
- Row 4: ch 1, turn; sc3tog.
Fasten off with a 25 cm tail. Keep the starting seven-stitch edge as the base. Sew that base to the marked upper edge of the head. Fold the pointed tip slightly forward and toward the face, then make one or two small hidden stitches to hold the fold. Mirror the second ear so both tips lean inward naturally. Leave most of each ear free to show the folded shape.
6. Four Little Legs and Hooves
Make four identical flat legs. Begin each with pale pink and ch 5.
- Row 1: sc in the second chain and each remaining chain.
- Rows 2–3: ch 1, turn; 4 sc.
- Change to deeper pink on the last pull-through of row 3.
- Rows 4–5: ch 1, turn; 4 sc.
Fasten off and weave in the color-change tails on the back. Leave the starting pale pink tail for attaching the leg. Make a short deeper pink embroidery stitch up the center of the hoof edge if you want a divided-hoof detail. The legs stay unstuffed and do not need to be folded in half.
Pin the pale pink ends behind the lower edge of the body so only the last pale pink row and both hoof rows extend beyond it. Place two legs near the lower-left curve and two near the lower-right curve, spreading them slightly to follow the reference. Sew each leg across its width with several passes, keeping all four hooves visible.
